

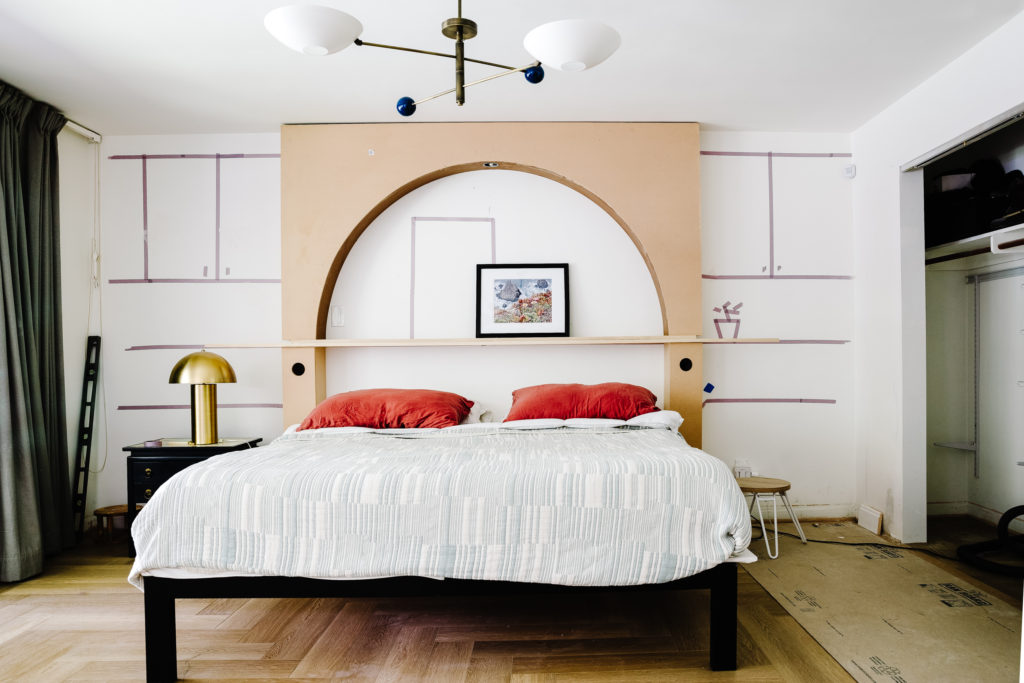
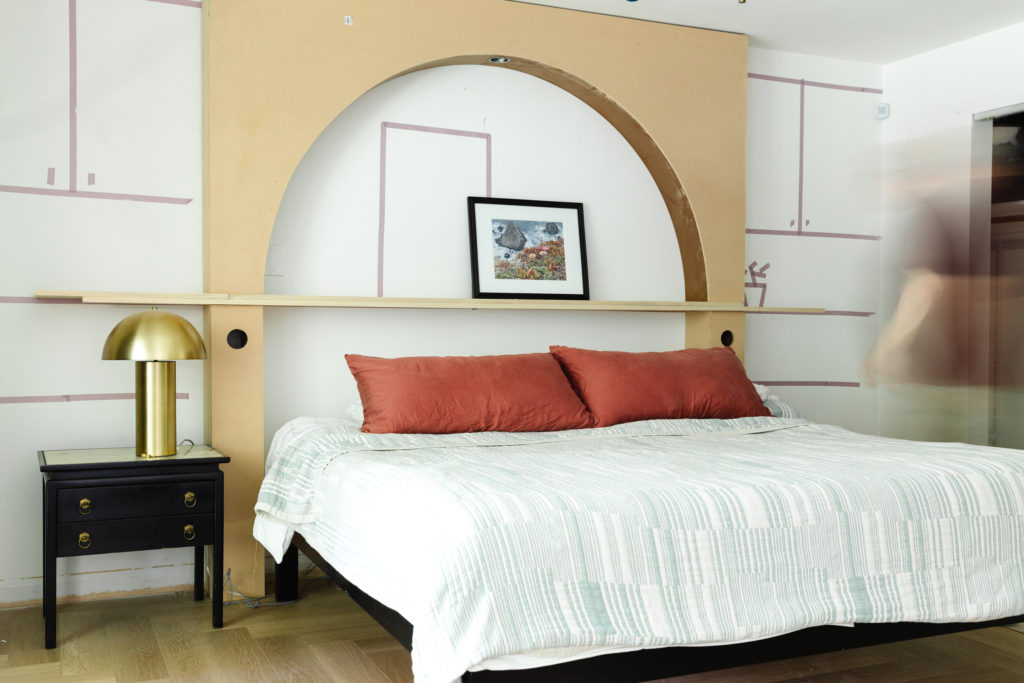
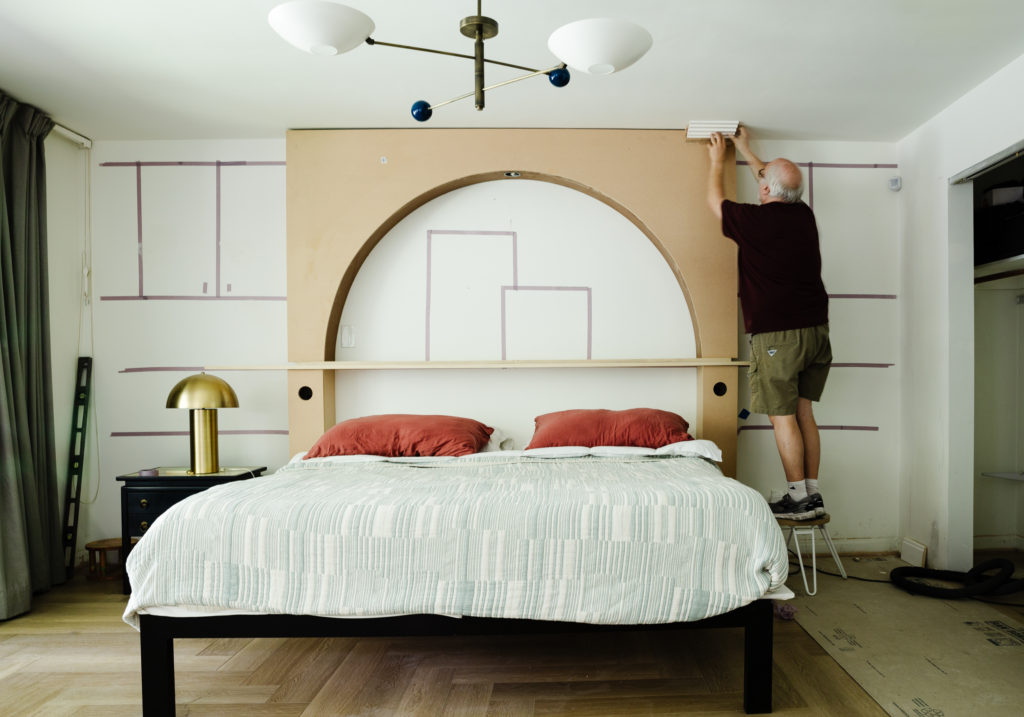
Somewhere under the rainbow…dreams of the arches that you dare to dream really do come true…Ok that doesn’t really make sense but my daughter was calling it a rainbow and I can’t unsee or unsing it. All that to say TA-DA! Its not completely installed but the arch is built and I had my dad and brother set it up there today so I could grab a photo and feel the excitement of seeing it come to life.
If you're new here, I'm Rebecca designer and founder of Studio Plumb. In January 2017 we became the second owners of the #plumbmidmod, a one-of-a-kind 1960 midcentury ranch on .8 of an acre outside of Sacramento, California. It has cool original architectural details, a creek running through the yard, and a perfect floorplan. It also needs a sh!#t ton of work. Bit by bit with the help of my dear old dad we're bringing it back to its former glory with a modern spin.
For more updates follow along on Instagram and all you design entrepreneurs check out our new podcast the Hot Young Designers Club.
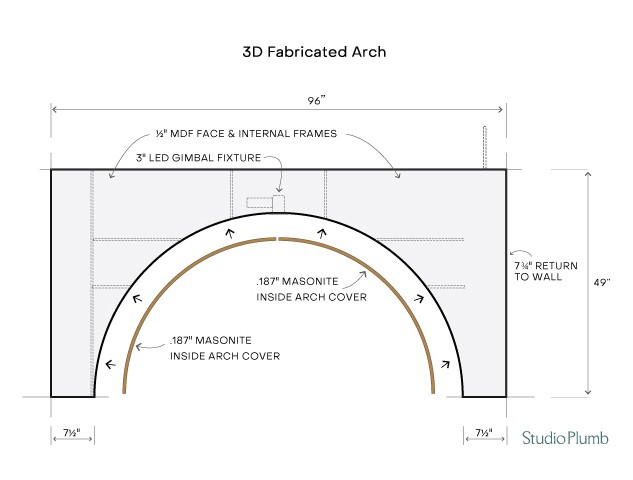
The tape on the wall was a fun to see it in scale but now that its three-dimensional I am getting very, very excited. I know a few people on Instagram mentioned they weren’t quite sure where I was going with all this but I’m hoping it makes more sense now. Once again, my dad’s “make it up as we go along” method worked out even better than either of us thought it would. The structure and face of the arch and columns are simple MDF board and the curve inside is a flexible piece of masonite. Since I will probably get asked how we made it I had my dad do a quick drawing while it was fresh in mind.
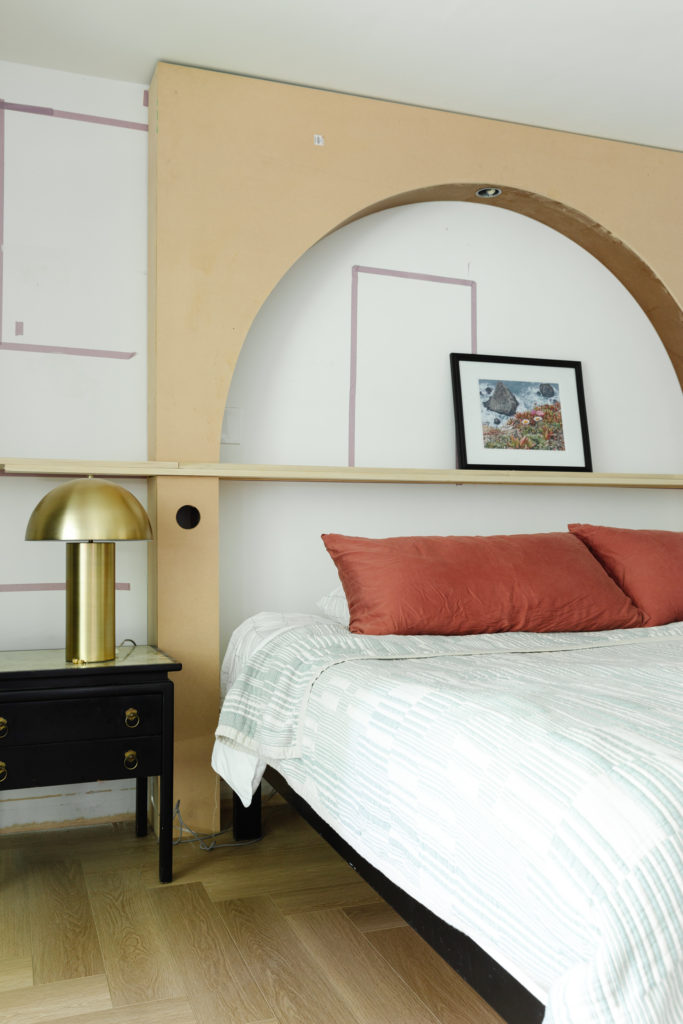
The long shelf that cuts through the center of the arch is poplar boards that we will leave wood and stain. It serves as a shelf on each of our sides of bed, as well as a picture ledge above the headboard. The face of the upholstered headboard will be inline with the front of the shelf so no, we won’t hit our heads on the shelf. 🙂
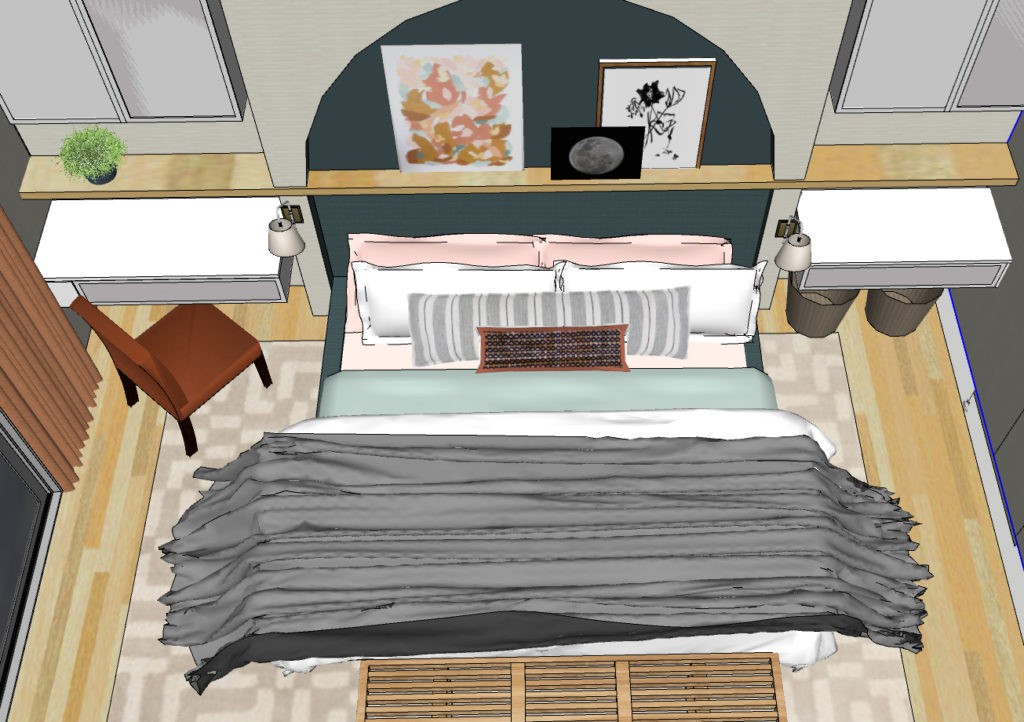
The structure makes it very simple to add lighting so we will add these sconces on either side. Yesterday we also decided we should add a tiny led spotlight at the top of the arch which will illuminate the art on the picture ledge. We have the worst lighting in our room right now so I’m kind of going overboard but also so excited to have all the options!! You can see the housing below– I wanted one that swiveled to shine back on the art but the only one I could find in stock locally was white. I’ll probably spray paint it black so it’s obvious when the arch is painted a deep blue.
The columns are separate boxes holding up the shelf and arch (everything will be secured to the wall) and the holes you see will be where the sconces will be installed.
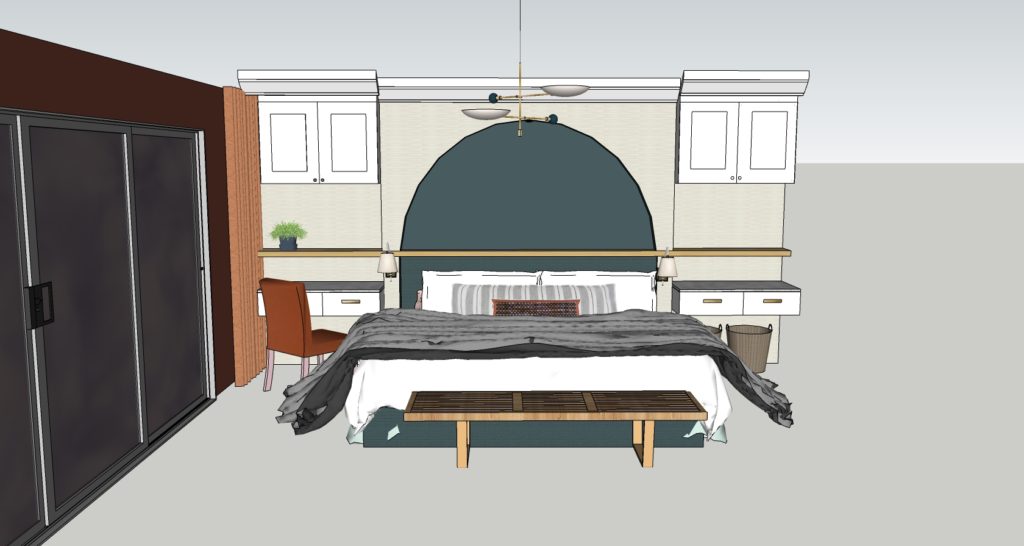
For finishes the face of the arch will be wallpapered to match the walls to either side. For contrast, the inside of the arch will be painted a blue to match the fabric of the upholstered bed and headboard.
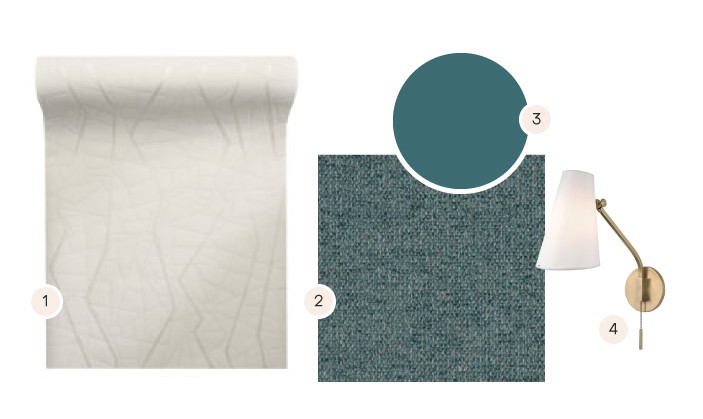
1. Wallpaper from Pacific Designs Int’l | 2. Trend fabric | 3. Paint tbd | 4. Bed sconces
Since I found out I was chosen to be a Featured Designer by Better Homes & Gardens back in December (along with Tim from Design Maze) I’ve had a lot of time to think about this room. No, I didn’t use that time to get ahead of the project timeline, instead I used it to adjust and pivot, and hem, and also haw. BUT I’m happy to say it was worth it because this room was like a stew that needed to simmer until it was just right in my head. This doesn’t happen with client projects for some reason, but for my own home it takes time for the right solution to click into place.
Today I thought it would be fun to look back at the major iterations and how they transpired to become this. Major thanks to my Design Husband Shaun, for being my sounding board, the past few months. I can always trust him to say things like “OMG STAHOOOOOPPPP,” which is good. Or “I’m getting urine vibes,” which is clearly not.
Inspiration
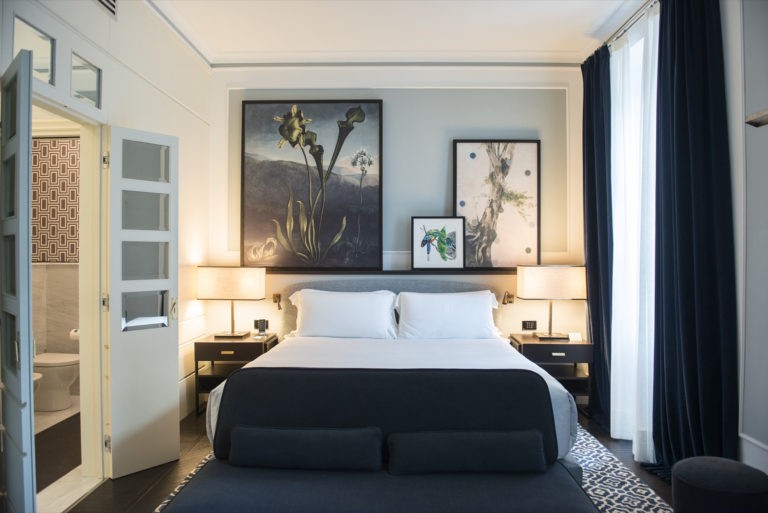
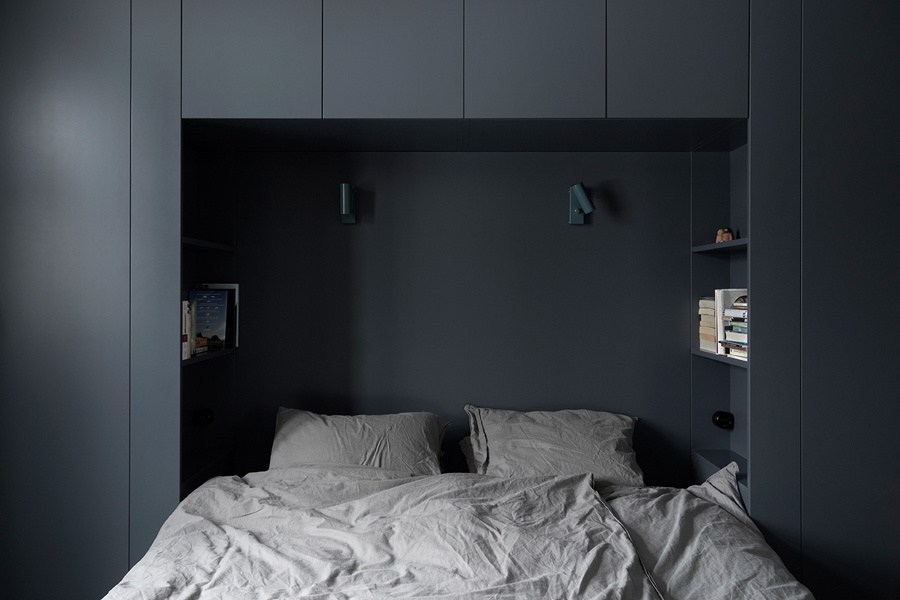
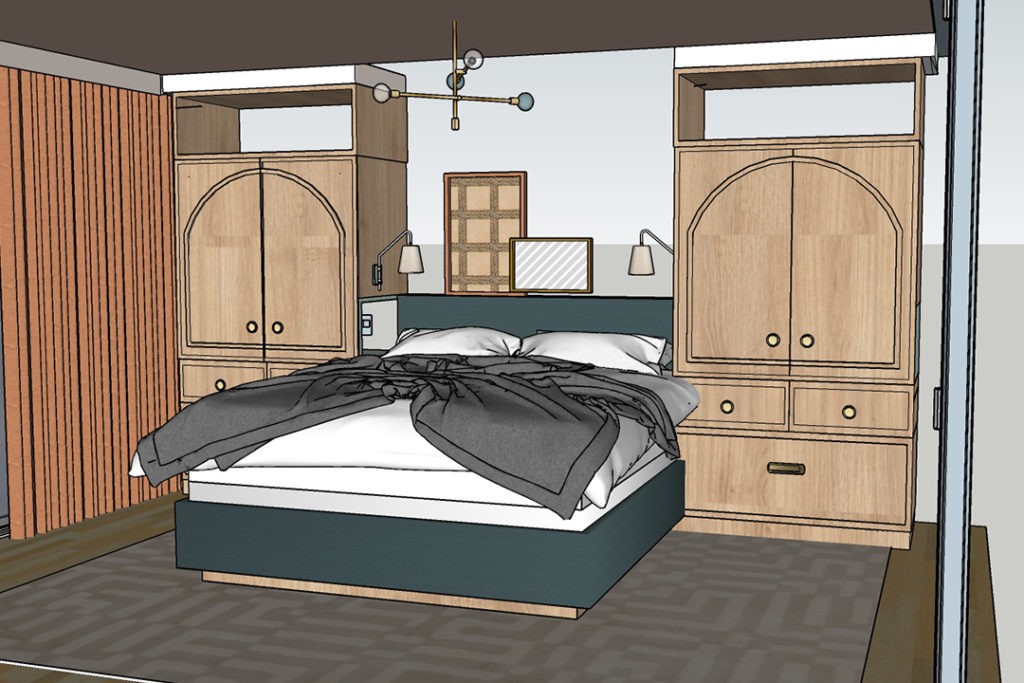
(L) I love everything about this hotel room. The overscaled art. The ledge that inspired my shelf, the interesting millwork, and the crisp bedding.
(R) This little nook looks so cozy. The shelves inset into the cabinets are a perfect alternative to nightstands
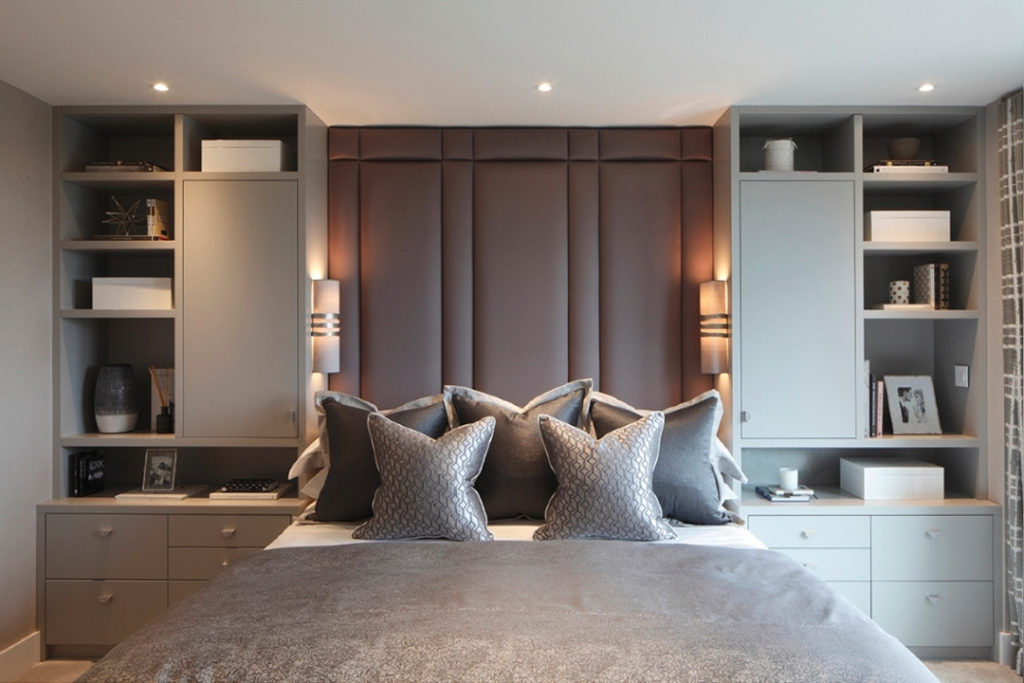
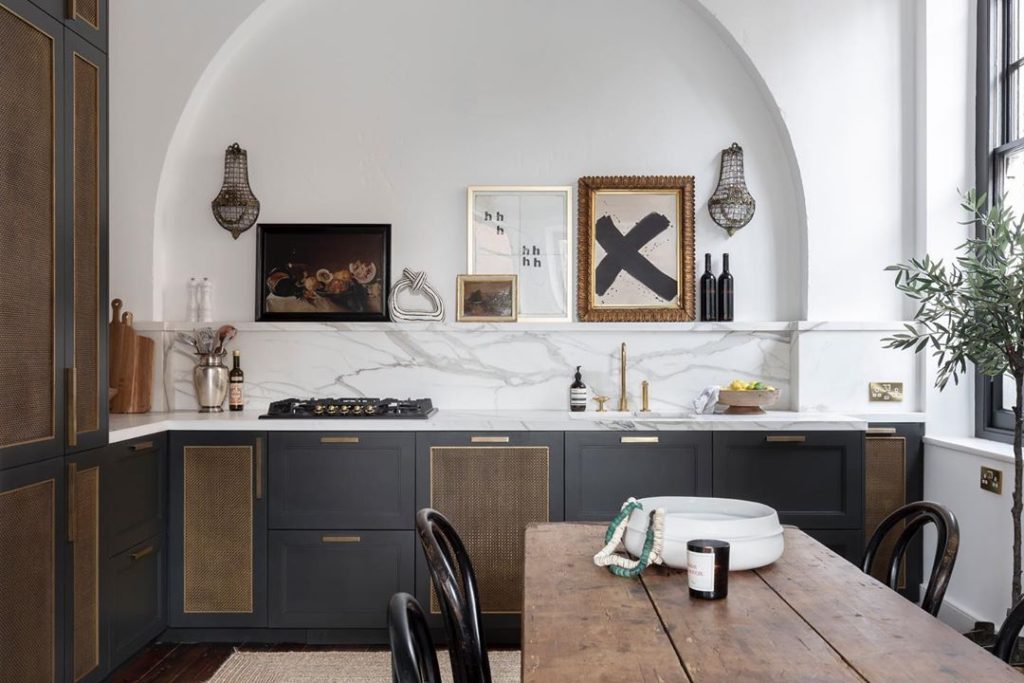
(L) These built ins are so space-efficient and and a combination of decorative and functional. I like how the nightstands are incorporated into them. (R) My biggest inspiration breakthrough came from this kitchen design. It has the picture ledge, the arch and I love the finishes.
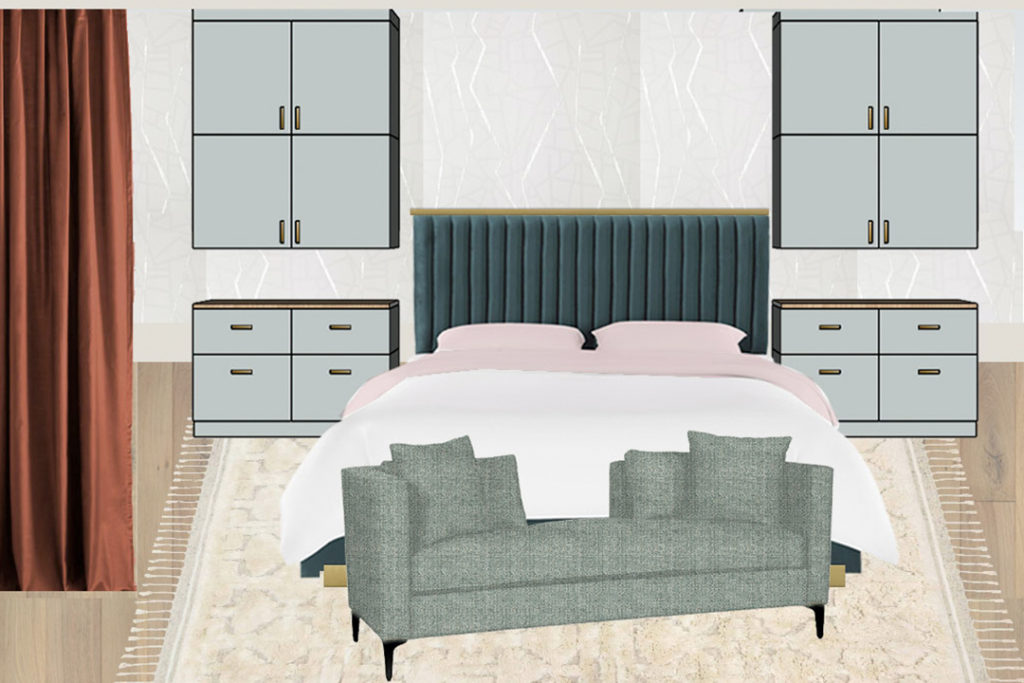
Version A

Version B
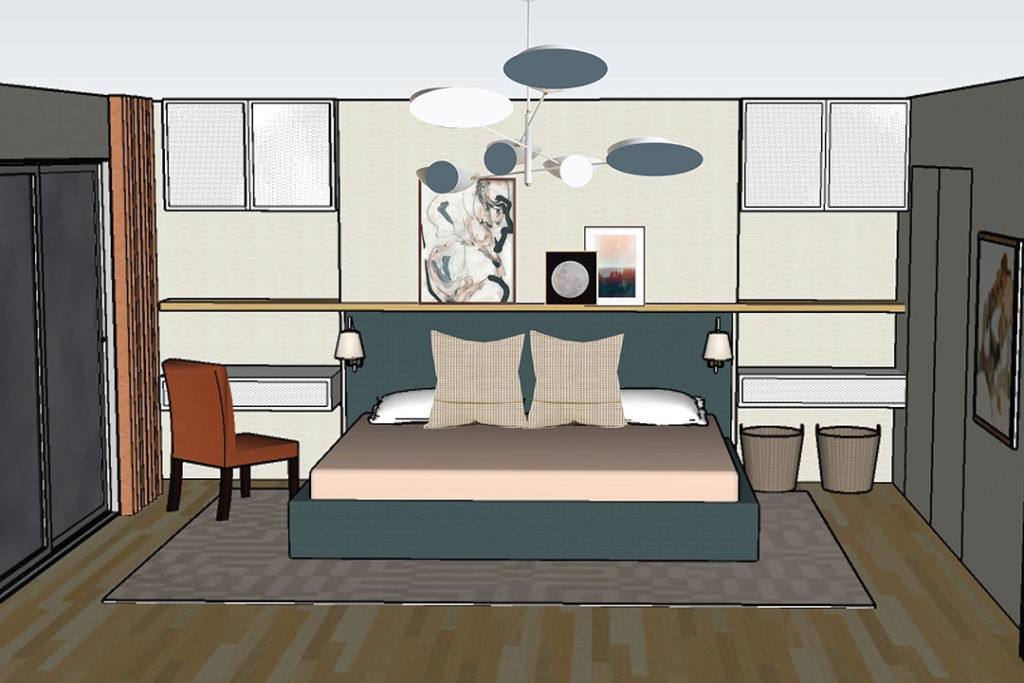
Version C
Version D
Version E
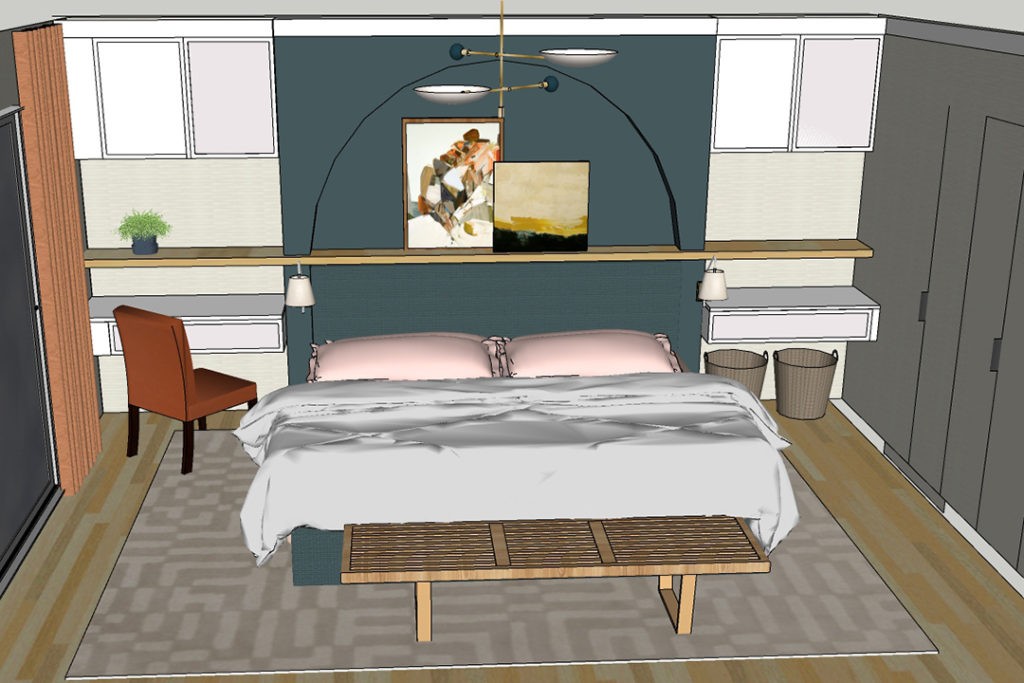
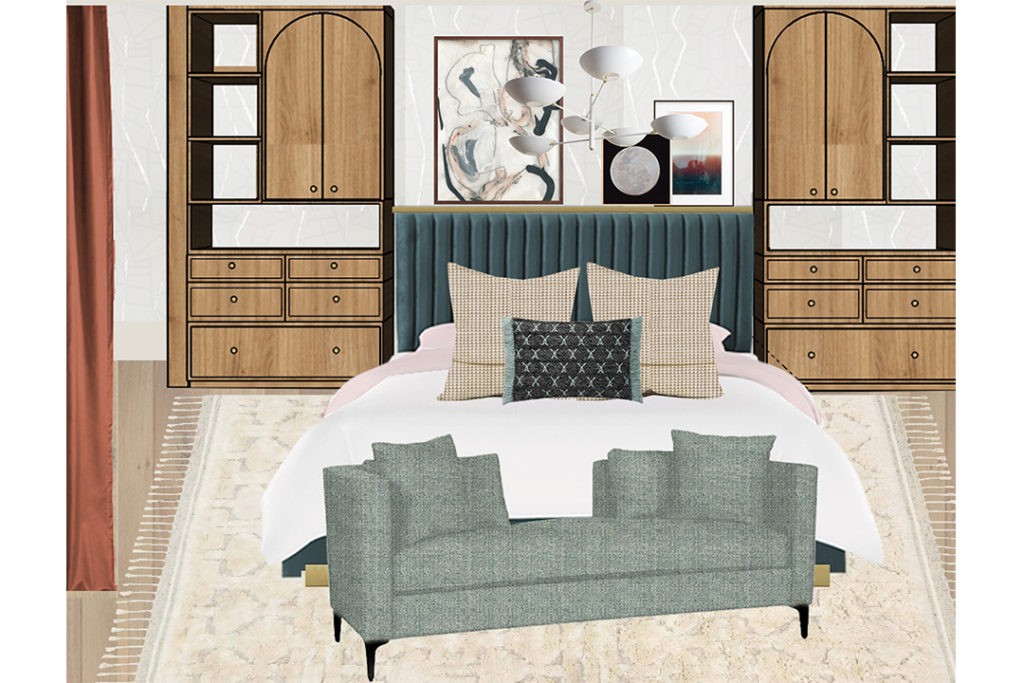
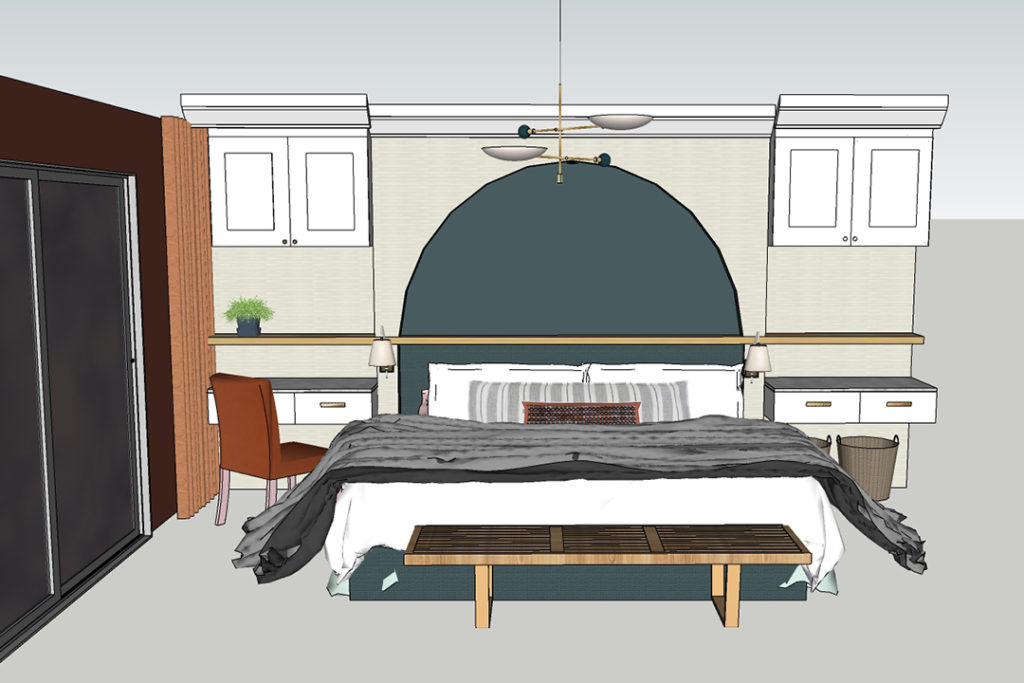
Final Version
And there you have it, probably only half of the actual versions I created with but these are the main ones. I love looking back and seeing how a design evolves and how each failed plan leads to the next better idea. I’m really happy with where we landed.
Here’s my dad holding up the crown. Its going to finish off everything so perfectly!
Not much got checked off this list but a lot happened behind the scenes in planning. Starting today (Wednesday) we have Handyman Robert on the scene to support my dad and entertain us. Wish us luck!
What's Left
Bedroom
- Wallpaper
- Build wall cabinets
- Figure out bedding
- Paint + trim entry door
- Install wall lighting
- Build + upholster bed
- Build bed wall + arch
- Paint
- Misc electrical
- Move alarm panel
- Rebecca's closet door
- Terry's closet doors
- Hang chandelier
- Install flooring
Bathroom
- Install vanity
- Install lighting
- Wallpaper
- Install lighted mirrors
- Install fan
- Living wall
- Install towel warmer
- Paint
- Bathroom door + hardware
- Style!
- Skylight installation
- Repair drywall
- Wiring sconces and mirror
- Ceiling electrical
- Remove window
My previous One Room Challenges
Do yourself a favor and catch up with the rest of the Featured Designers, they are all so talented and will be turning out some incredible work.


5 thoughts on “ORC Spring 2020 :: Week 4”
Love seeing how the plan of the headboard wall revolved and OMG they all look so good! I do love the last version the most and your dad is a superhero!! I want that arch in my own bedroom!
I love this! It’s brilliant. Can’t wait to see it to completion. If it were me I’d defiantly use the space behind the headboard as a hidey hole for large art, extra table leaves, things needing storage and seldom used. We’ve lived in 7 mid century houses and they never had adequate storage.
An apple a day keeps the doctor away.