

Ahhh!! I can’t believe we’re here celebrating One Room Challenge Reveal Day. We pushed ourselves so hard in every way, added a few last minute elements, and have so many people to thank, but the good news is the backyard oasis is done and I may never going back inside again.
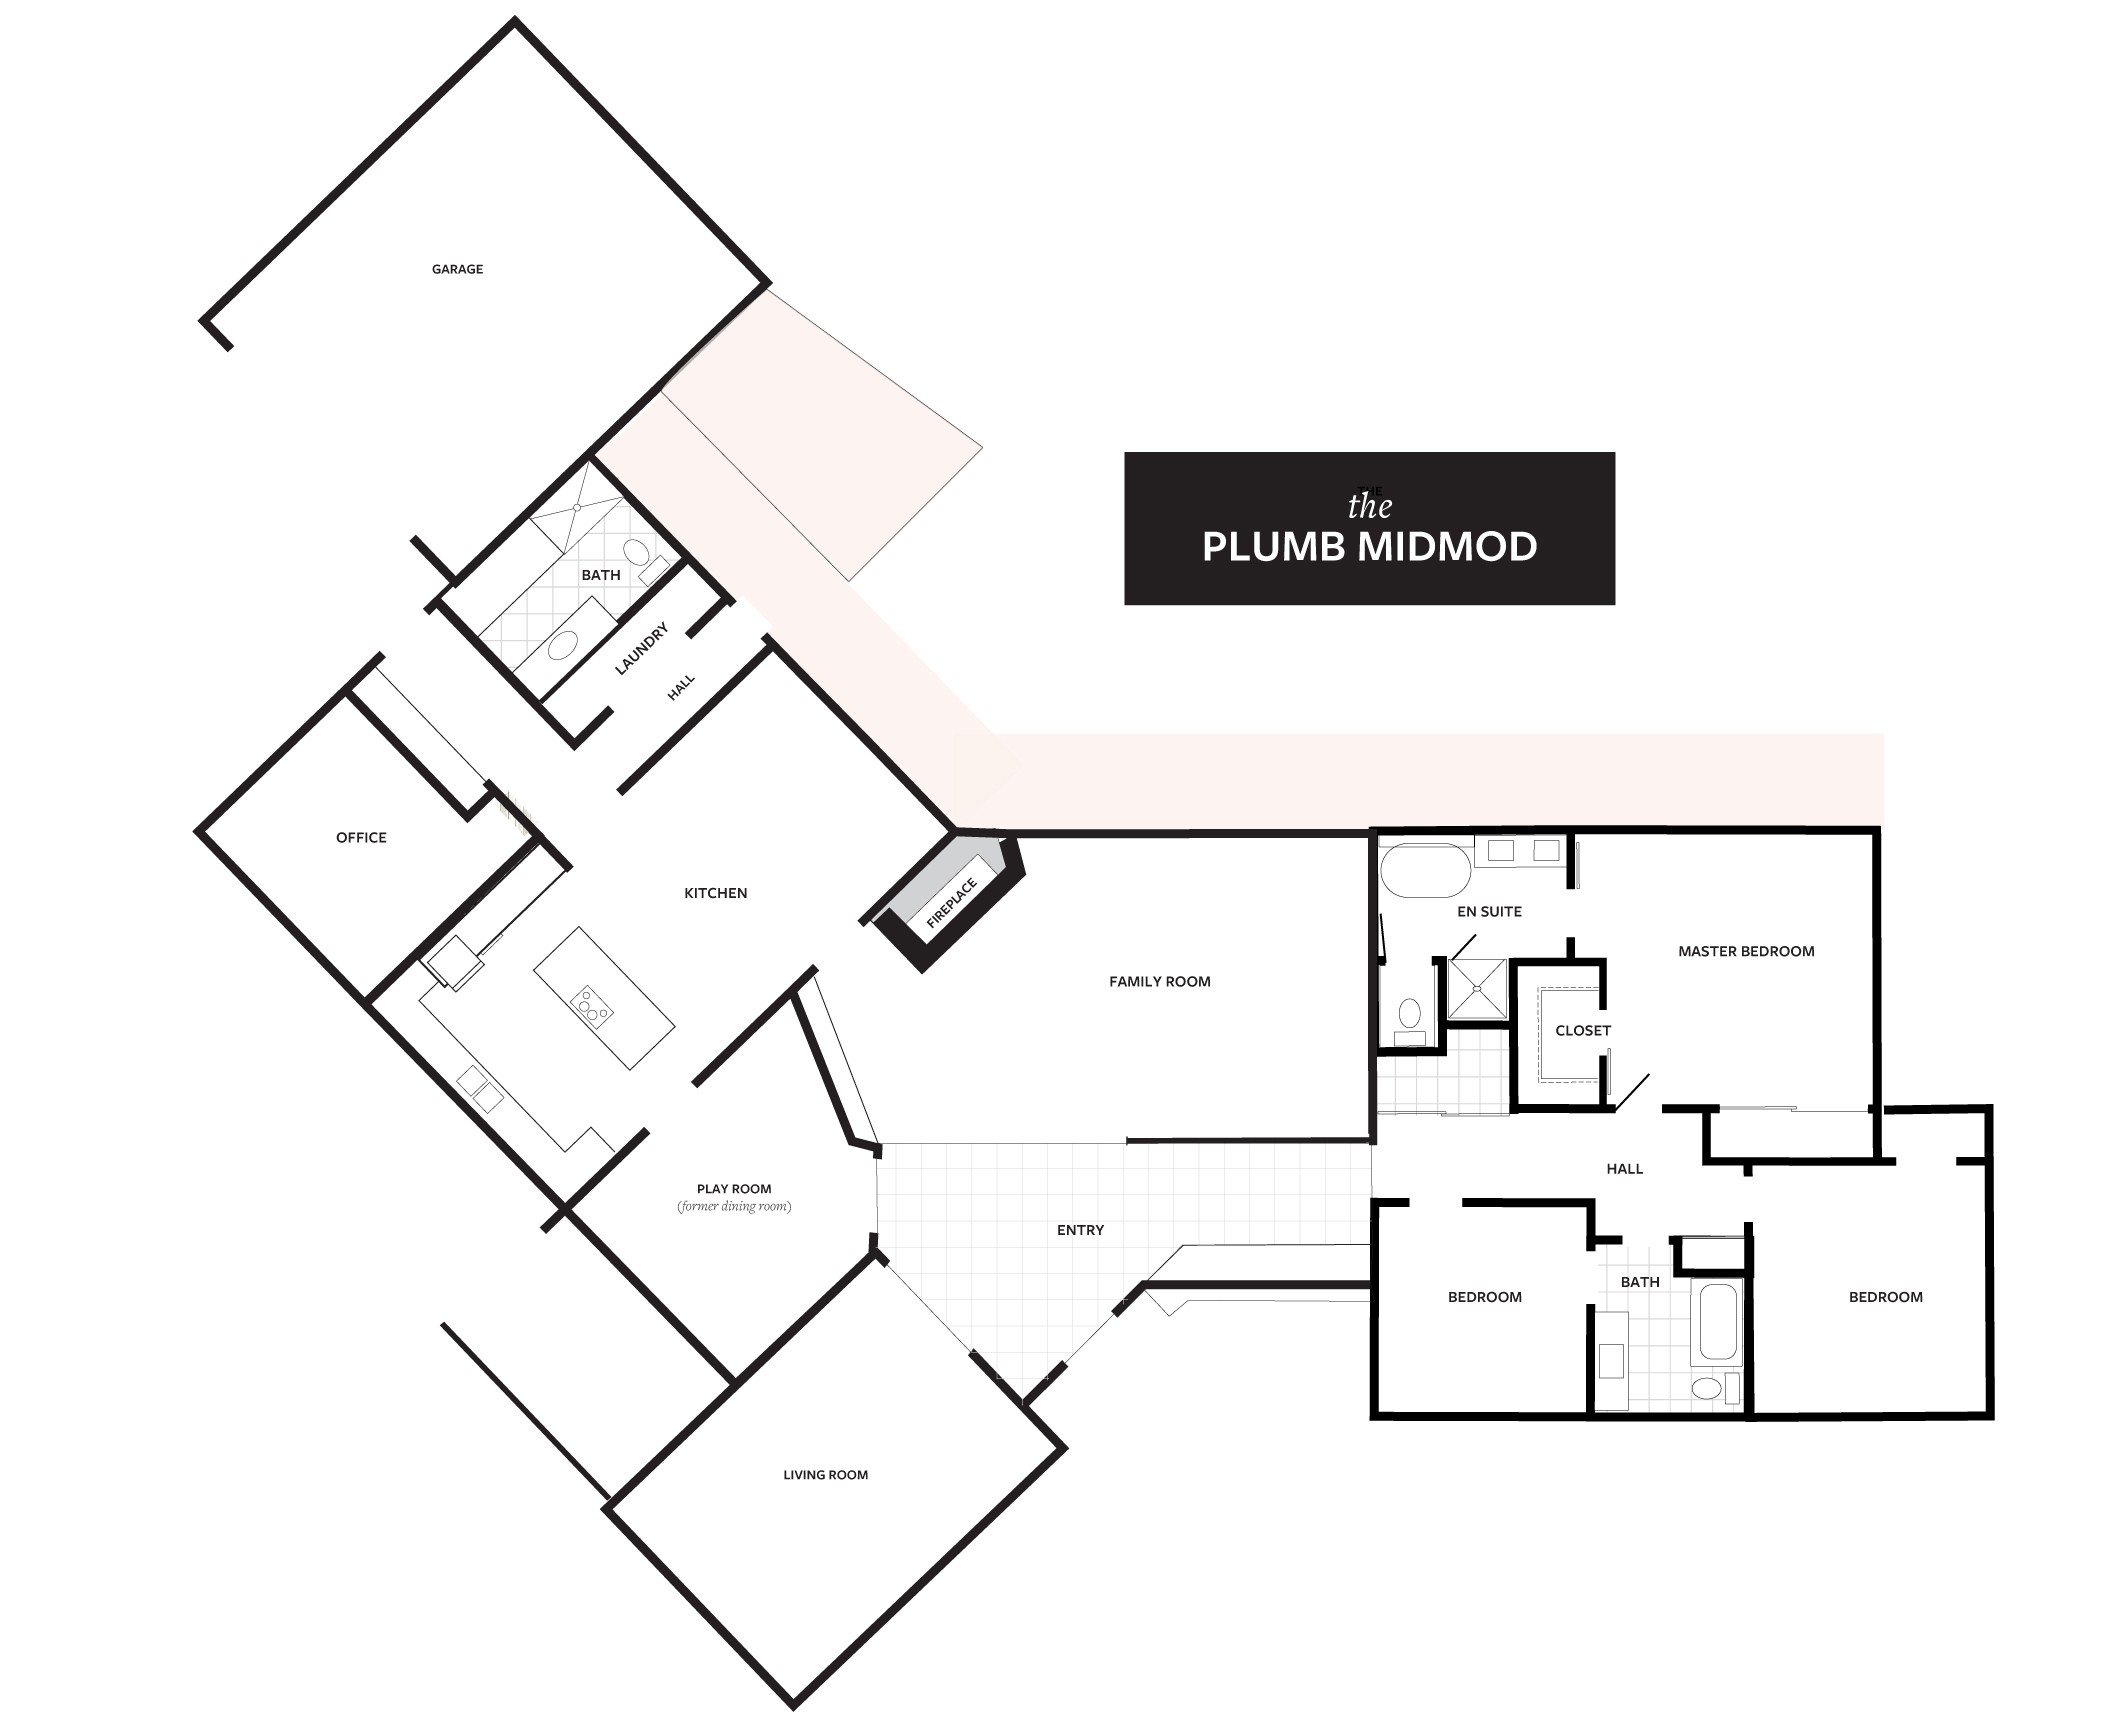
Hi! If you’re new here, I’m Rebecca, a designer located in Sacramento, CA. I’m currently renovating our 1960 ranch also known as the #plumbmidmod.
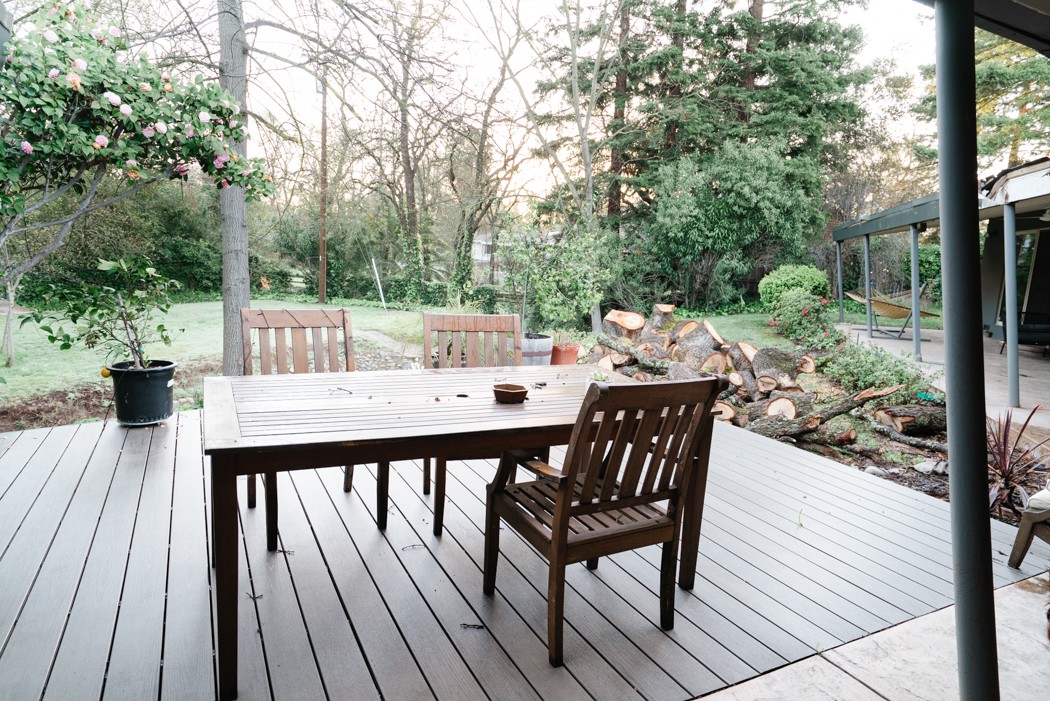
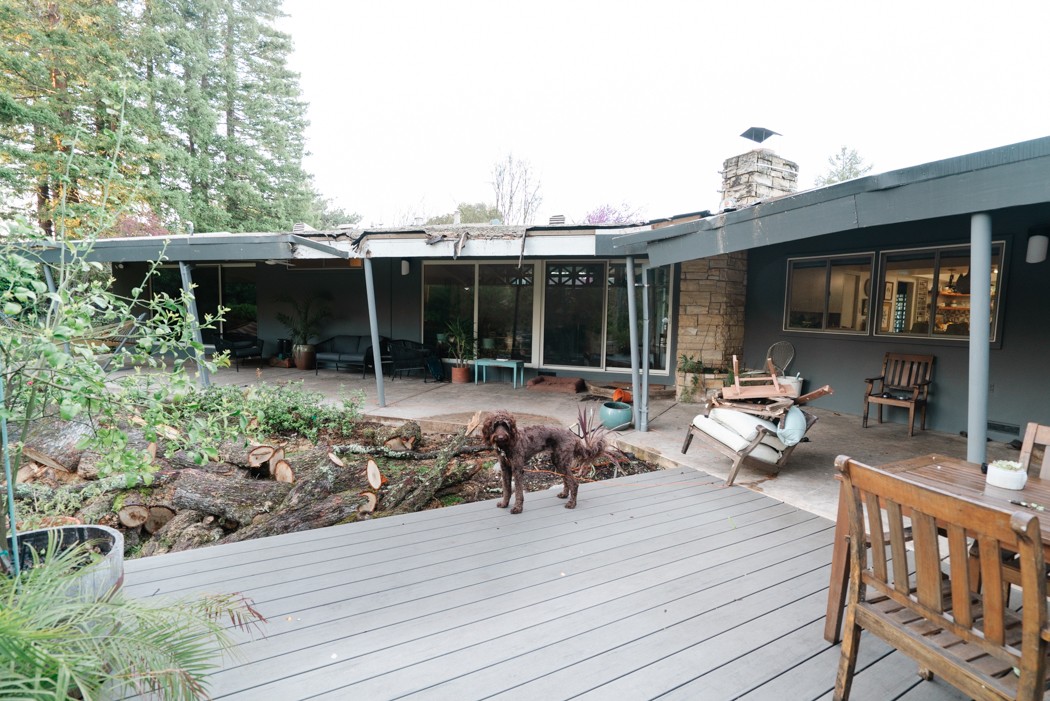
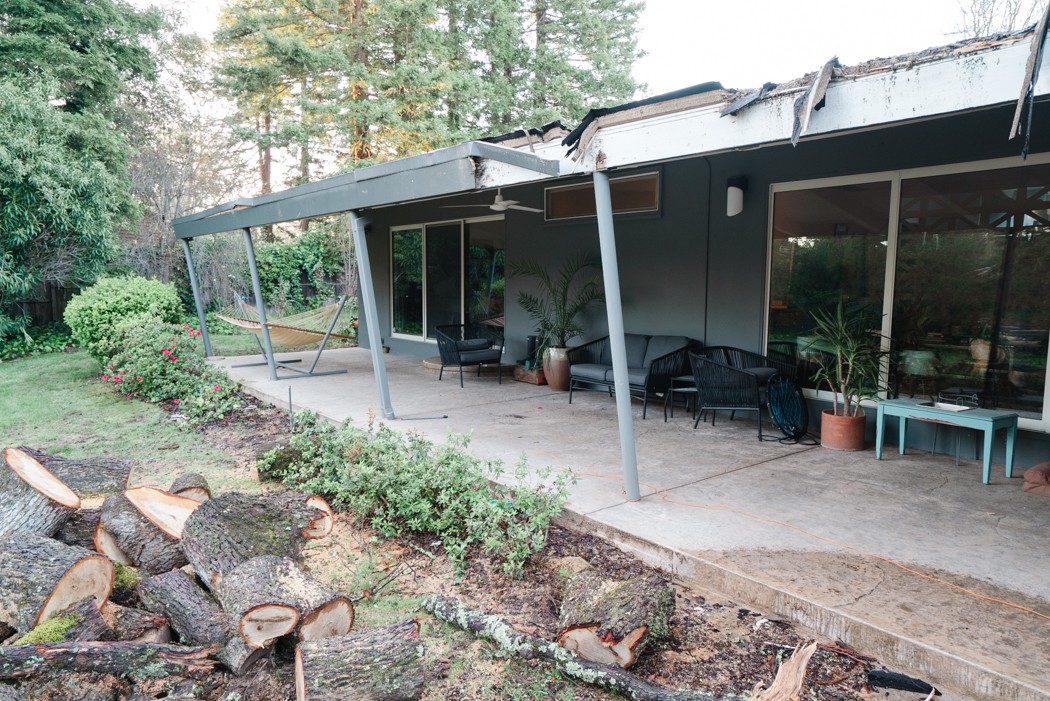
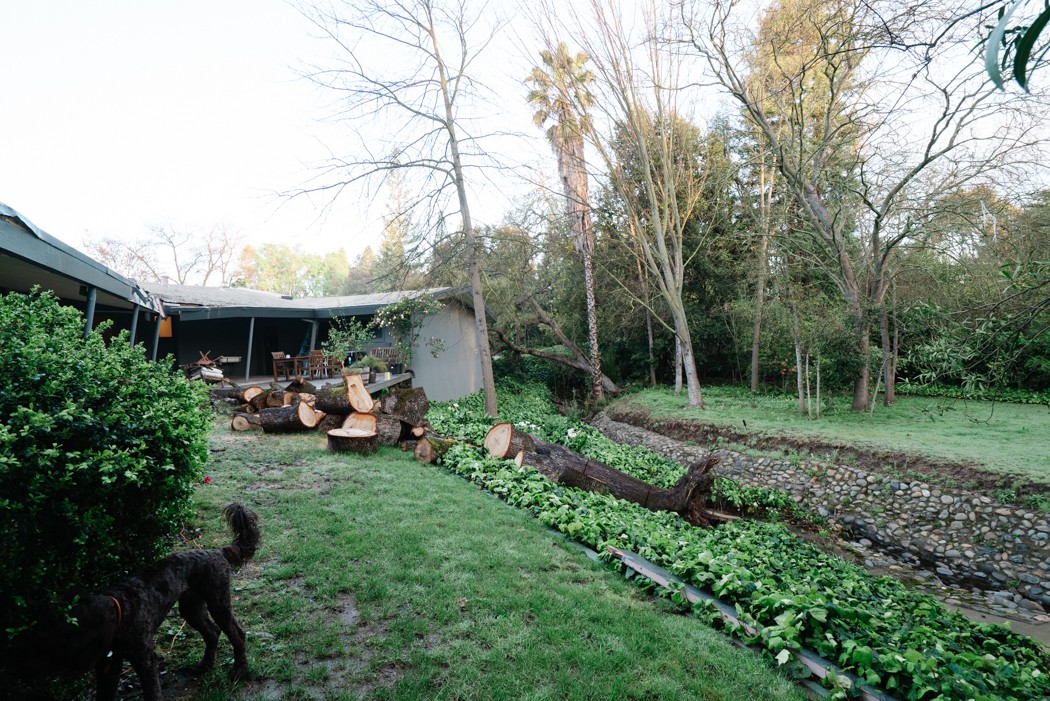
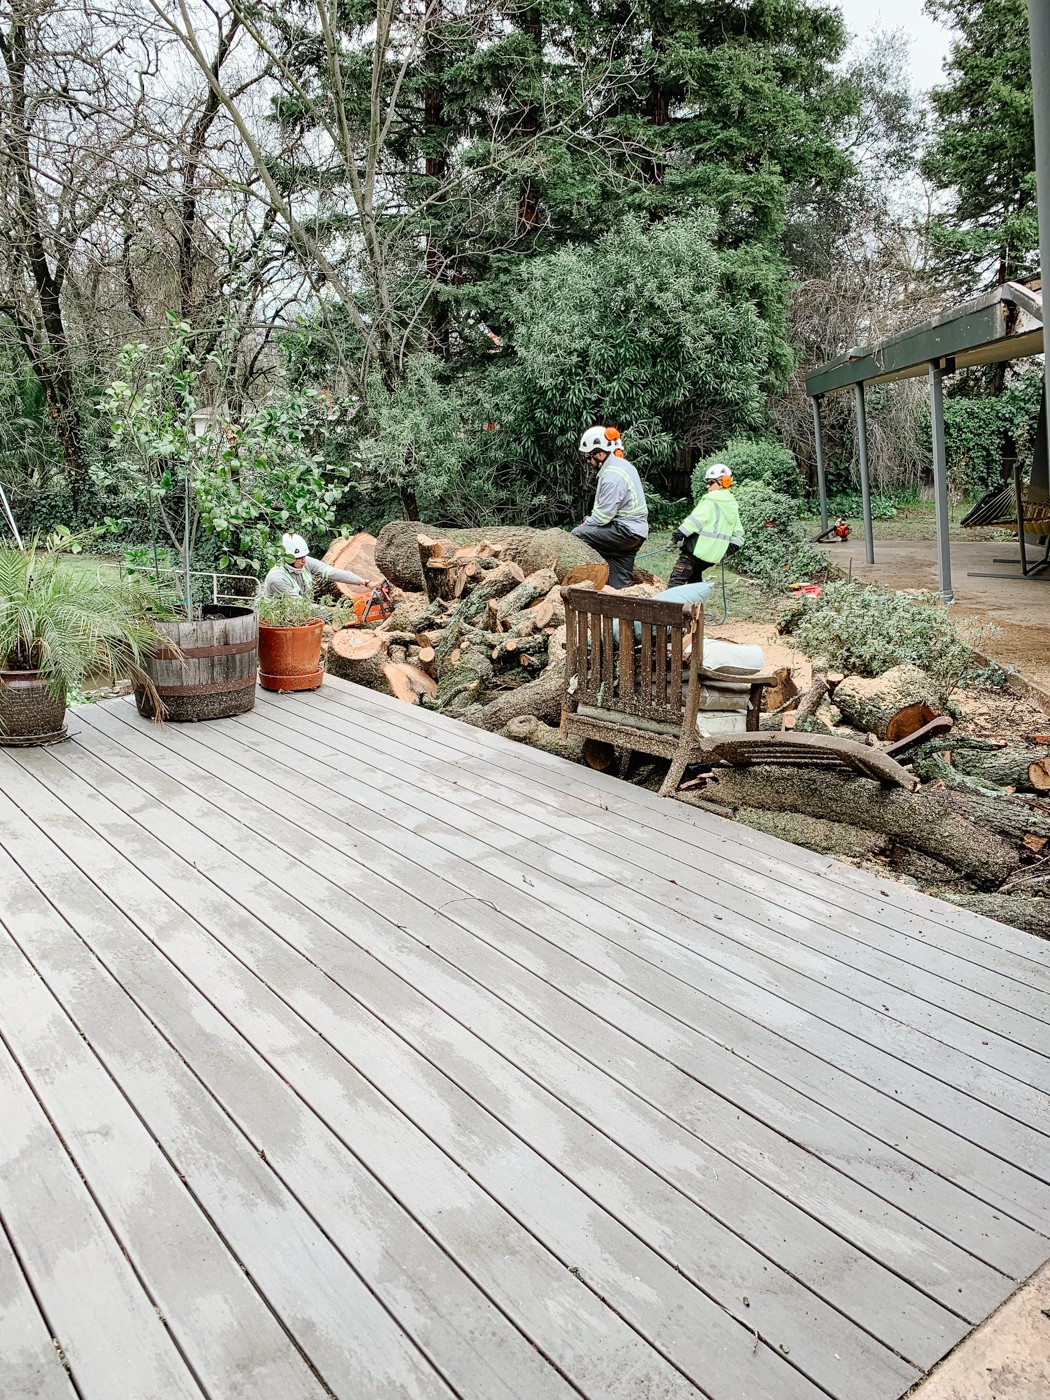
But first (sorry), a quick look back at where we started (more in Week 1). In February we woke up to find our beloved old oak tree had fallen onto our roof. It took weeks to have it all hauled away, and we were left with a pile of sawdust for a lawn, broken patio furniture and a desire to make some lemonade out of the situation (make that a margarita). And we had just finally had the house painted in December.
Before


After our kitchen renovation for last fall’s ORC (link) I knew we could do hard things and the results of completely finishing a project in 6 weeks makes the intensity so worth it! Here is the floorplan (in pink) and original inspiration board.

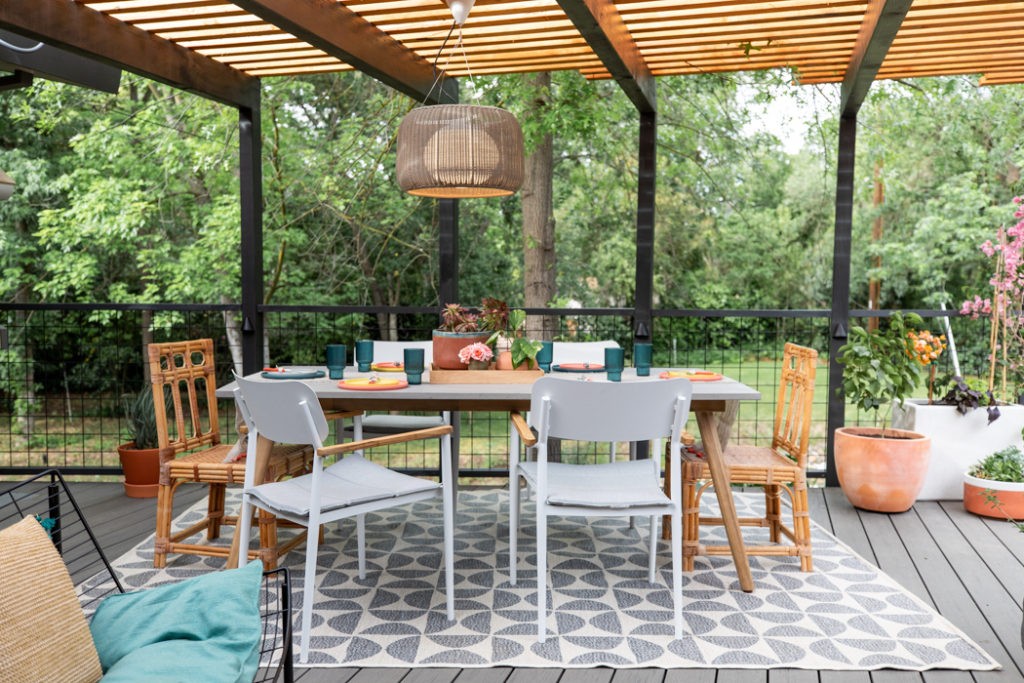
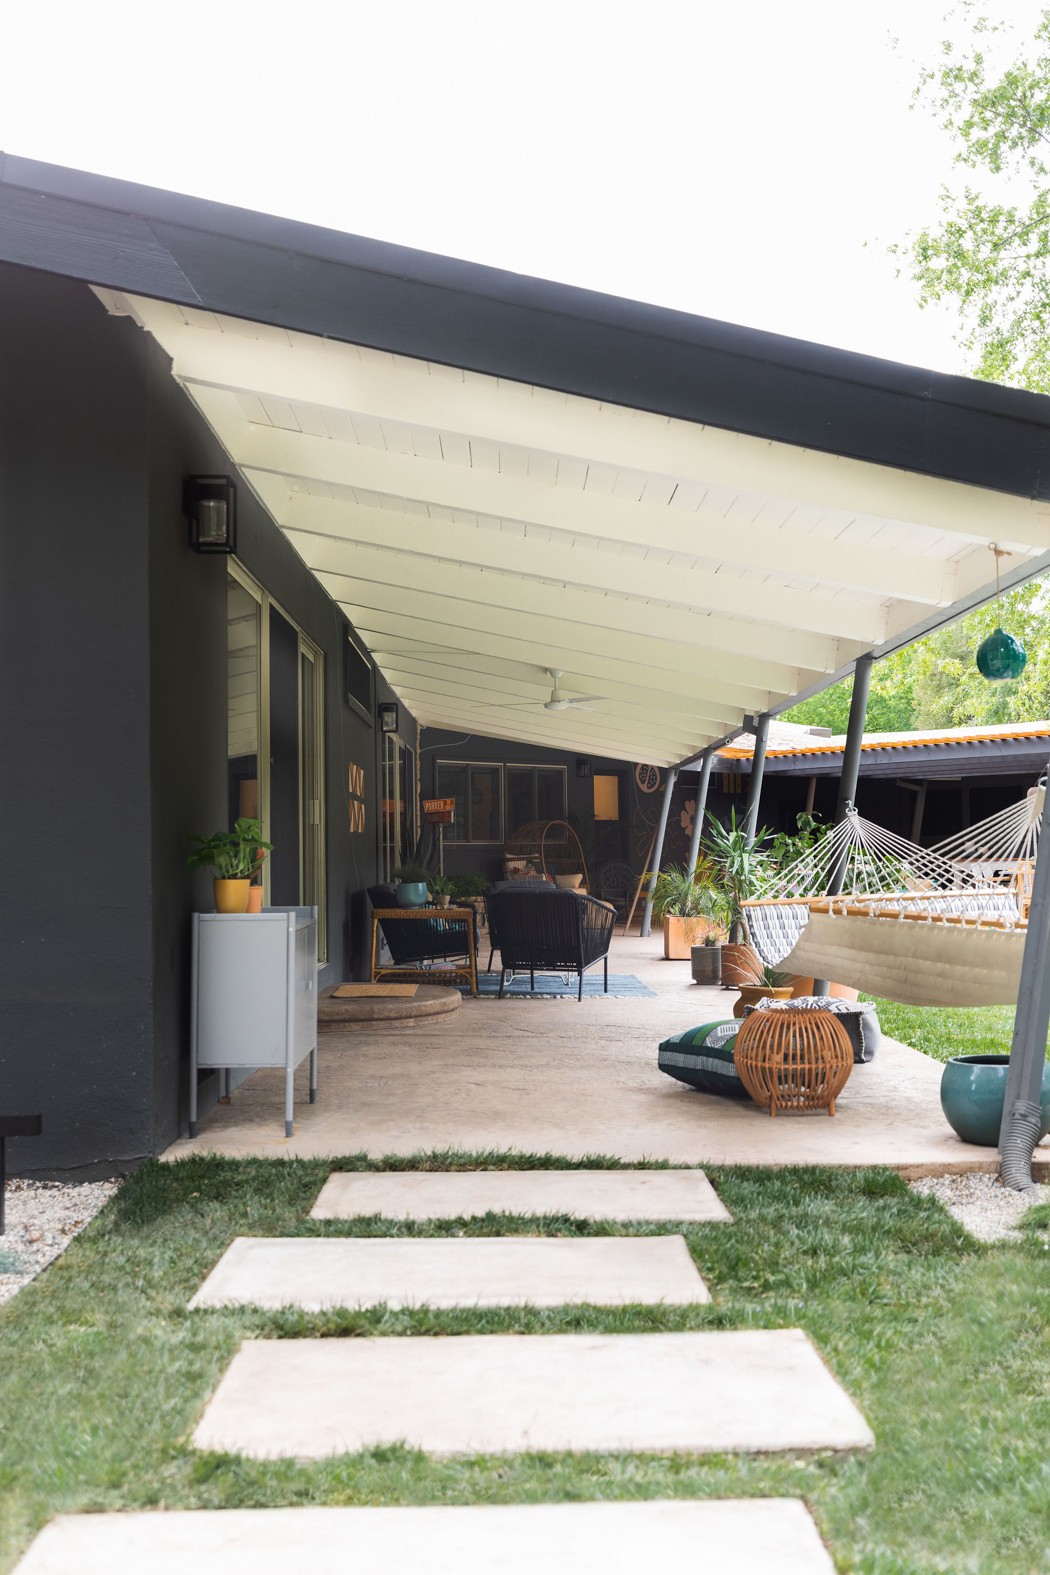
And here’s the #plumbmidmod patio in all her glory! Can you believe it? I hardly can. Nicole Dianne completely killed the photography and it was so great to finally get to work with her on this. Ok, let’s run through it all.
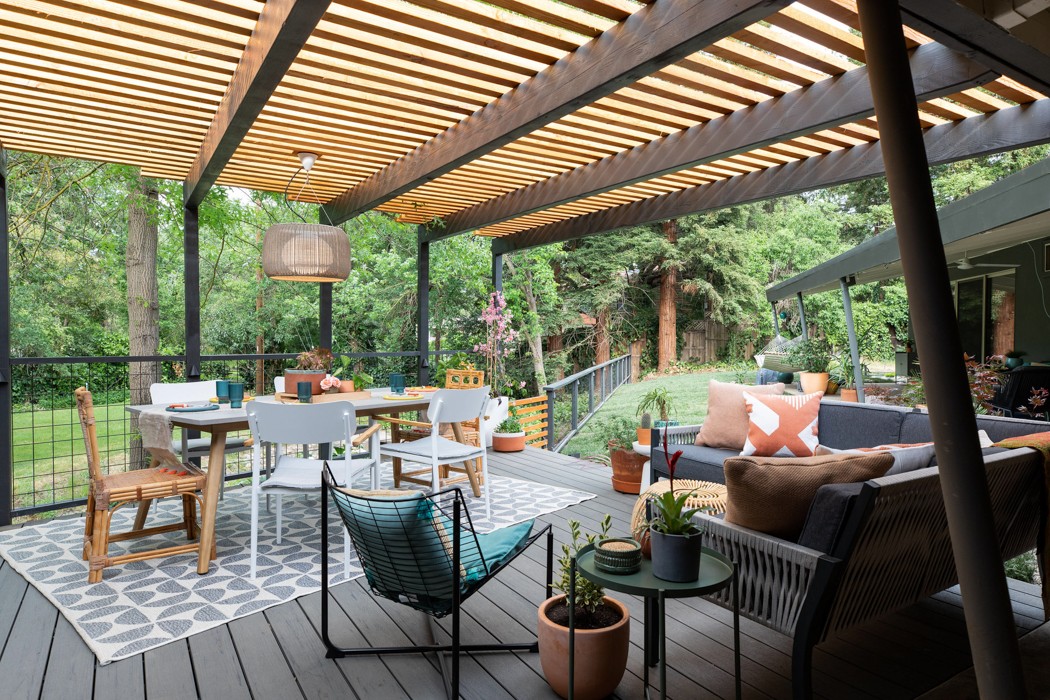
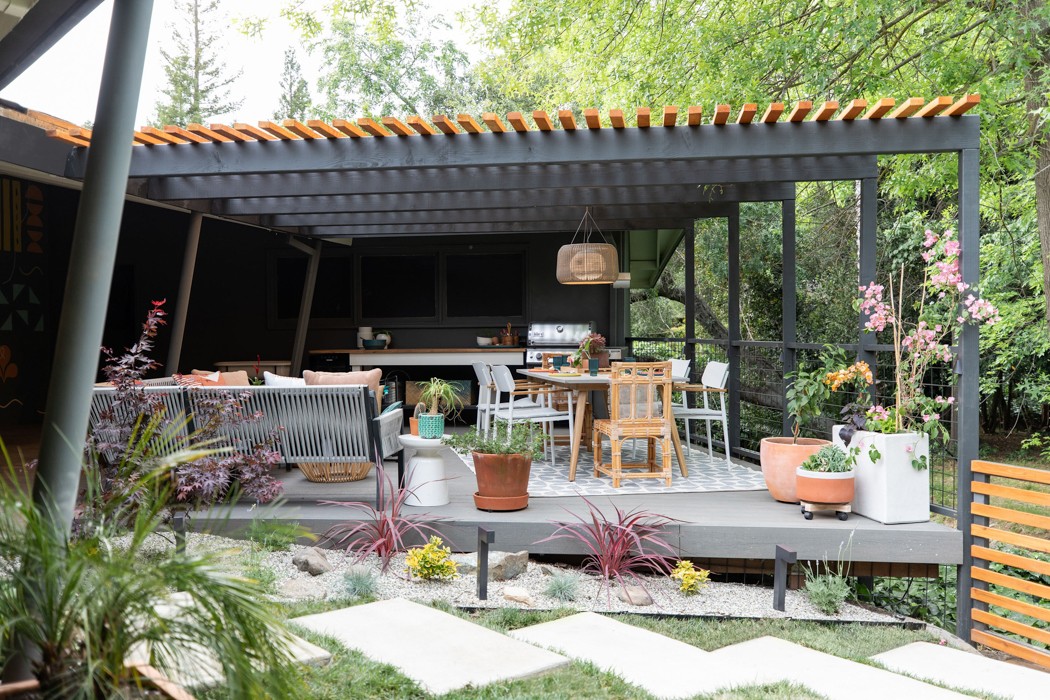
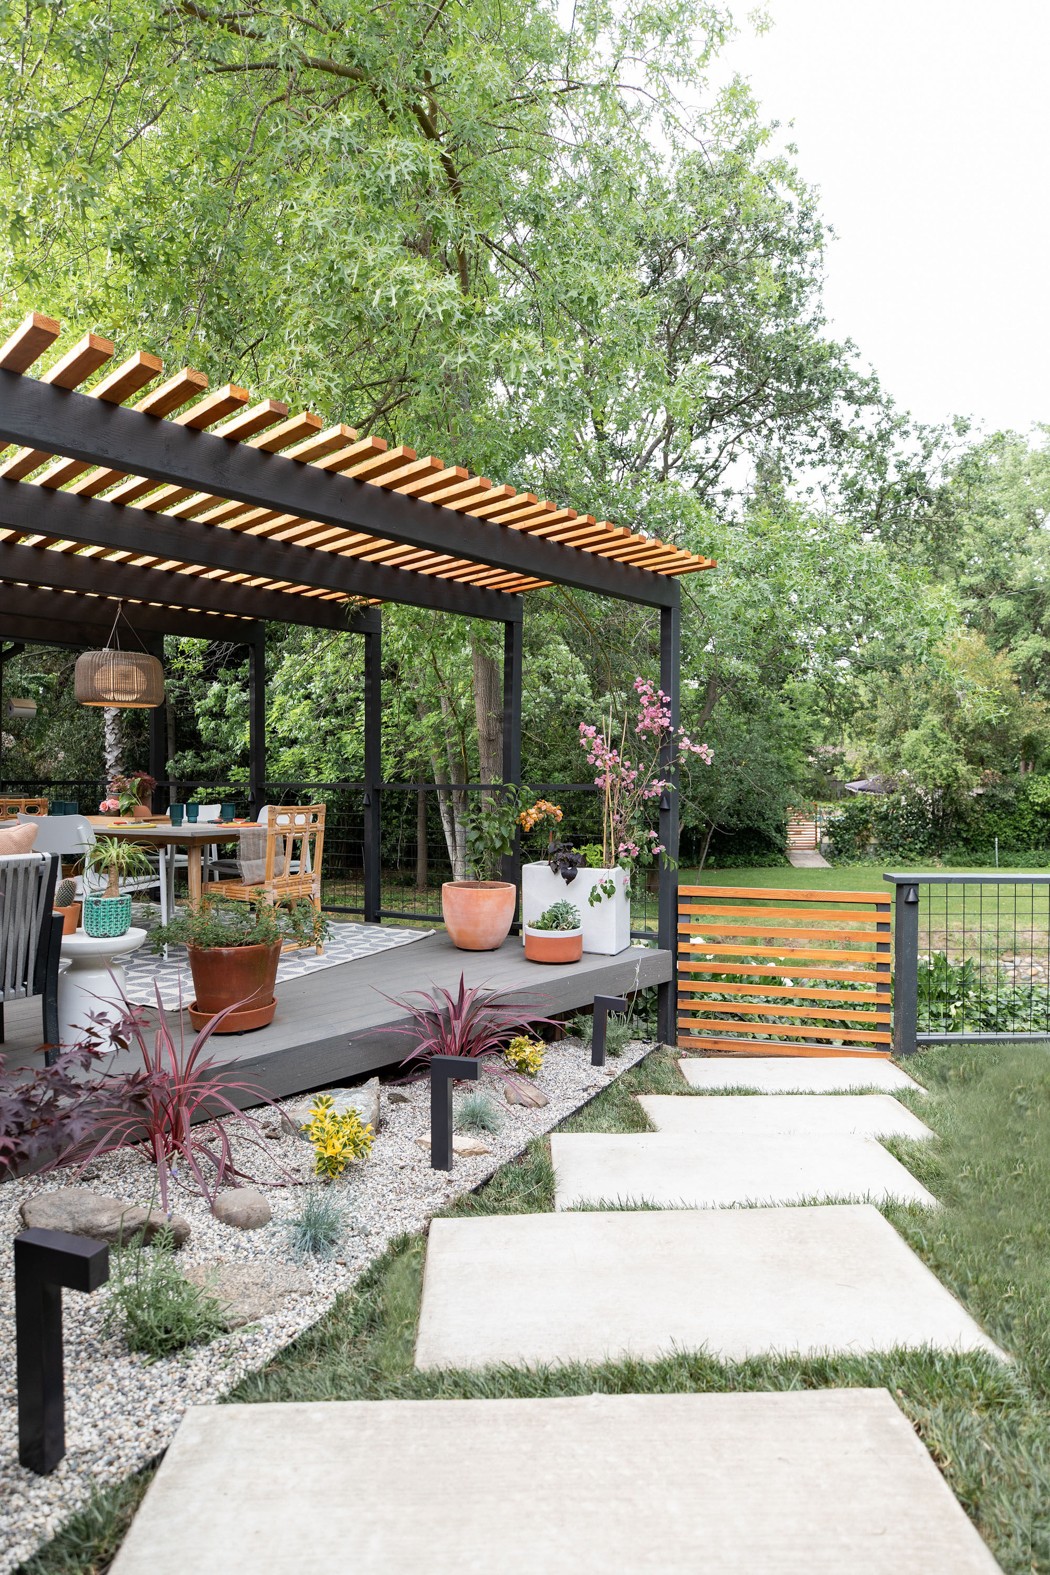
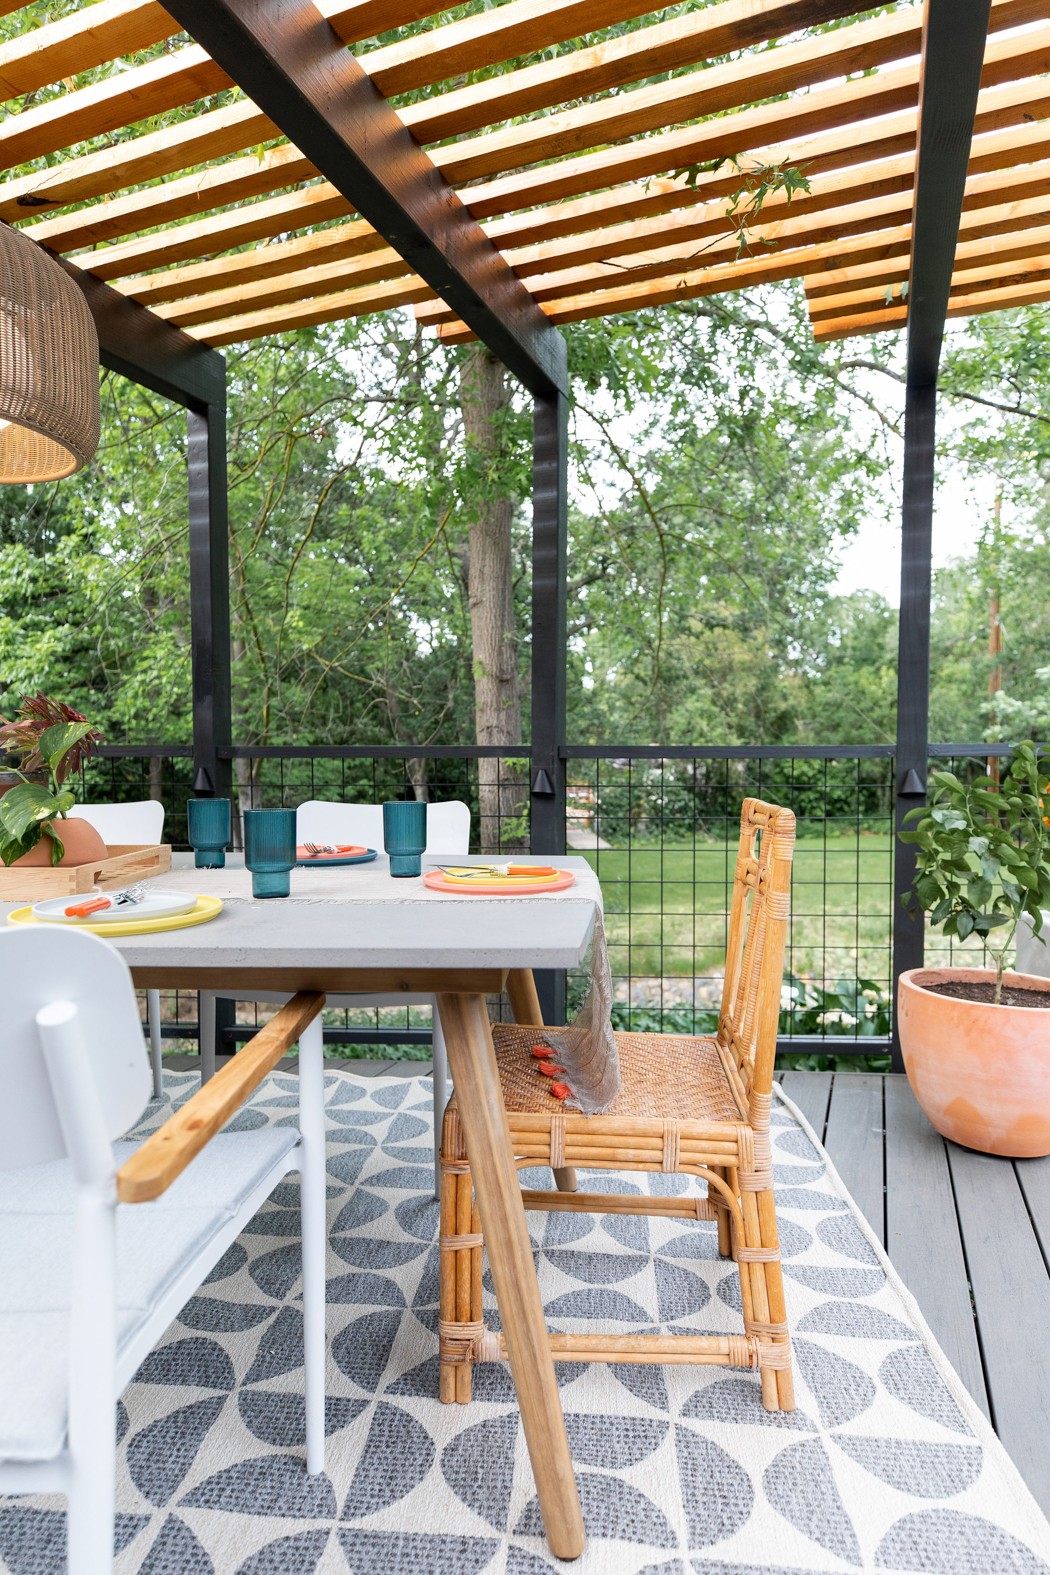
Pergola + Fence
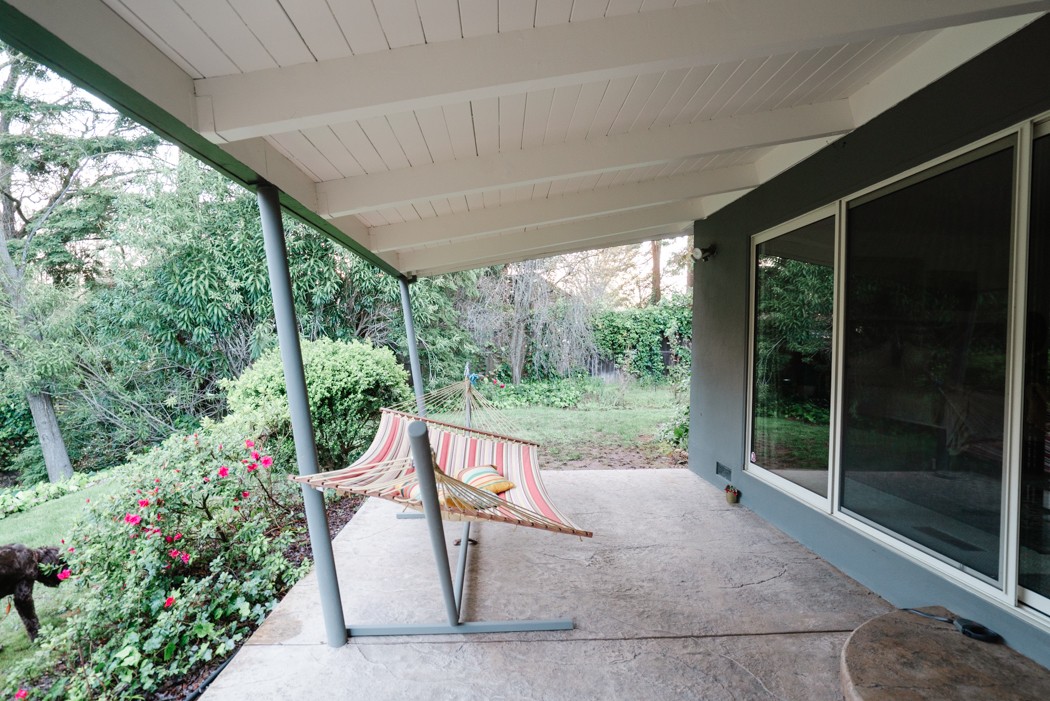
I think everyone will agree the pergola is the major show stopper although it was not part of the original plan when I set out to do the backyard. Its one of those things that organically evolved and I’m kind of kicking myself for not thinking of it in the first place (would have saved us a few headaches). When we bought the house it was just a big empty planter with scalloped brick edging but the first summer we built a deck on top of it to extend the use of the backyard. I don’t have any good photos of it before, probably because it was ugly and I avoided it, but here’s one and a shot of the building process. Bye state-of-the-art intercom!

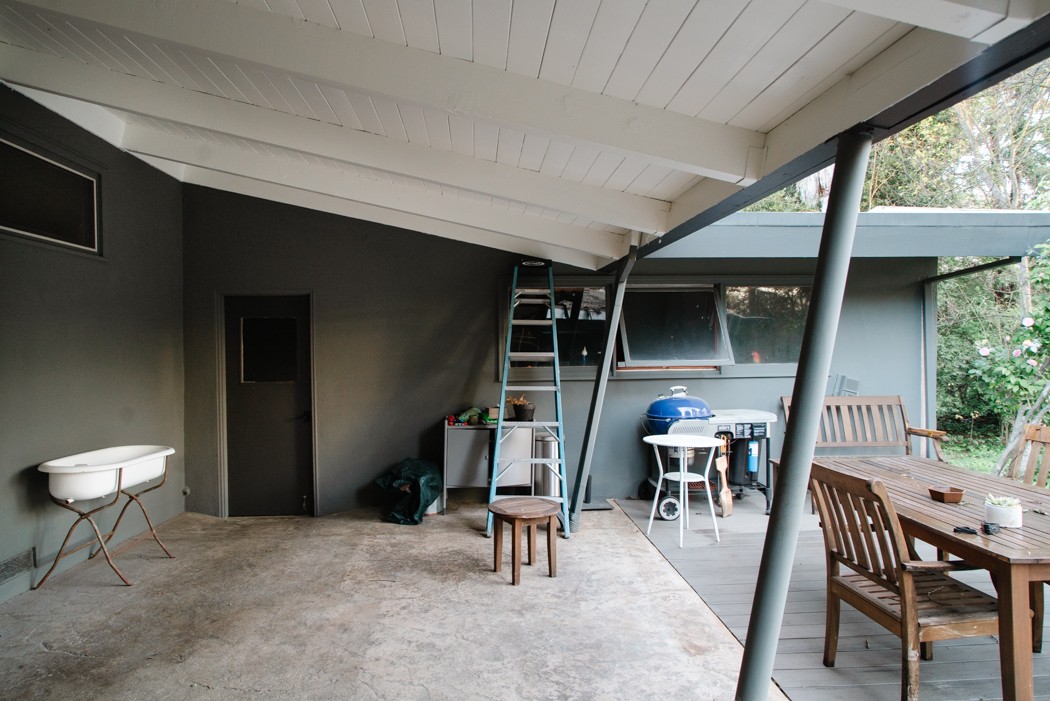
That was a huge improvement but it was hot and exposed out there during the summer and not overly inviting. As I was starting my design I sat back there and realized what it needed. We have about 75 feet of covered patio with the overhang so it wasn’t my first though that we needed more shade but once the idea hit I knew it had to be.
I was heavily inspired by this photo (source)I and loved the simple right angles that kept the look modern and open.
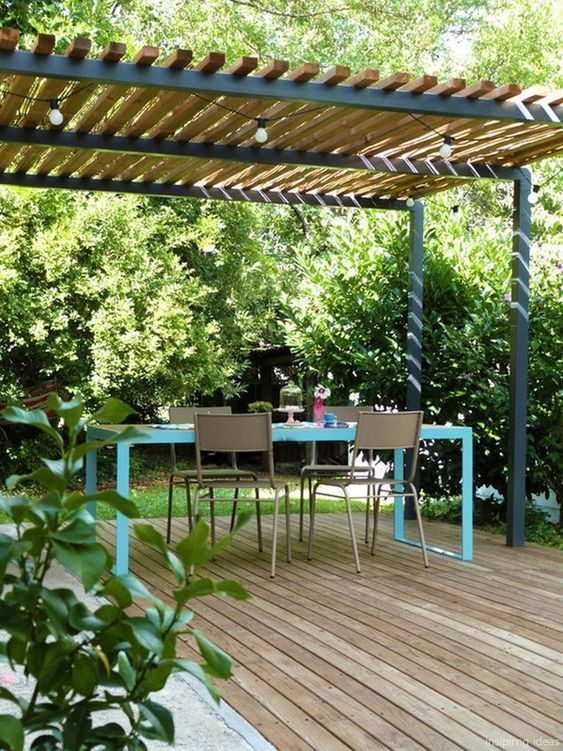
We painted all the vertical beams the color of the house trim, but I wanted to bring some warmth into the materials so loved the natural wood on the trellis slats. When the light hits it in the evening it glows and even takes on optical allusions. Its so cool. If you haven’t realized yet, this project was very If you Give a Mouse a Cookie. Since we had a new ‘dining room’ out there I realized we needed a better place to cook and serve food. So Week 5 my dad and I came up with this super simple outdoor ‘kitchen.’ Its really just a few 4×4’s and an Ikea butcher block counter top but it was just what we needed! And of course Terry took the opportunity to upgrade the barbecue. We took off one of the ‘wings’ that comes with it and parked it flush against the counter. We also designed the counter so our wine fridge could park underneath it and now we have cold drinks outside! One more thing–I also wanted to limit the view into our disaster of a garage so my dad, who prints banners and signs made perforated bus vinyl in a light black. If the lights are off you can’t see in, but you can see out from inside! Genius.
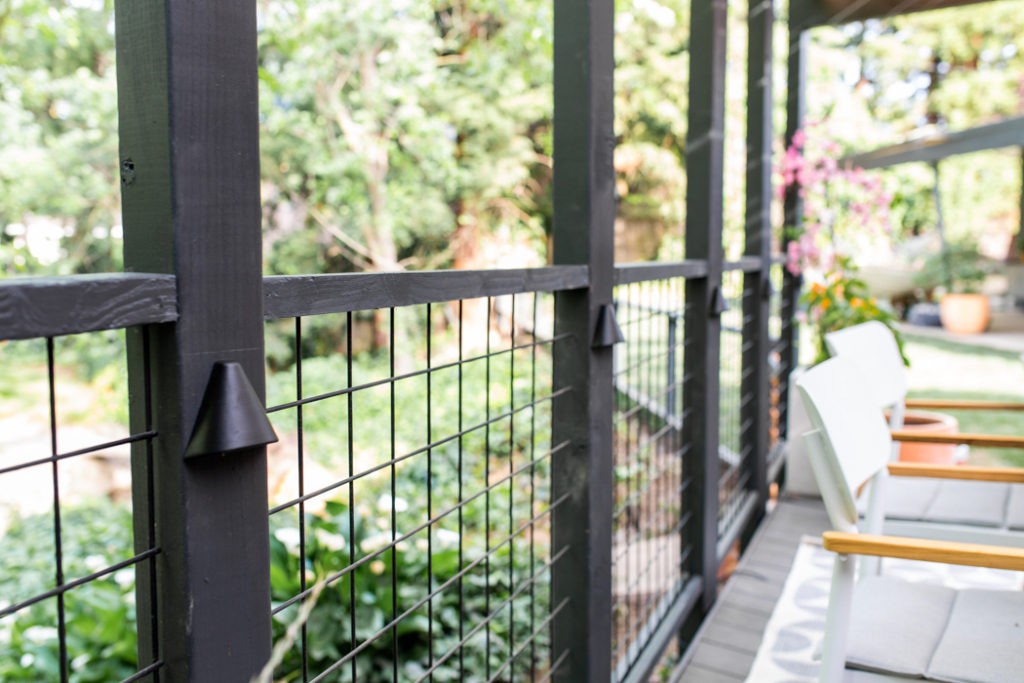
We also have been struggling with the open concept of our property. The pool is enclosed and secure, but the rest of the yard has always been completely unfenced. Last year we added a gate to the side yard going out front, but the dog was still basically free to run amok, and escape through the creek. Which he did daily. We’ve been ‘on the fence’ (pun intended) about adding a fence along the top portion of our yard to secure both dog and child and finally decided it was the right thing to do. My dad designed the frame and we used simple black hog fence panels so the view wouldn’t be disrupted and cost efficiency. We ran it the length of the yard, including the deck, and painted the fence posts so it wouldn’t look too rustic. I must say, its completely perfect. Getting the gate to meet up with the corner of the deck was tricky using the same framing so we decided to match it to the trellis and I love the attention it gives. Since, you know, mouse/cookie I also decided the pool gate off in the distance should match. Thank you for making that happen Dad!!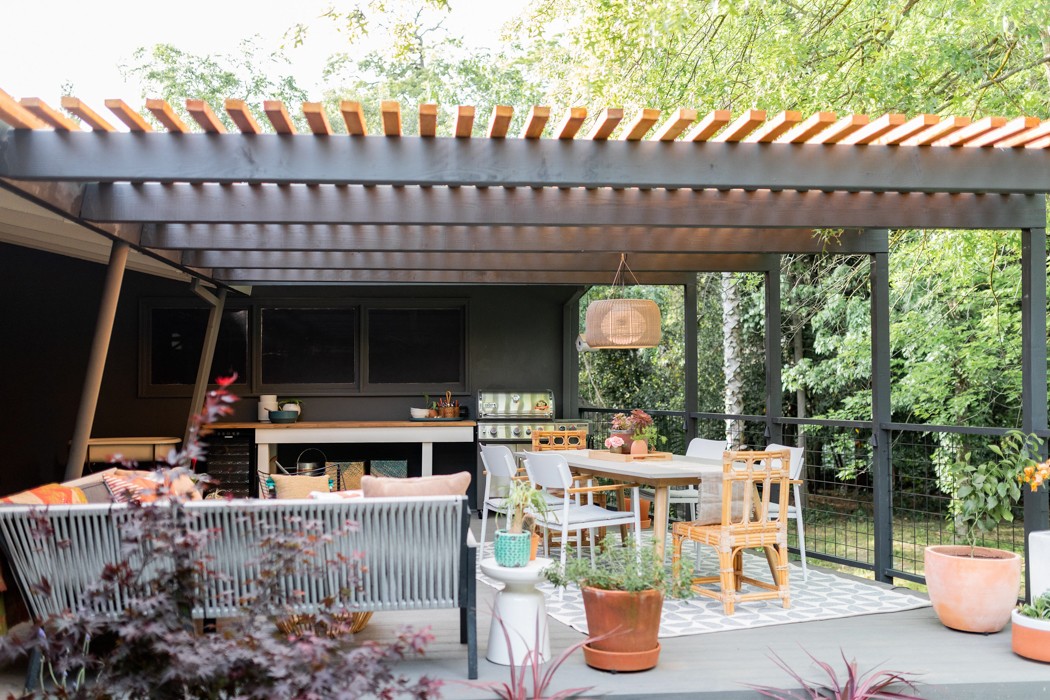

Lighting
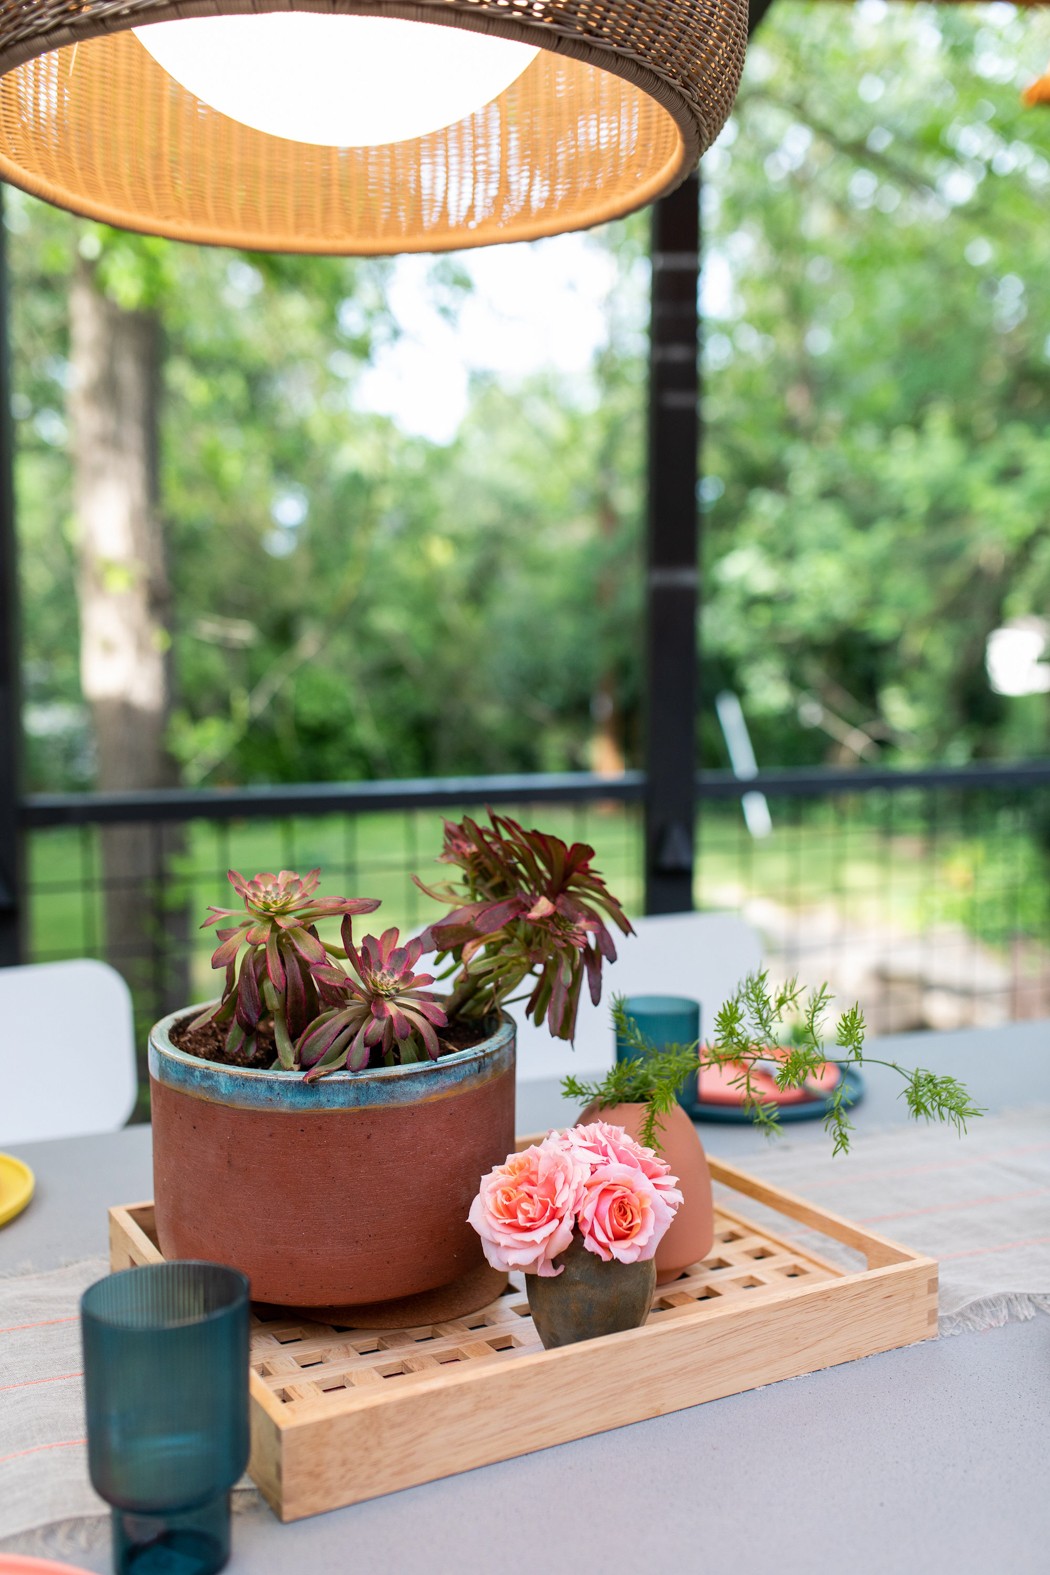
And what’s a dining room without a proper statement light? We partnered with Lumens on all the lighting, which I’ll go into lots of detail in a future post, but I’m obsessed with everything we did with them. They are already my go-to for clients since they have the best product lineup and customer service so let’s just say I freaked out when they offered to jump in on this. We started with the outdoor pendant and its just so good. Aesthetically its the perfect mix of tropical and modern and I love the matte white finish and the canopy detail in the pyramid shape. Functionally its completely wet-rated so it will hold up to all weather conditions and we don’t have to worry about it in the rainy season. The rattan is synthetic but is such great quality and still has a natural, organic look. I love the mid-mod inspired inner globe that the casts the perfect glow when you’re out there. Quality lighting is such a game changer and I love it so much.

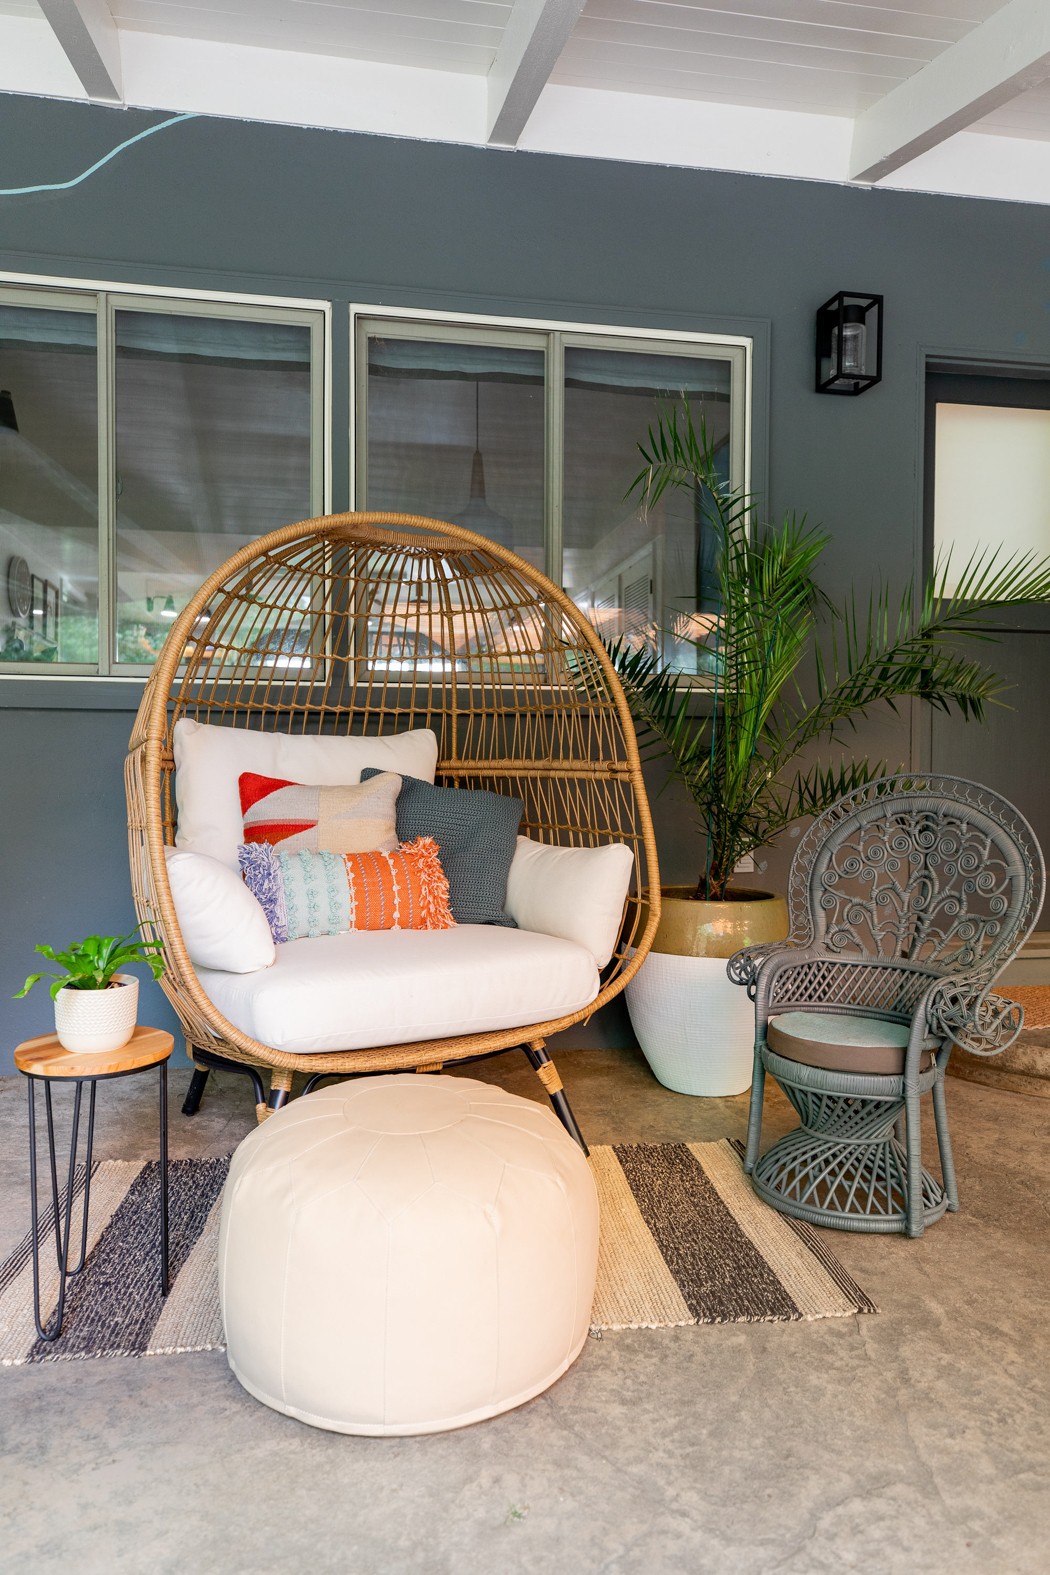
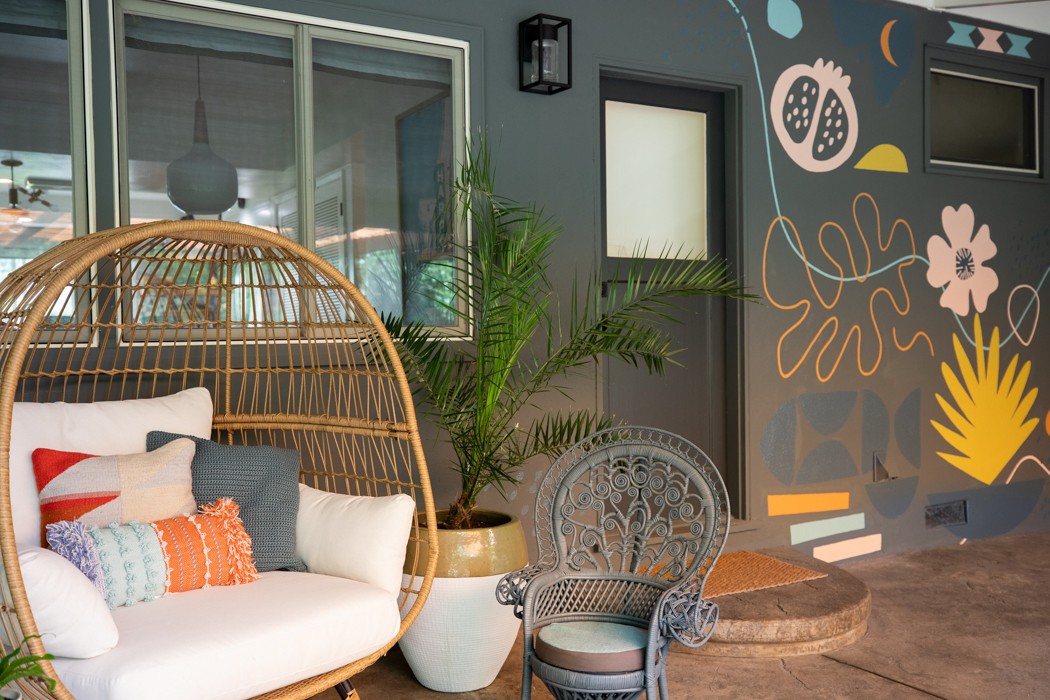
If you saw on Instagram I was never in love with the wall sconces we installed after the house was painted. I like the look of them but the scale was wrong on our patio. We went with a simple box framed sconce, also gifted by Lumens, and I love the modern form with the seeded glass. It brings a sparkle that was missing and the perfect amount of detail. They’re so pretty! Also, this egg chair from Target just had to happen, more on that below.
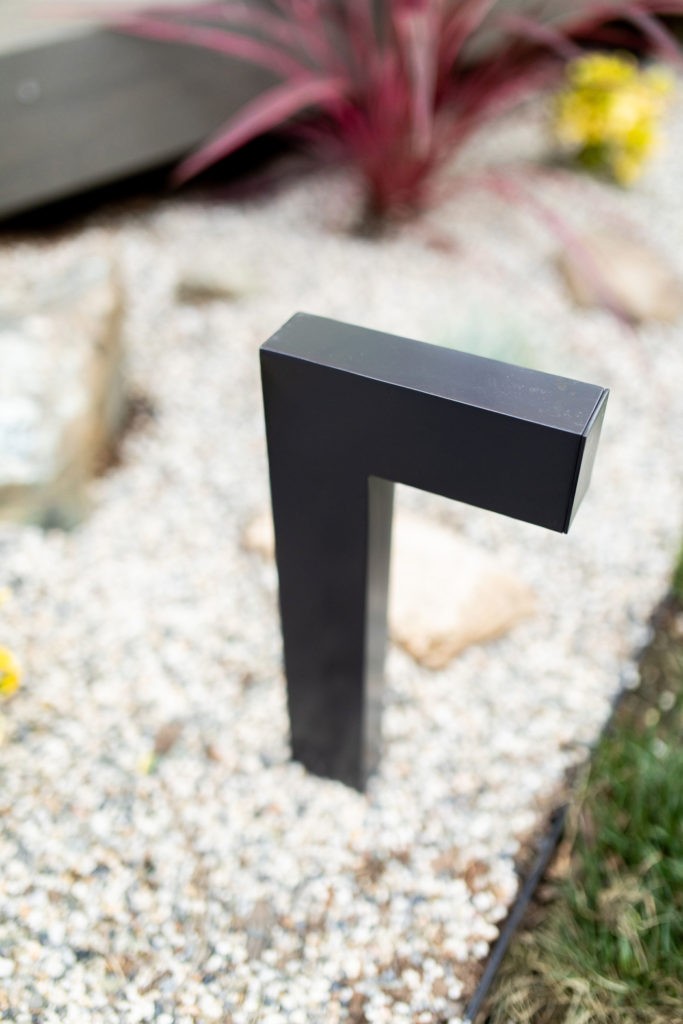
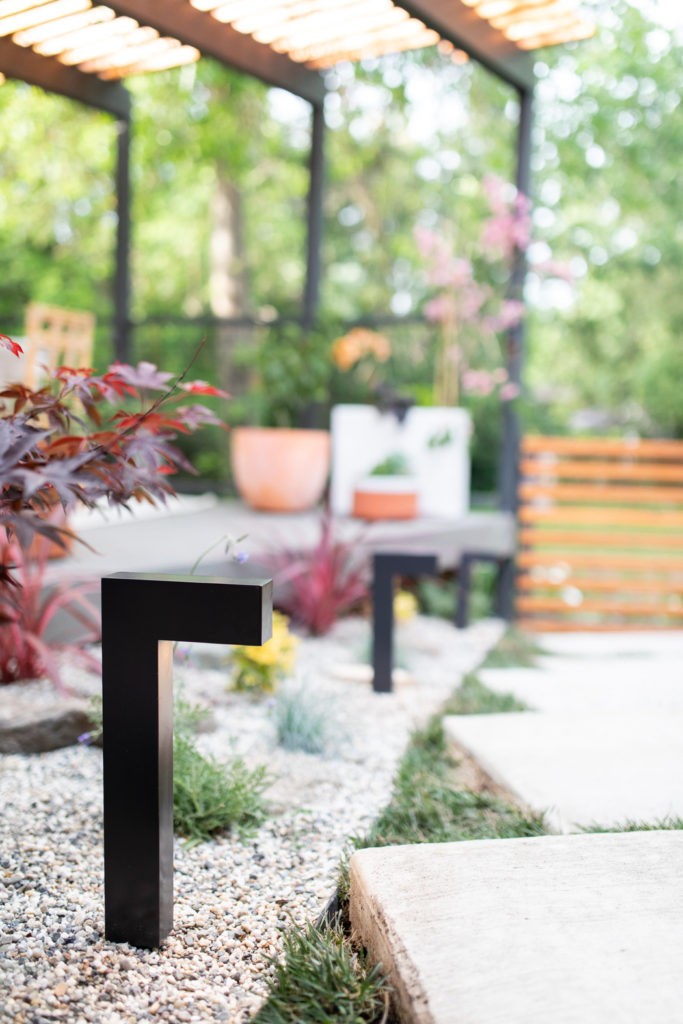
We also took the plunge and did landscape lighting as well. I say “plunge” because I’ve never specified landscape lighting in my own home or a clients’ and was a little intimidated. The team at Lumens was so helpful, and had me start with their Outdoor Lighting Guide. I decided to add deck lights to the fence posts, path lights in the planters, and one dramatic up light on a beautiful redwood. gave me feedback and suggestions on what kind of transformer to get. If you are local to Sacramento you’re in luck because we are home to their showroom and their team can walk you through things in person. If you’re not, they r sales and trade teams are ALA-certified (American Lighting Association) and know the ins and outs of lighting and technical specifications. When it came time to install it was actually way easier than I thought, and turned out to be a complete game changer out there. It extended the usable hours of our space and sets the perfect mood. Again, I’ll be doing a whole lighting post soon plus show you how it looks at night!
 Sod + Plants


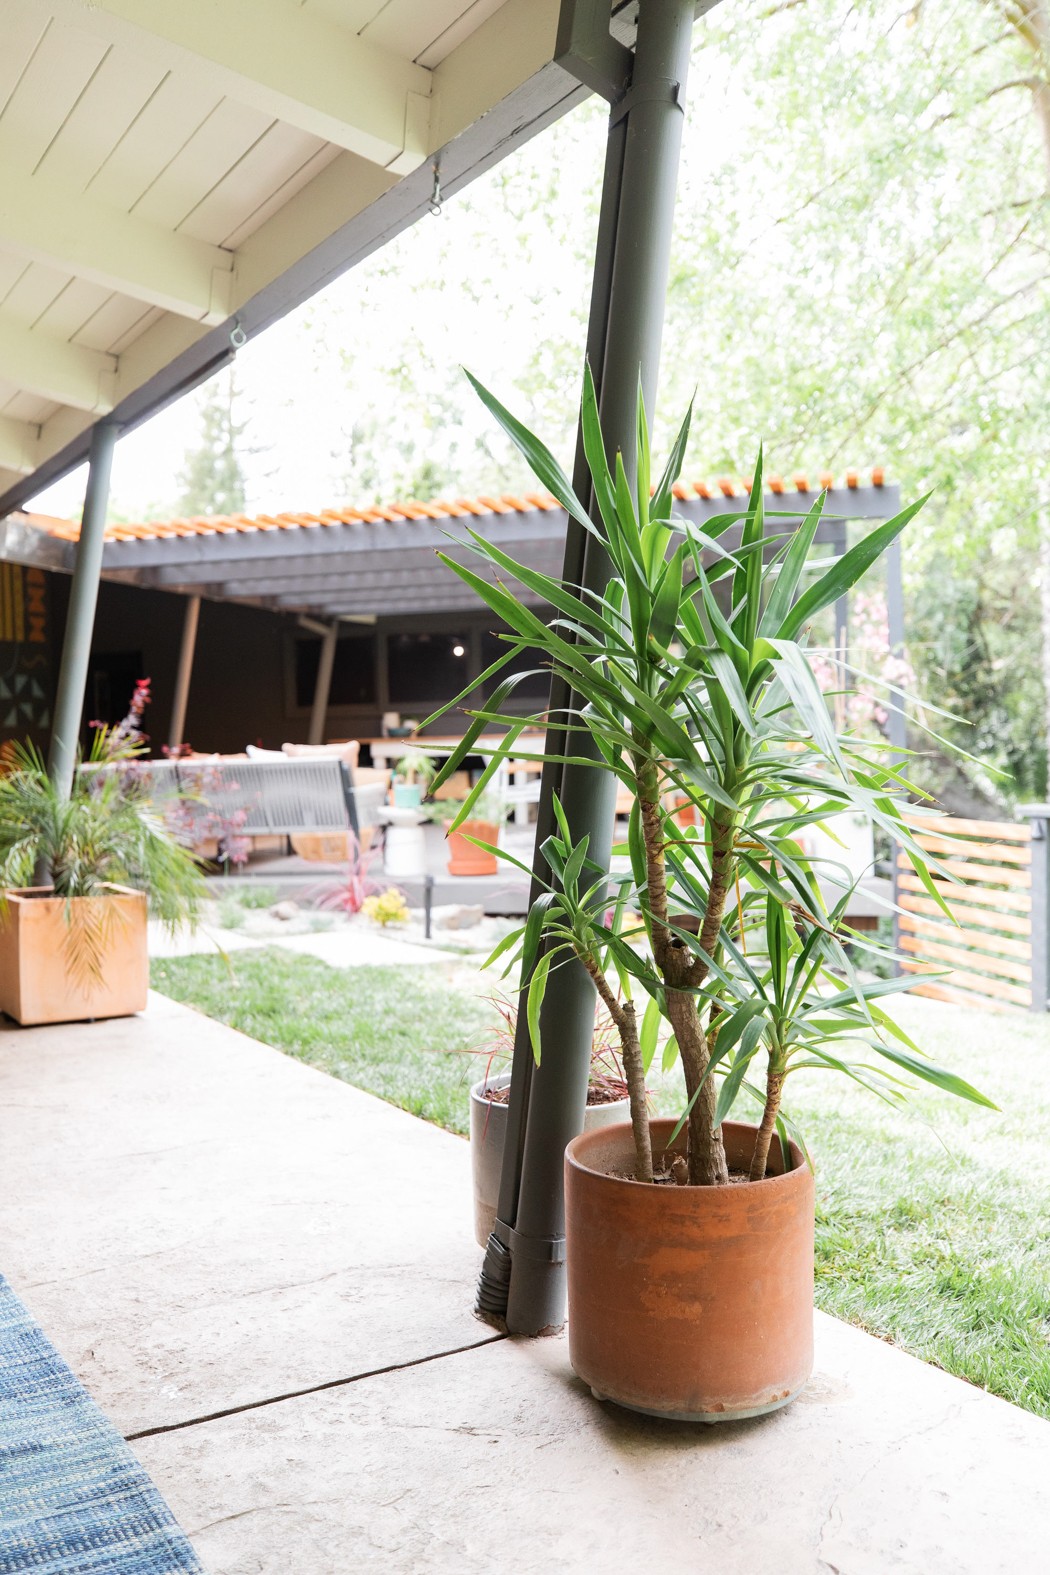
Bye bye grandma plants! I mean, on their own azaleas, ivy and roses aren’t completely terrible, but together and left unattended (our fault), they really aged the look of our yard. I wanted to bring in some Palm Springs midmid charm with the plants and also lots of color without inviting too many bees. Green Acres Nursery & Supply, a family-owned company in the Sacramento region came through to partner with us on plants and the lawn and I’m so happy with everything! We used a variety of drought-tolerant varietals with graphic shapes and architectural details (more on my DIY design process here), and repeated plants to create flow and consistency. The quality of the plants from Green Acres is just the best and they stand behind their products. They will even replace or refund any plant that doesn’t survive within one year of purchase!
So… ya. After the tree trashed our already pathetic lawn situation, getting fresh sod from Green Acres Nursery and Supply was a legit miracle and I just coined them our Fairy Sod Mother.😂 Its so satisfying having that instant gratification of newly laid grass. It will take a few weeks until the roots take hold and will be ready to use and can be mowed, but looking out at that sea of green cools down the whole area and is an immediate oasis. The great news is you can now order sod online! You can buy online directly from idiggreenacres.com as long as you order a minimum of 20 rolls to be delivered. If you order over 100 rolls delivery is free! For reference we ordered 110 rolls and used almost all of them.
Landscaping
Ok, so I had my plants and knew I needed sod but had no idea how to actually get the work completed. Have I mentioned that my husband is a reluctant (but capable) participant? That’s when I met Charles from Shipshape Landscape and I will forever be grateful to him. He pulled off a project that should have taken a month in less than a week and its sooo good! Not a flip job that will break down in a couple years.
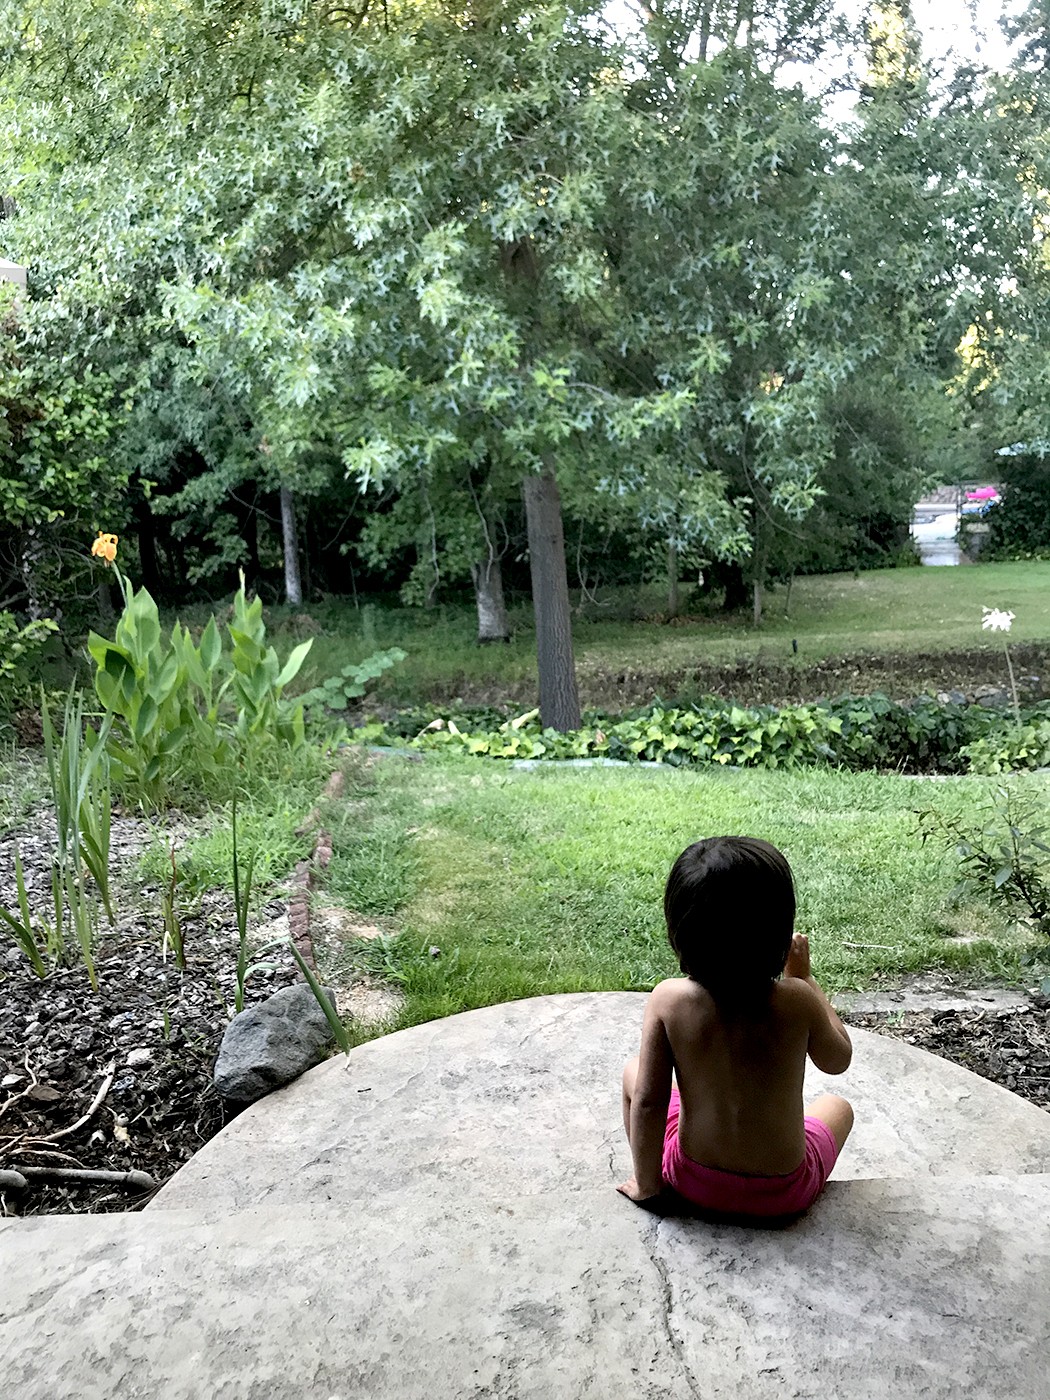
He helped me figure out a couple pieces to the project with his strong design eye and years of experience. First being the concrete pavers. We have a steep path that goes down to the creek, which its own problem, but there was no defined walk way connecting the patio to that path. Here’s a photo from our move-in.

We decided to pour concrete pavers and dig them into the slope to create steps down to the gate that leads to the back lawn and pool area. Charles suggested a large planter to border the deck and using crisp black metal edging to separate it from the lawn. Now I want to eradicate every concrete curb and brick scallop from the property (there is a lot). Its so clean and cool but simple.
 We also repeated the pavers on the other side of the yard that leads to the side of the house. This was always a utilitarian, muddy pit with bad drainage. Now its a dream to walk through here! I absolutely love the right angles and graphic lines they create.
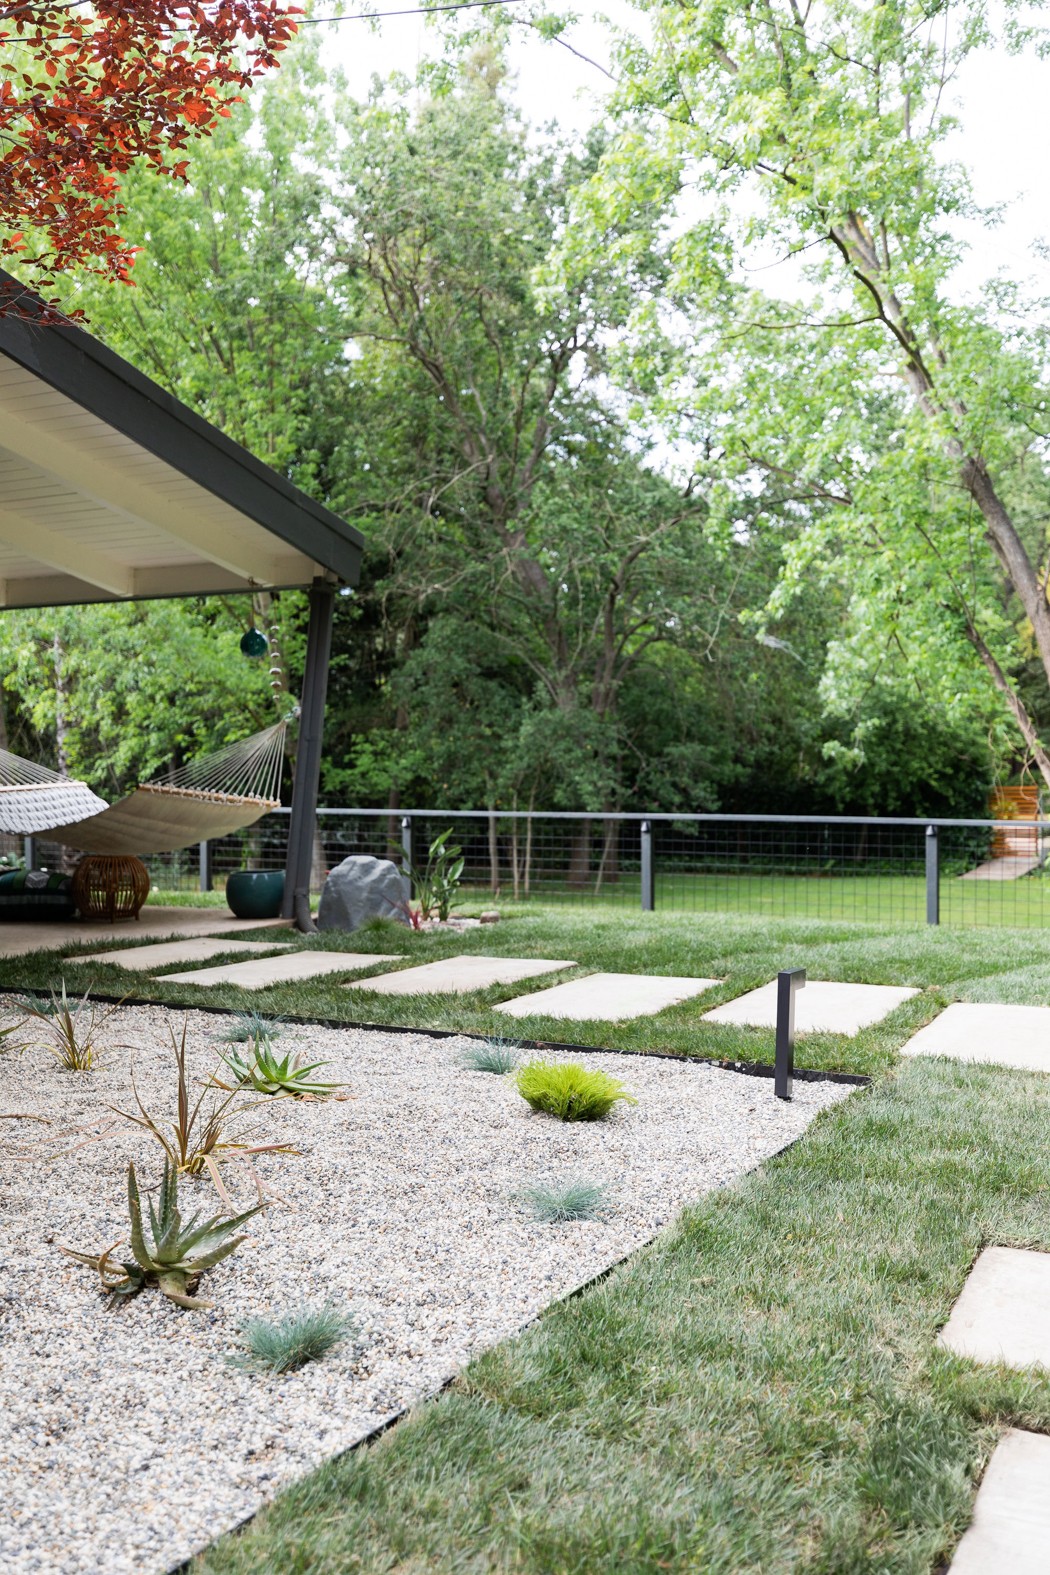
At the last minute I second-guessed the metal edging on the corner planter by the hammock. The kid and dog were whipping around that corner, and it seemed a little dangerous, and then a reader messaged me that she had major vet bills from the same stuff. Charles came up with a great idea and swapped it out with plastic paver edging, just in that spot and it alleviated my concern. Thank you Charles! By filling in the planters with 3/8 salt and pepper gravel it just looks so serene, and even though the plants are still small, it feels finished.
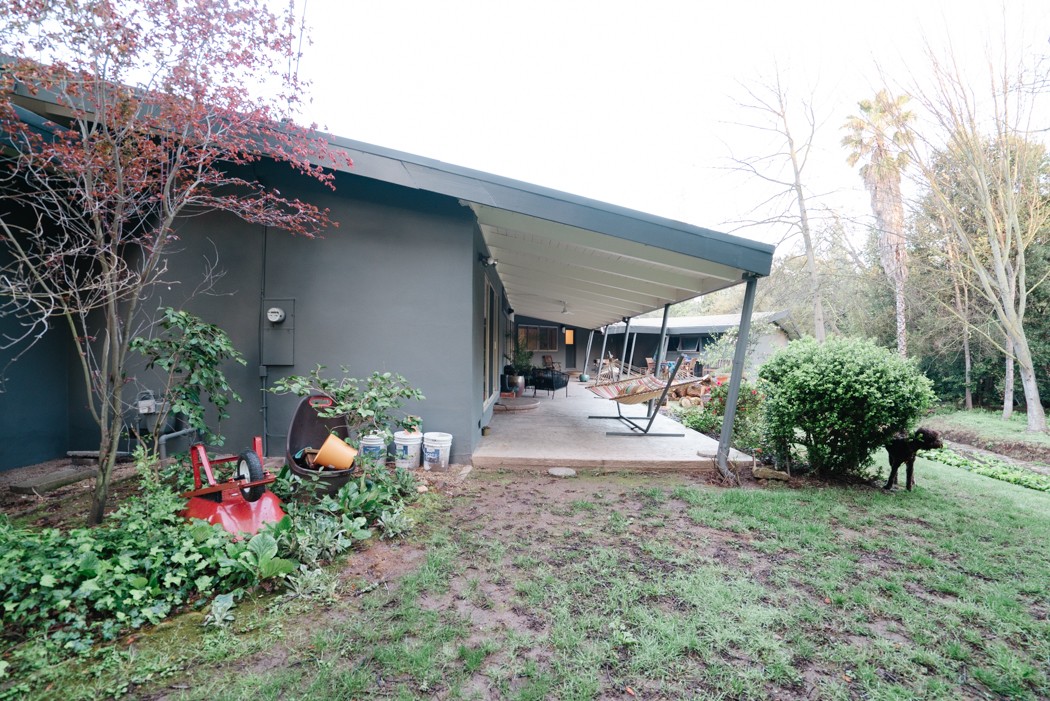
Here’s a reminder of the before.
And tada!!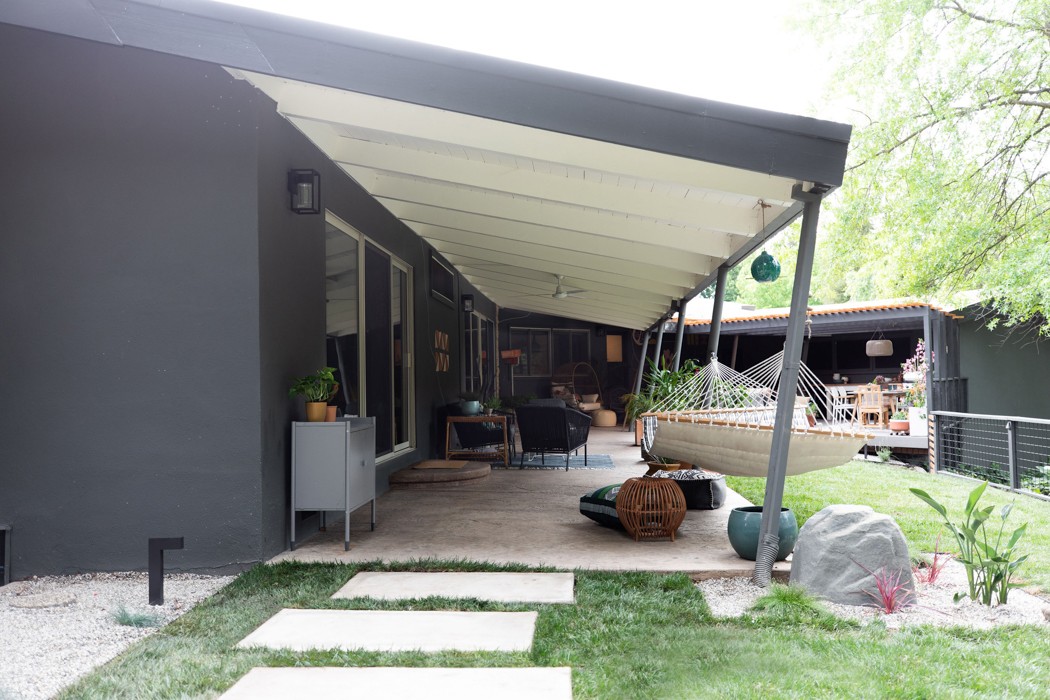
What you can’t see is the upgraded/updated irrigation Shipshape put in under the ground. Charles trenched and dug new pipes, replaced valves and got us set up on a timing system. My husband has been struggling with the band-aided sprinklers and pipes we’ve been dealing with so its a huge relief knowing our beautiful new landscape will survive and get watered properly. Its so professional!
The Mural
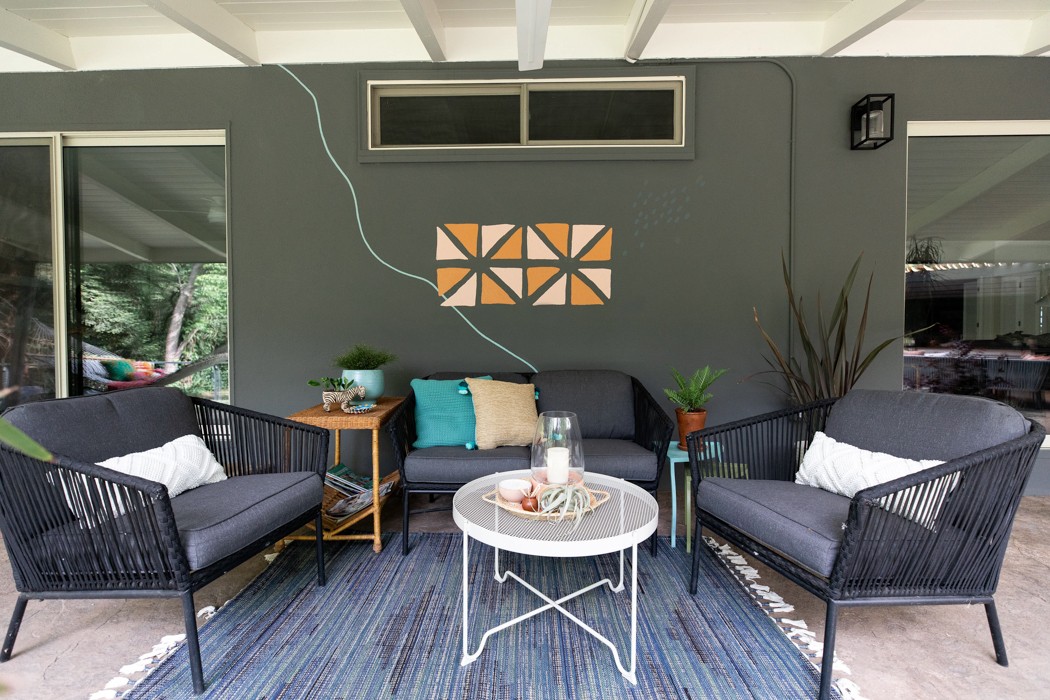
Ok, the mural. One of my other hair-brained, last minute ideas was to do something with this dark wall that runs between our back door and the garage. The concrete slopes down so its not level to really do much with furniture and like I said, its dark.
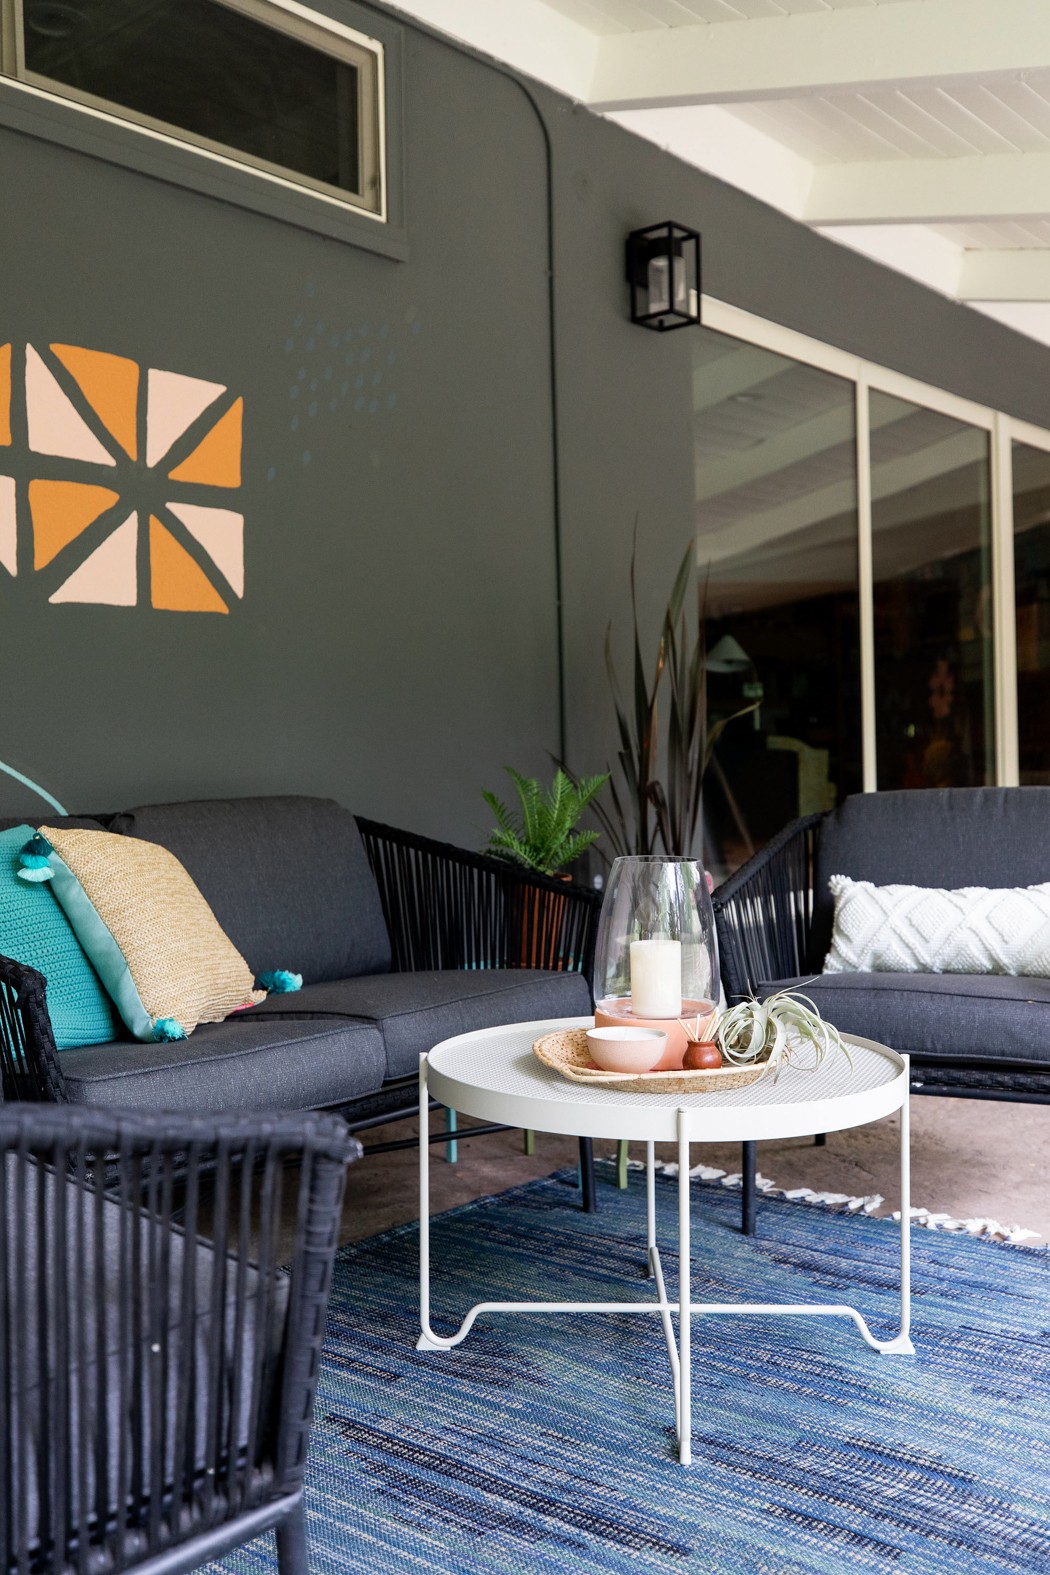
 So I roped my buddies Grady Fike (designer, illustrator) and Jeremy Stanger (muralist) to design and paint a mural! Omg, I love it so much. I think I’ll go into detail in a future post (do you sense a theme here? I have so much to talk about), but the illustrations depict the story of our home. Quickly: the blue line represents the creek that runs through the yard, the rose honors the original owner’s gardens, a deer that likes to visit us, and the graphic shapes from some of the architecture including the interior breezewall.
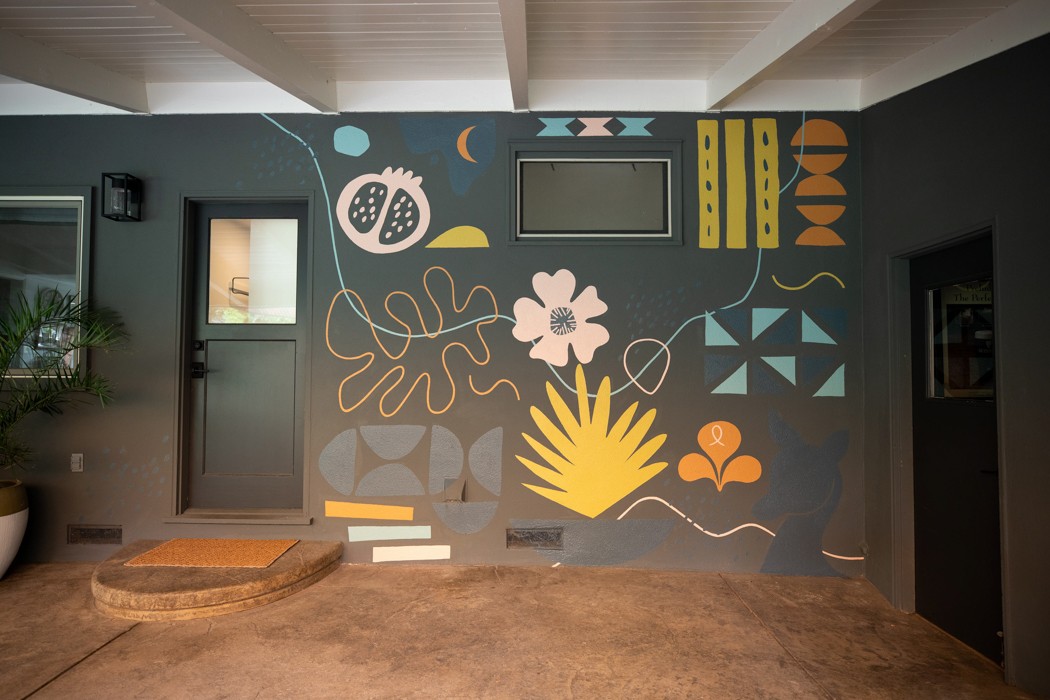
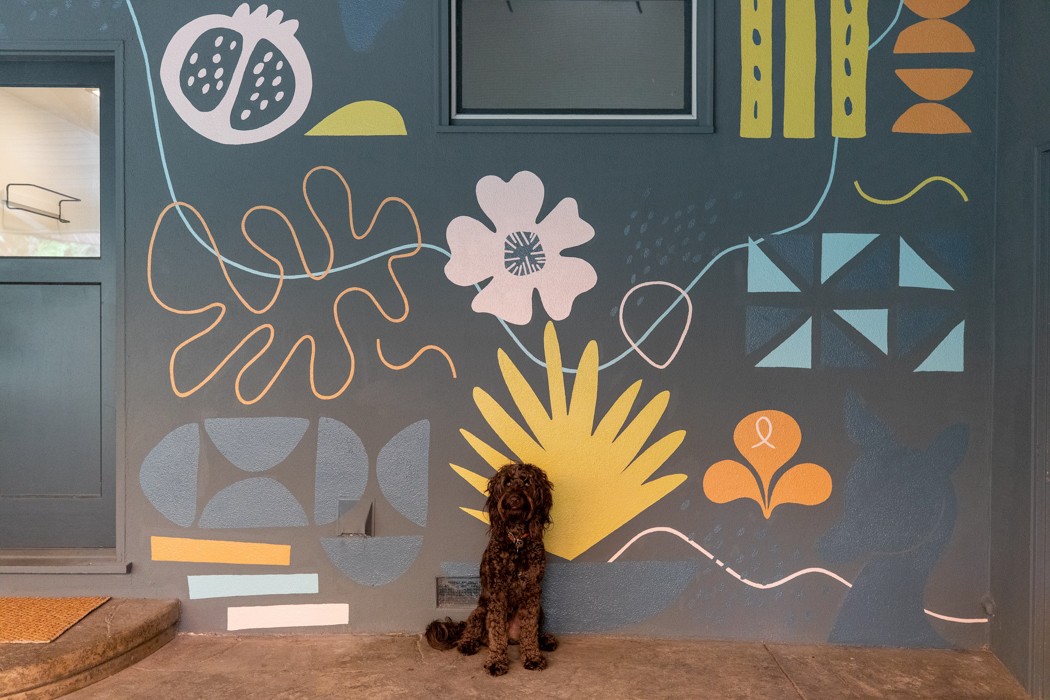

Jeremy knocked the painting out in a day, and when he came back to touch it up I asked him to add a few more ‘addendums’ to fill some spots. Yep, I’m the worst, lol. But they are the best! Grady is a freelance designer, and Jeremy is responsible for many of the painted walls popping up all over Sacramento. If you have a project, hit them up!
Furniture
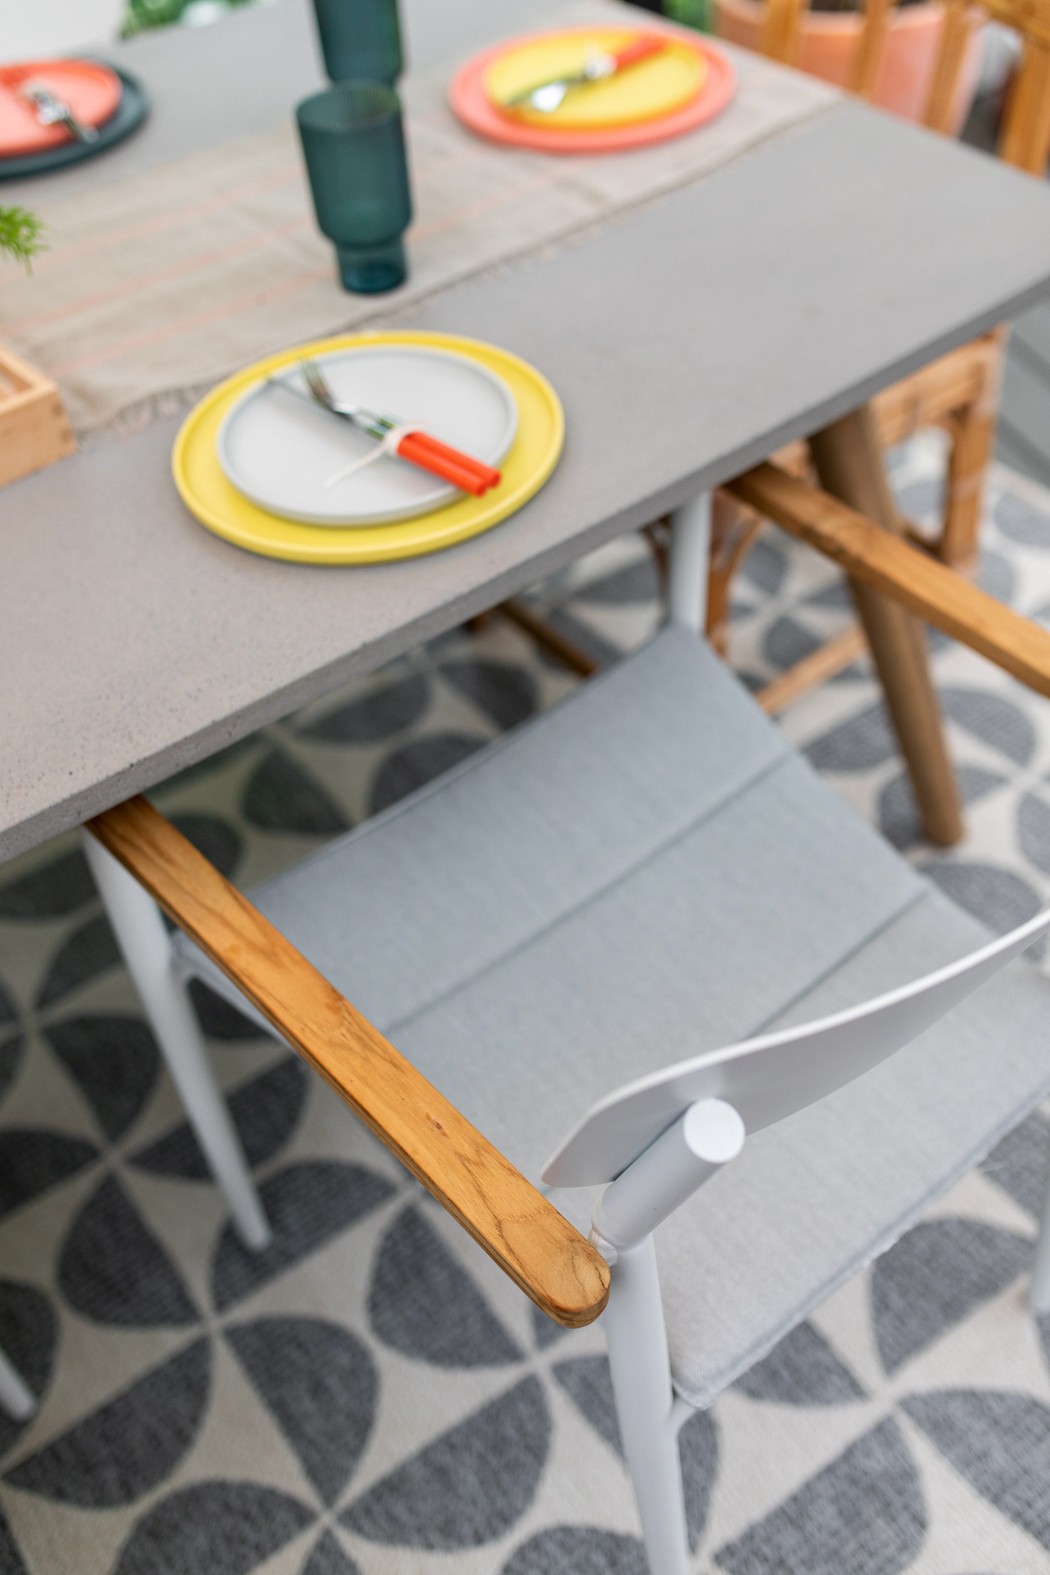
We have been wanting a new outdoor dining set for years, and finally pulled the trigger with this project. The table and chairs are from Article (not sponsored), and are the perfect mix of modern and organic. I love the wood accents on the chair arms, and the table top is a durable concrete. Unfortunately, or maybe fortunately, I didn’t check all the boxes until a couple days before the shoot and realized we were short one chair (Rookie mistake! Always check all boxes right away!). Article’s customer service was great and will make good on everything but I had a time issue. I pulled out our woven thrifted kitchen chairs and ended up loving the natural texture they brought to the party. Another happy accident!

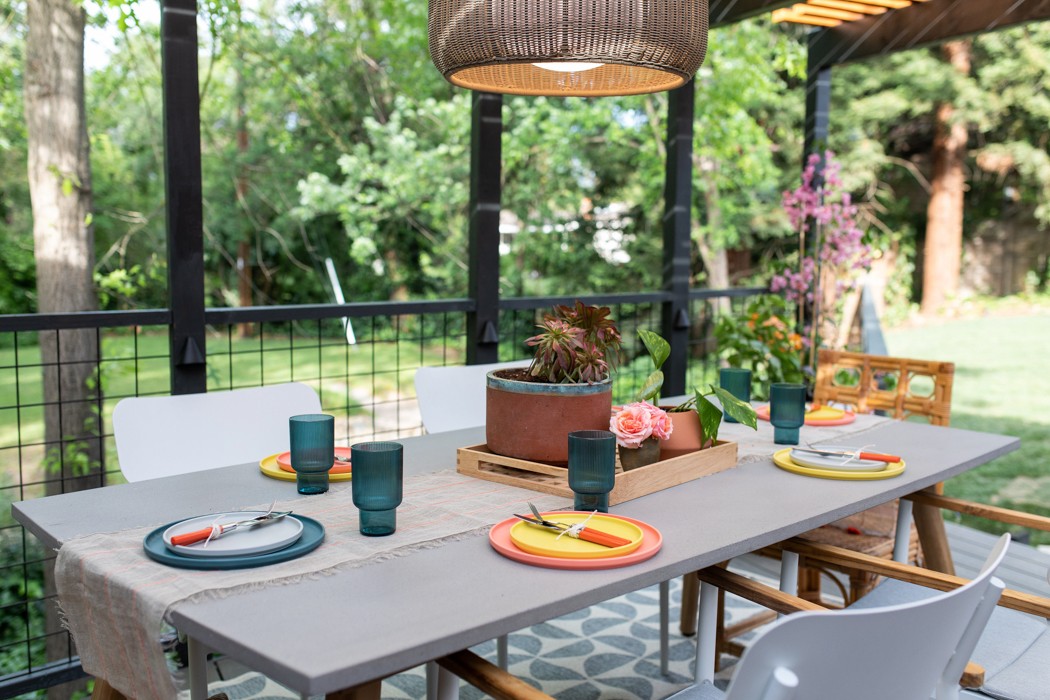

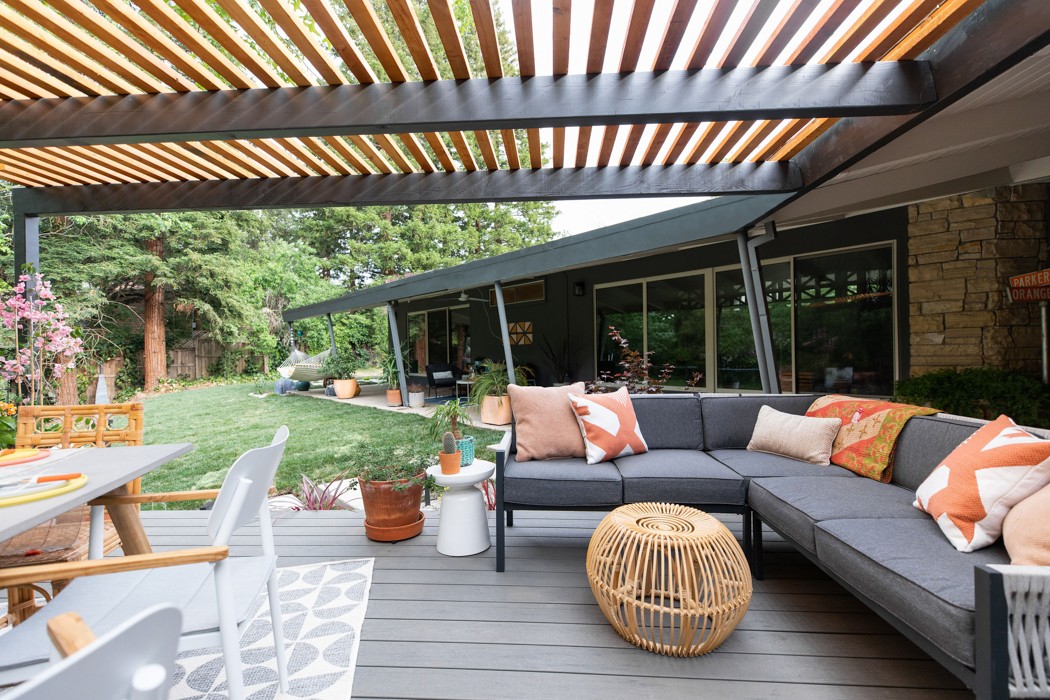
Configuring the furniture for the deck was tricky and we tried it several ways before settling on this. The deck isn’t square, and the angle along the back is odd to say the least (remember, we weren’t ever planning to add the pergola). I love where we ended up, and I found this small- scale sectional at Target that brings in more seating, and allows us to look out at the view. A mix of modern and organic accent tables brings the balance I was looking for.
The second I saw (and sat in) this egg chair I had to get it. Its deep, so comfortable/comforting and womb-like. Cecily loves to get in there with me and it makes the perfect spot to snuggle and read a book (not that I’ve done that yet). My parents lent (gave?) me these old street signs from my hometown of Orange, CA. My maiden name is Parker so they’re a special family memento and fill this corner planter.

We used our existing conversation set at the other end of the covered patio that we’ve had for a few years. Desmond gnawed on some of the corners but provides another seating area with a view of the yard. It was feeling dark over here and the morning of the shoot I asked Jeremy to add a little “annex” to the mural. The pop of color is perfect and brings more of our inside breezewall out. Also, if you follow the blue ‘creek’ along the wall it meets up with the main mural. 🙂
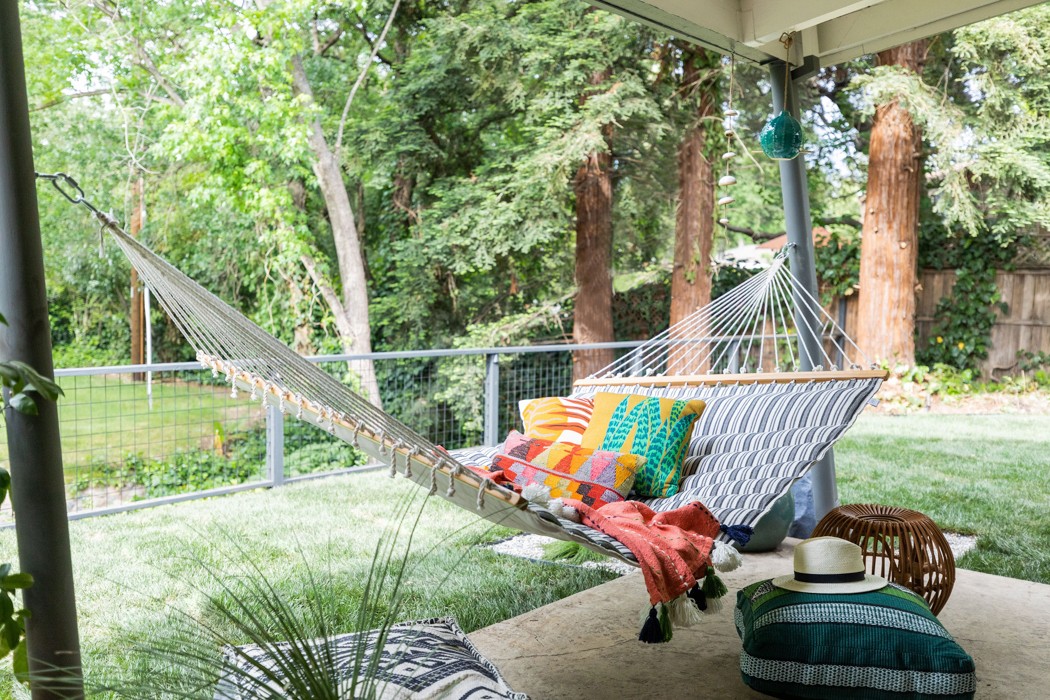
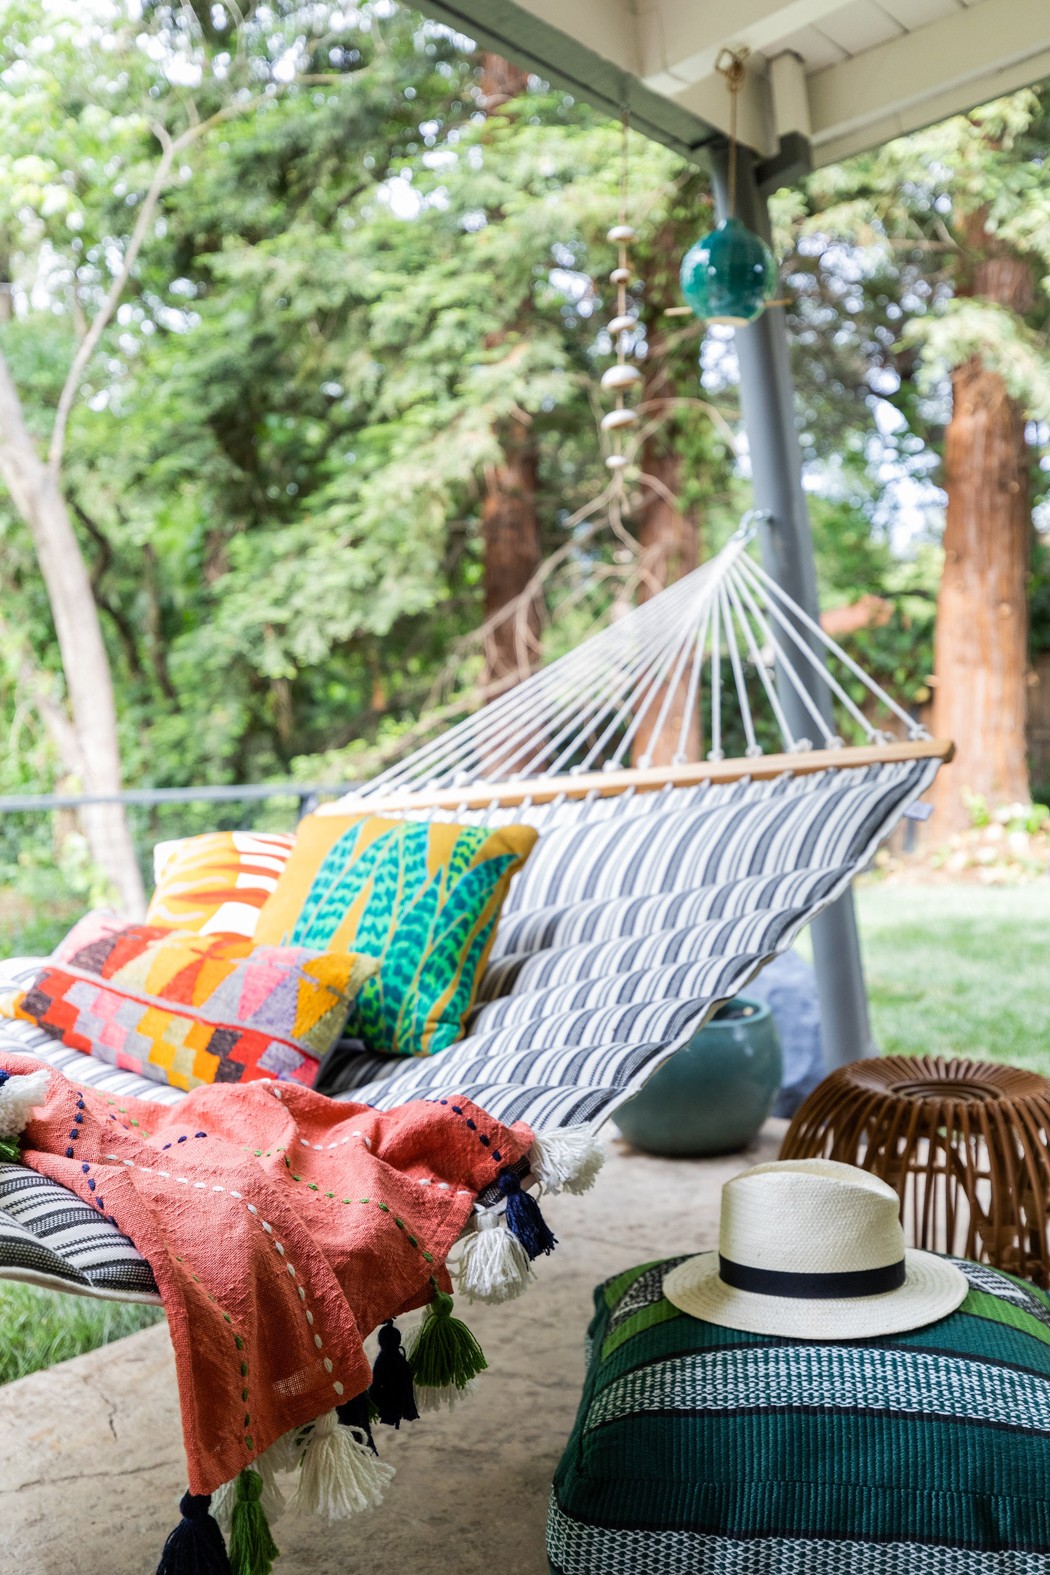
And because we didn’t have quite enough spots for the 3 of us to relax we reworked our hammock lounge. It used to sit on a big stand that was always in the way so my dad and Terry secured it to the posts. A hammock with a simple, modern design is surprisingly hard to find (why!?) but Target came through again.
Welp, this may be the longest post ever written but I’d love to answer any questions and hear your feedback! Also, there will be summer parties on the agenda!
One more HUGE thanks to those that made this possible – my dad, mom and Terry who jumped in to help with the project, or babysitting and I couldn’t do anything in life without you. And more big thanks to Lumens and Green Acres Nursery & Supply for sponsoring us with their high quality products. Charles of Shipshape, you are a dream to work with! Jeremy and Grady–let’s do more murals! And all the workers who jumped in and had fun with us. Nicole, you are just too good! And that turnaround was insane, promise I’ll never ask you to do it again. 😉 Robert the Handyman, always a part of the ORC show and Wonder Pat who literally moved mountains. Now let’s have some margaritas out here!
All after photos by Nicole Dianne photography.
Resources
Finishes:
House body: Grizzle Gray by Sherwin Williams | House and wood trim: Iron Ore by Sherwin Williams
Lighting:
Outdoor Pendant from Lumens.com | Pyramid Deck lights from Lumens.com | Wall sconces from Lumens.com | Atlantis LED Path from Lumens.com |
Plants & Sod:
Green Acres Nursery & Supply | Plant list
Furniture & Decor:
Dining Table | White Dining Chairs (color no longer available) | Rattan Dining chairs-Vintage | Outdoor kitchen countertop | Outdoor sectional | Black Conversation Set | Hammock | Rattan egg chair
I’ve been so head down in this I’m so excited to finally catch up on all the Featured Designers and other Guest Participants . Everyone works so hard, I love this challenge!

In case you missed where we’ve been catch up here: Week 1 (before photos, inspo and the design plan), Week 2 (surprise elements), Week 3 (pergola progress), Week 4 (landscape design), Week 5 (landscape)


42 thoughts on “ORC Spring Patio Reveal!”
Looks soooooo good! Hard to pinpoint a favorite moment! The rug! The lighting fixture! The MURAL!! The egg chair…the landscaping. Congrats to you and your team!!
Wow! Love this outdoor space and what you’ve done with it! Now I want to come over for a drink out there! Well done!
Seriously Rebecca! It looks amazing friend! Congratulations on a job so well done! I can’t wait to come over and enjoy i!
Every detail looks thought out and fantastic! Way to go! Beautiful work!
Just WOW! Rebecca, I can’t believe how amazing this space (spaces!) turned out and just time for summer. So many amazing details – I especially loved that you included a margarita in your inspo board. It really makes me wish I had an outdoor anything! Truly, well done! P. S. I hope you get to keep the street sign! 🙂
I just knew you’d take this ho-hum space and make it spectacular! Well done, Rebecca. Every little detail is just wonderful. Now time to enjoy. ~~ Susie from Chelsea Project
This is my dream patio! You’ve given me major inspiration to tame my crazy back yard. It looks amazing. And that pergola is absolutely swoon-worthy.
OK, This is my dream outdoor space! Pinning all this for inspiration! You did so much work!!! Watching your stories on IG just made me tired but it was worth it because you will be enjoying it all summer! Oh, and that mural is the coolest thing I have ever seen! I don’t have enough words to say how much I love this space!
Wow! Ok I want your entire patio and backyard! Amazing job!
I love everything about your makeover!! I’m practically squealing with excitement at my desk! And can totally relate to the instant sod gratification. We went with Green Acres last year and it was one of the happiest days of my life when they rolled it out, ha! I guess we are neighbors!
I am absolutely crazy about everything you did!! And as a former resident of Sacramento, I know how much you’ll be able to use this space, too! Bravo!!!
Yep, we basically live out there now. Until its 108 degrees. Ha!
Stunning! Congratulations on an amazing job well done!
Wow! What an amazing project and so functional. I bet you are going to spend a ton of time in that space. I am so in love with your ground lighting!!!!
Wow! What a transformation! It looks so good – I love that egg chair – I always admire it when i’m at Target 🙂
What an outstanding makeover! Outdoor spaces aren’t easy to do. This came out so beautiful. Enjoy this amazing space now that the weather is getting nicer! Congrats!
This is soooooo beautiful! Outdoor spaces are some of my very favorites and this is just so good. I bet you guys find yourselves out here all the time! Enjoy.
Rebecca, it looks amazing! I love thw mural, and everything else, too. You have definitely increased your seating capacity, and that egg chair is so fun. Nice work!
I seriously CANNOT believe the before/after on this space – and that you got this all done in 6 weeks!!! This is serious backyard goals – love everything about it. Oh – I have the same Target set but in the dining chair version – they are THE BEST!!
OMG! I’m SO happy I found you and your AMAZING home through the ORC. Your project, and home are STUNNING! You must be thrilled. It’s just gorgeous ❤️
Thank you thank you! Yep, having a space to do nothing for the last few days has been the best place to crash land. 😉
Rebecca, SO GORGEOUS!! I love when reveals make me question if it is even the same space. You have done a ton of work and it is just beautiful! I was happy with creating a patio for the One Room Challenge but your project puts us to shame lol.
Well done!!
Cheers,
Denise
ps. pinned multiple images 🙂
Awwww! That’s so sweet. And ya, the before was pretty epically terrible. Not to shame! All finished projects are the best projects! Thank you!
Everything is just beautiful. The thought behind every detail can be seen- great job! Now it’s time to enjoy
I am LIVING for that cool pergola! Loving the black and wood combination, it’s so different from traditional pergolas. The mural also turned out so good! So much work but so, so worth it.
Thank you so much! I think that’s why it never dawned on me to put one up before because a traditional style wouldn’t have looked right. So happy its done though! 🙂
So many great elements to the space! What do you do with all the pillows/cushions during the rain and inclement weather?? Do you have a dedicated storage area? I love having cushions and pillows, but having to bring them inside all the time irritates me!!