


Let me be clear–I am not a landscape designer and have always had a bit of a mental block around it. There are too many plants to know, too many variables to think about and it just seems overwhelming. But I know what I like, I have a vision for how I want our yard to look so I’m going for it. I’m also feeling a little more confident with the help of Green Acres Nursery & Supply, my favorite local nursery chain. They are a family-owned business with 5 retail locations in the Sacramento region. I can’t even tell you how excited I am to be partnering with them on this project for the spring One Room Challenge. They have the best customer service and stand behind the quality of their products. I was there the other day and heard several groups of people walking with a member of the nursery staff getting guidance and ideas for their projects.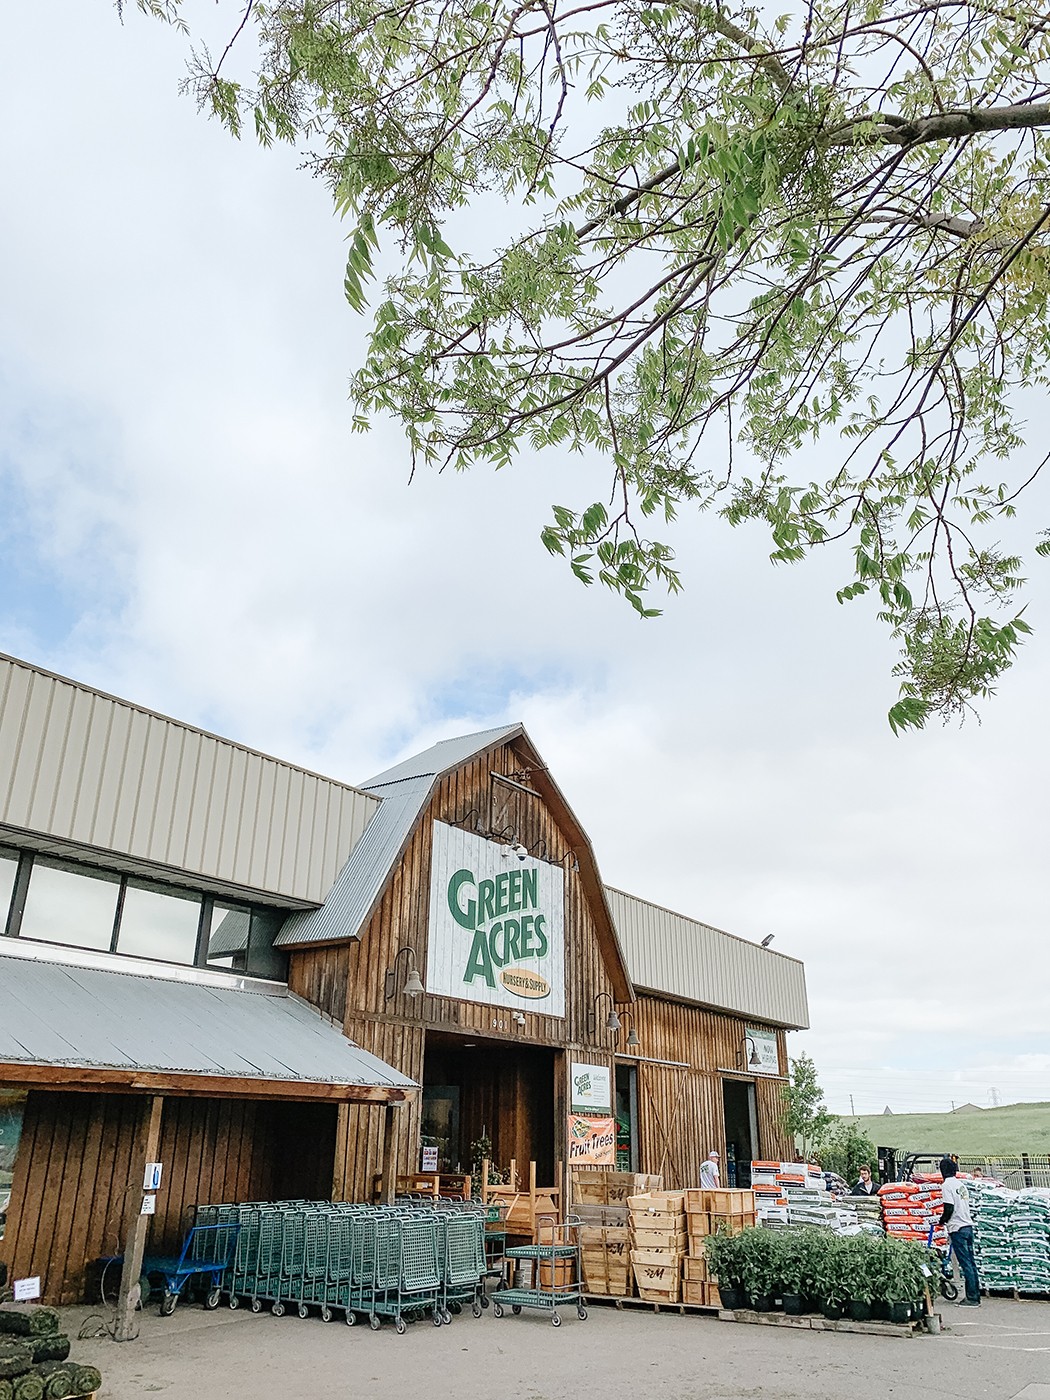
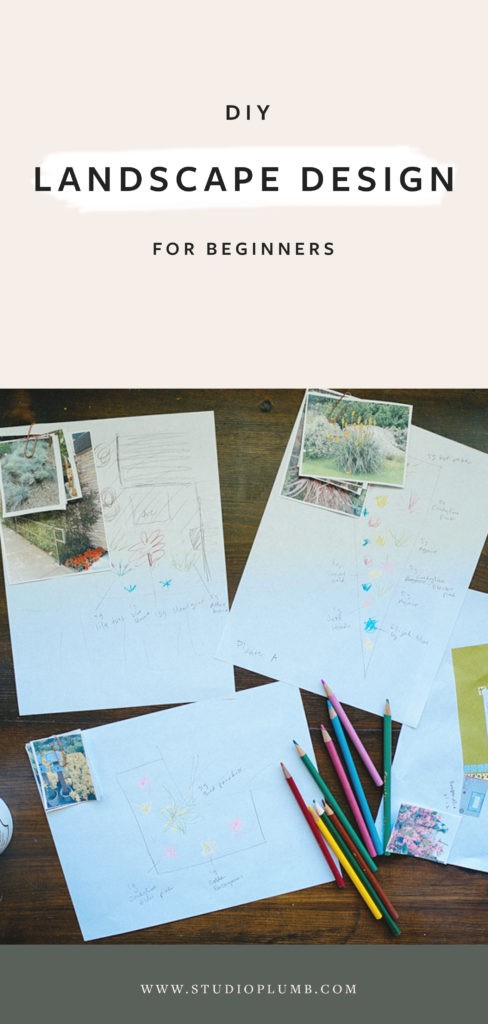
I started my design process in Sketchup for scale, but quickly moved over to analog which means anyone can do this! Below is the design plan of our yard. I started with the layout of our existing yard and planters, then determined where I wanted the new planter locations to be.
One of the biggest changes you can make is by reworking the shapes of your planter beds. In our case I kept all the planters straight and geometric to work with the long lines of our house and the midcentury aesthetic. Know that you can do this however you’d like! If you have a shoebox rectangle of a yard, add some curves to the planter borders to soften the edges and corners. I’m focusing on three planter areas (labeled A-C) and then lots of container plants which I’ll work out down the road. If you’re doing this yourself get out a good old pen and paper and make it as close to scale as you can eyeball.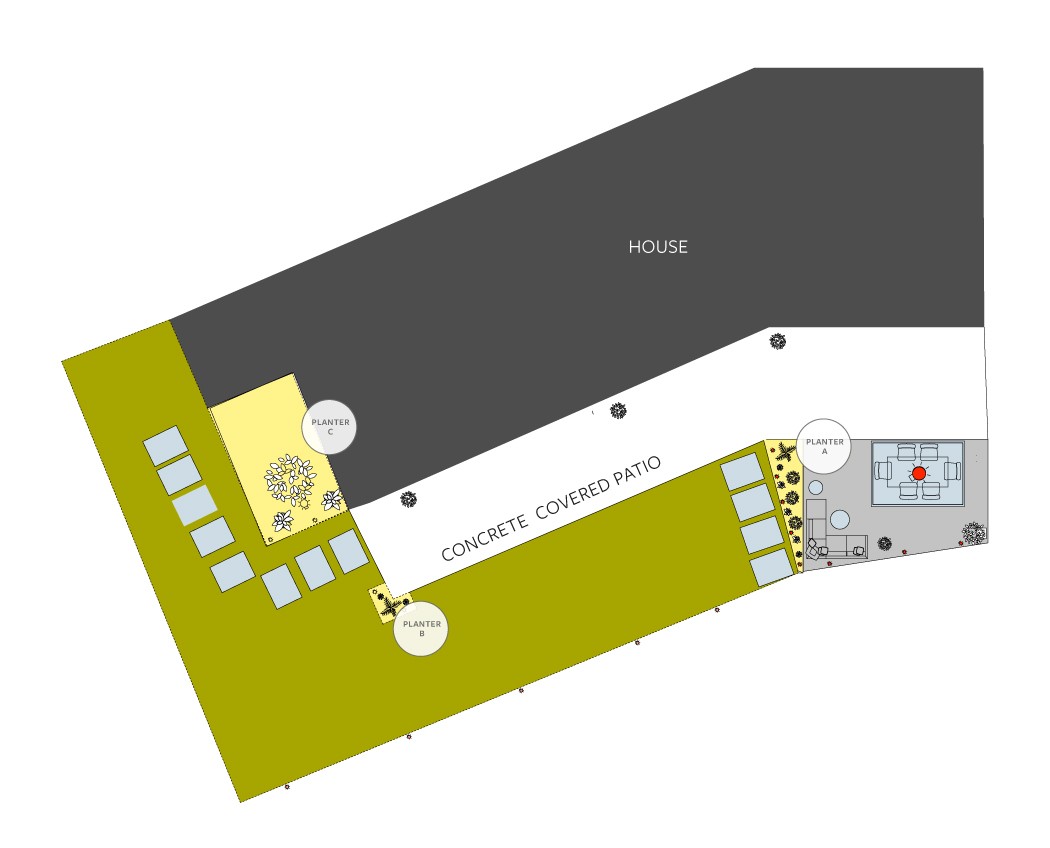 During this process pay attention to the way the sun moves across your yard and how much sun/shade each area gets over the course of a few days. In our case we have 3 planters and each gets different amounts of sun because of where they sit under trees and the house itself.
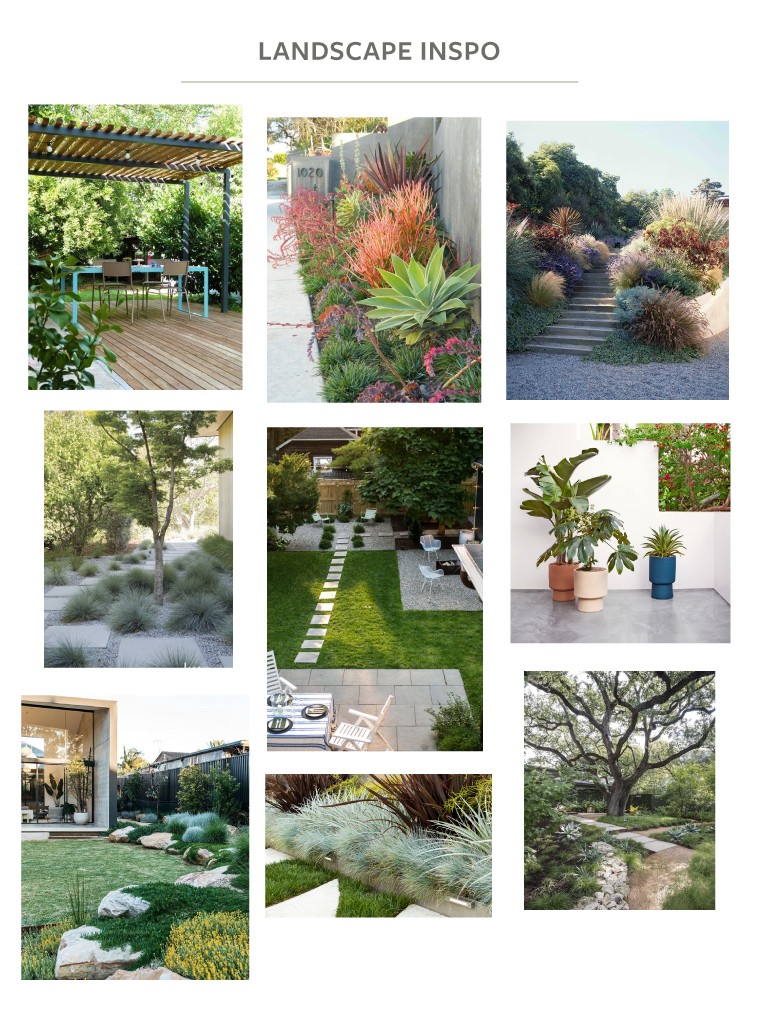
Now its time to get inspired. I started on Pinterest, finding inspirational landscaping images that I was drawn to, and made a mood board. This gave me a mental image of what kind of plants I was looking for and would work in our yard and the style of our home. I love architectural forms, lots of texture and a variance of color without a ton of blooms. Although I love flowers, but they can be high-maintanence, use a lot of water and also attract bees which I’m allergic to. I also think they bring a different feel to the landscaping and I want this to have a 1960s Palm Springs vibe. We’ll be using some type of gravel for ground cover and hopefully metal edging dug into the ground for edging.
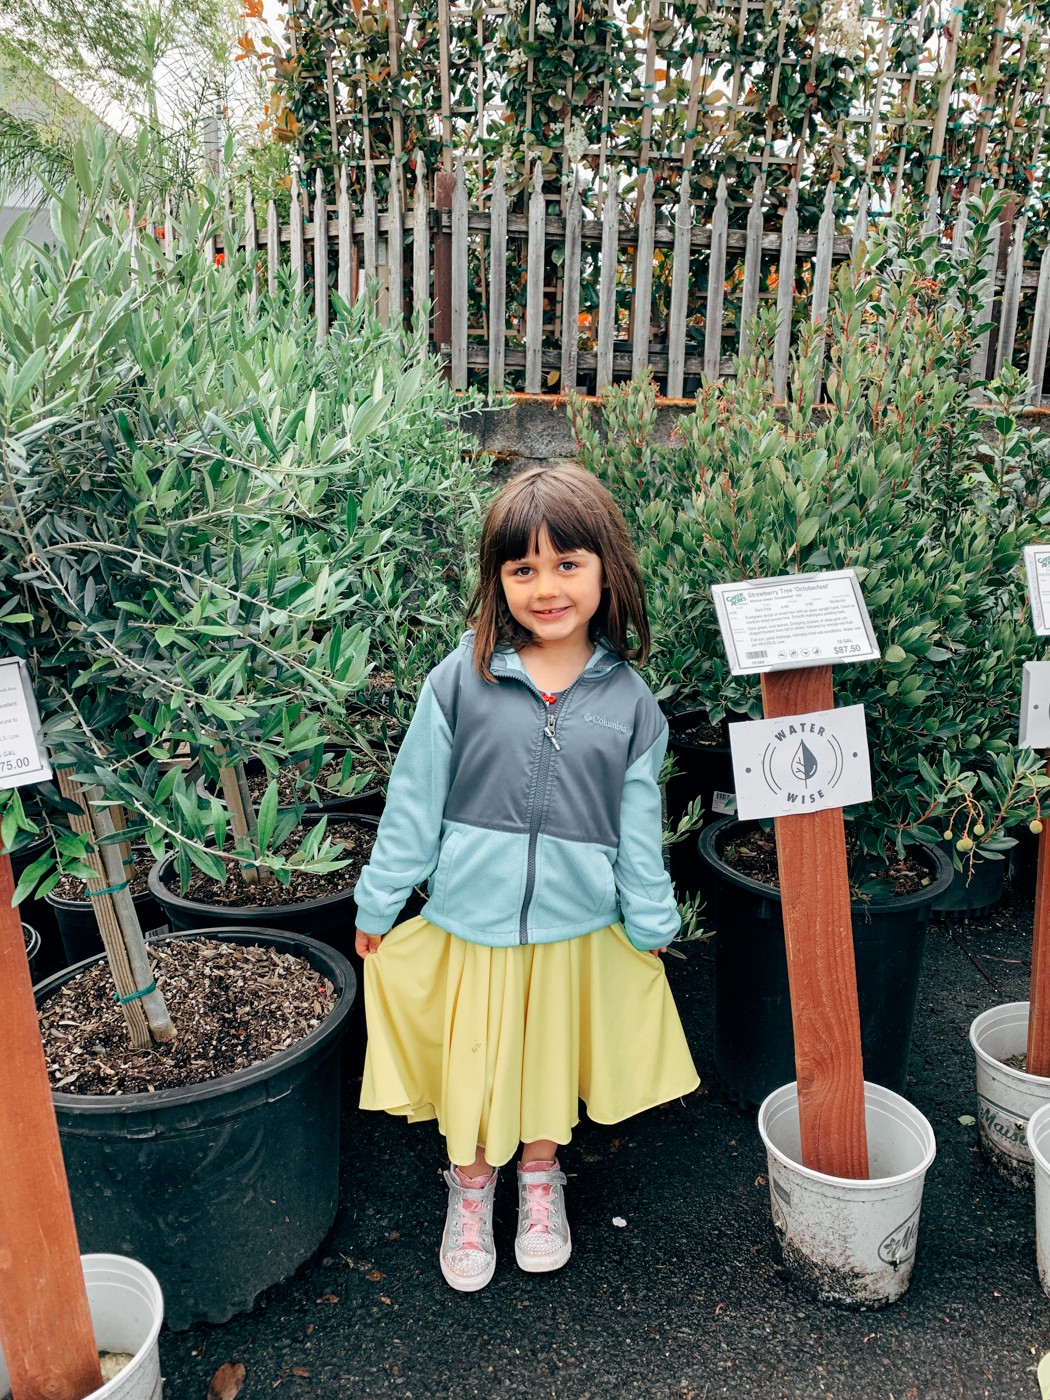
Next we made a family field trip to Green Acres Nursery & Supply. We walked around, asked for help when we needed it, and took iPhone photos of plants that I found interesting and had the basic sun/shade requirements we needed. I made sure to take photos of the names and prices to help me with budgeting and sourcing when I got home.
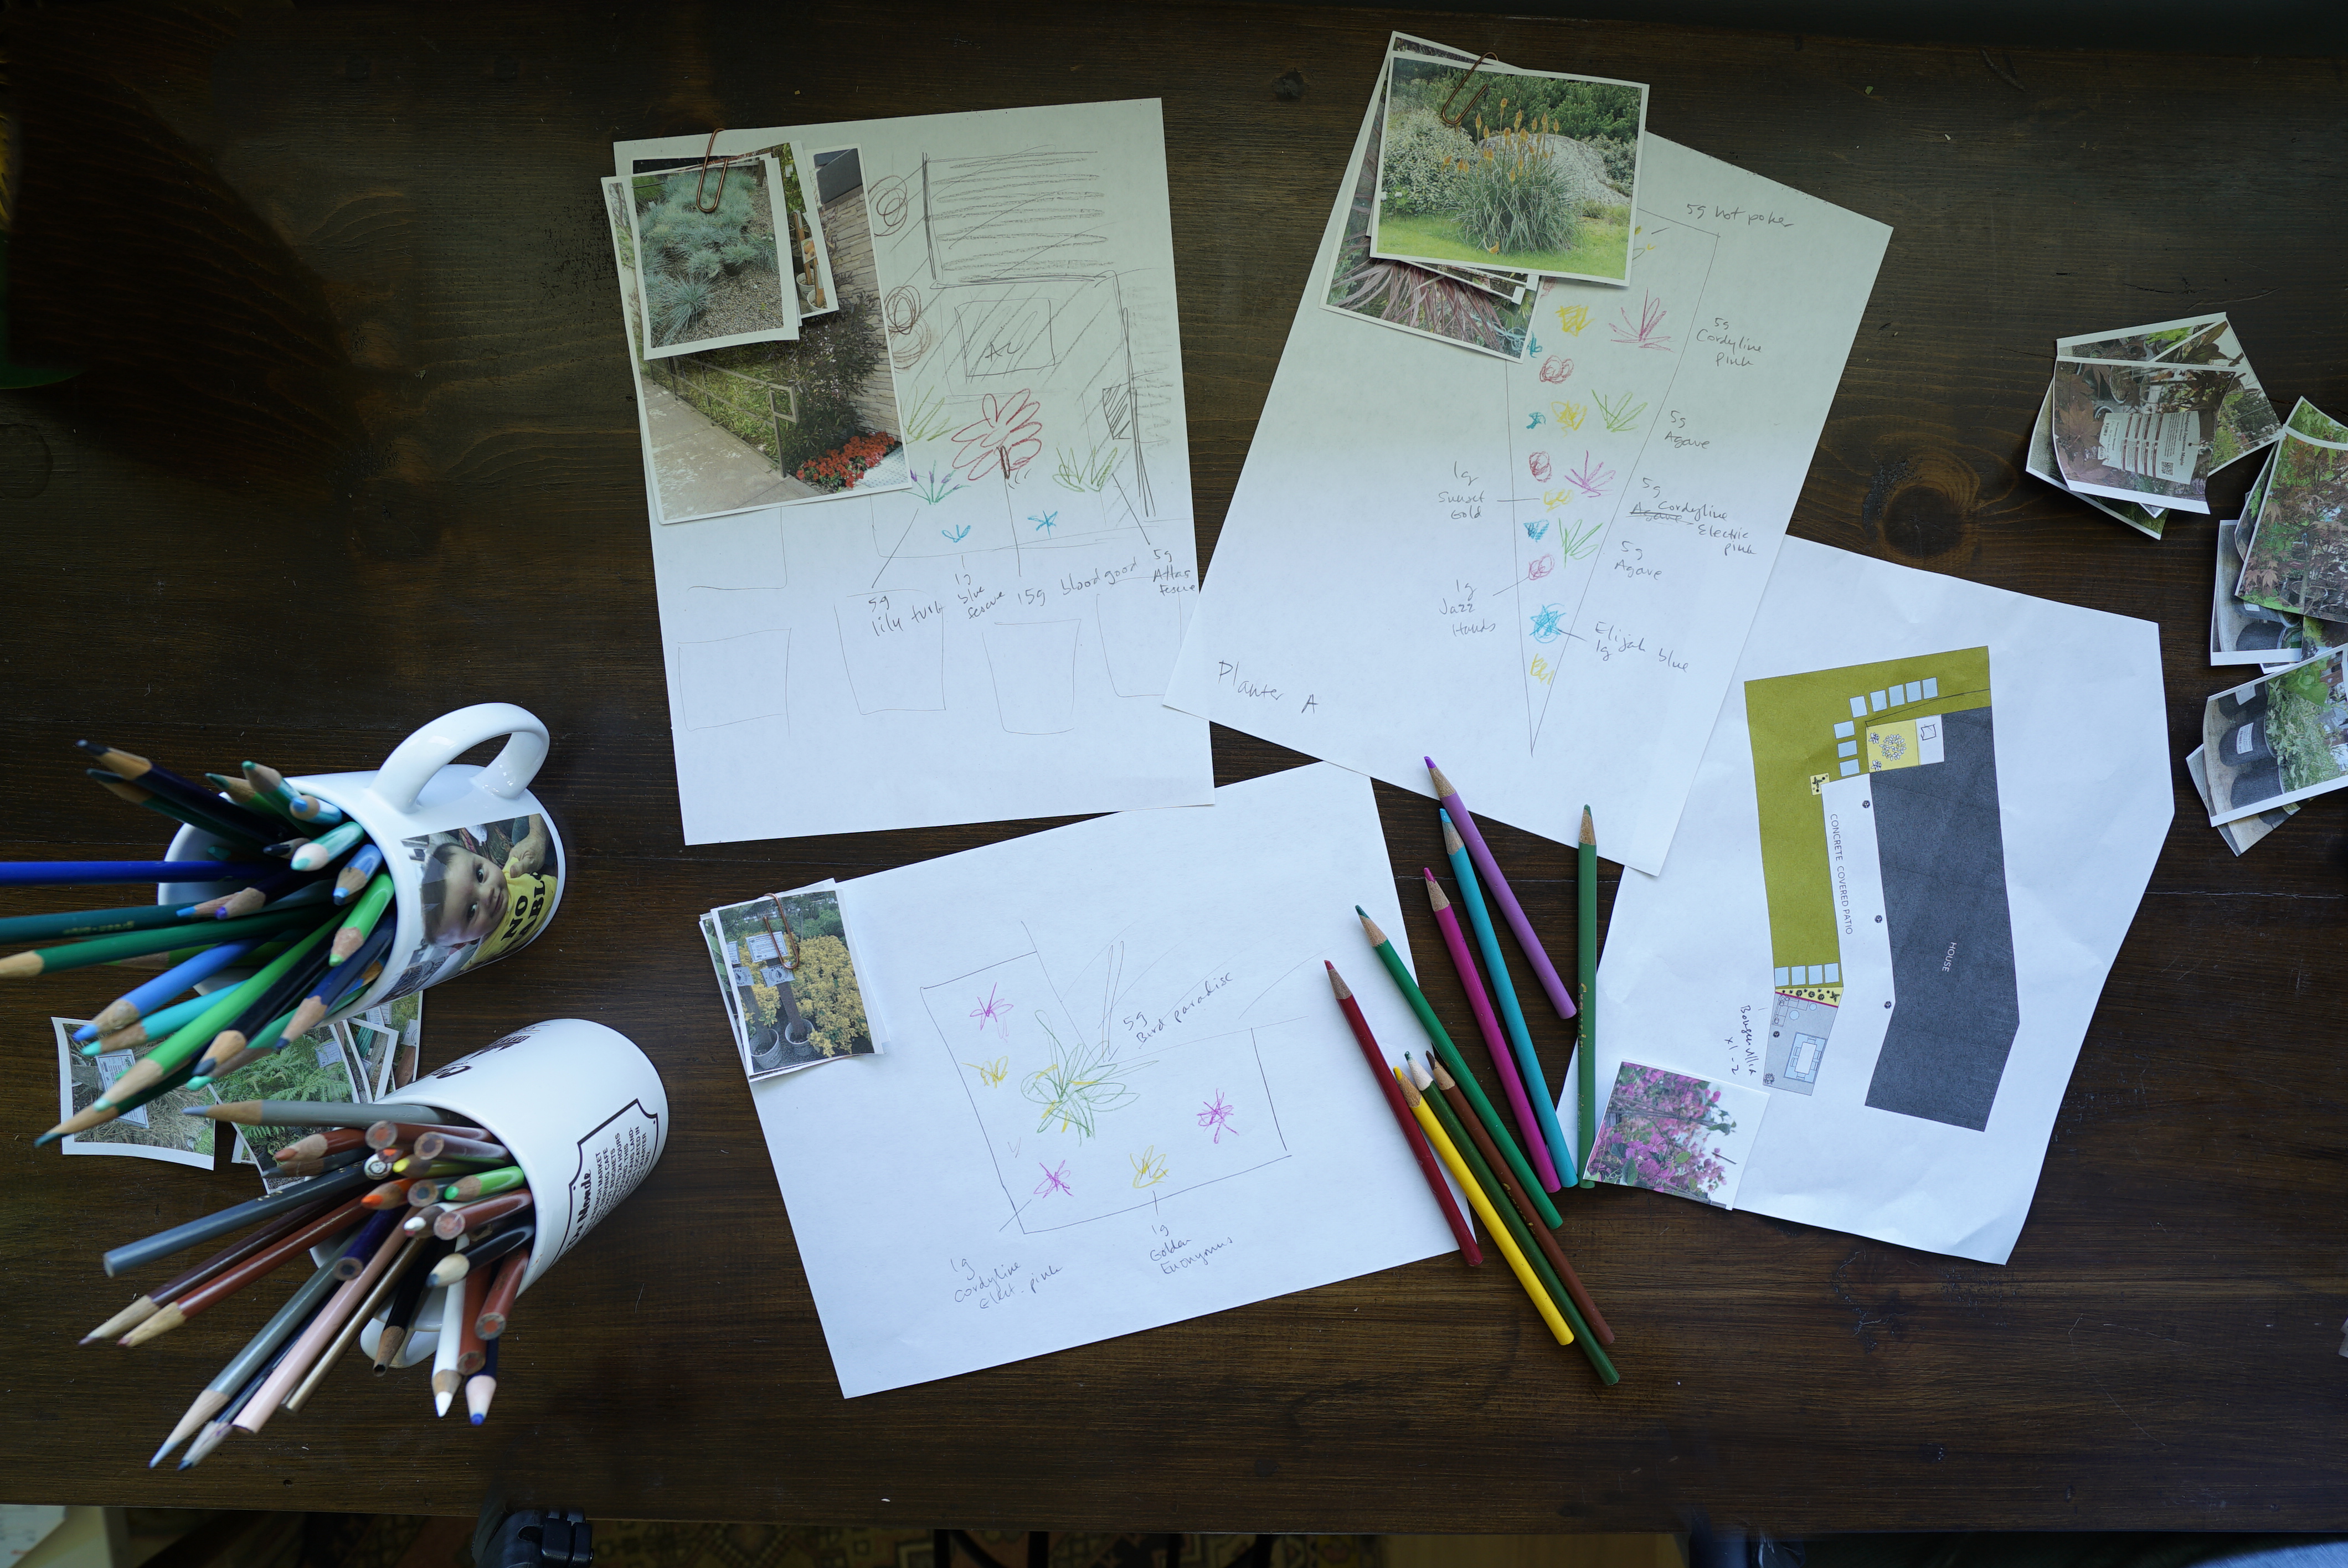
Back home, I had a little bit of information overload, so printed out small photos of each plant and so I could play around with them. I made piles of container plants, shade plants, and then pulled my favorites for the planter beds themselves. I pulled out my daughter’s colored pencils and started some rough sketches of each planter, adding in scribbles to determine plant placement and size. Guys, this is not an exact science. I mixed and matched my little photos, doing some research along the way and envisioning one planter at a time. I do know that repetition is your design friend with this, and it makes it a lot easier when you’re only selecting a few plants that get repeated several times.
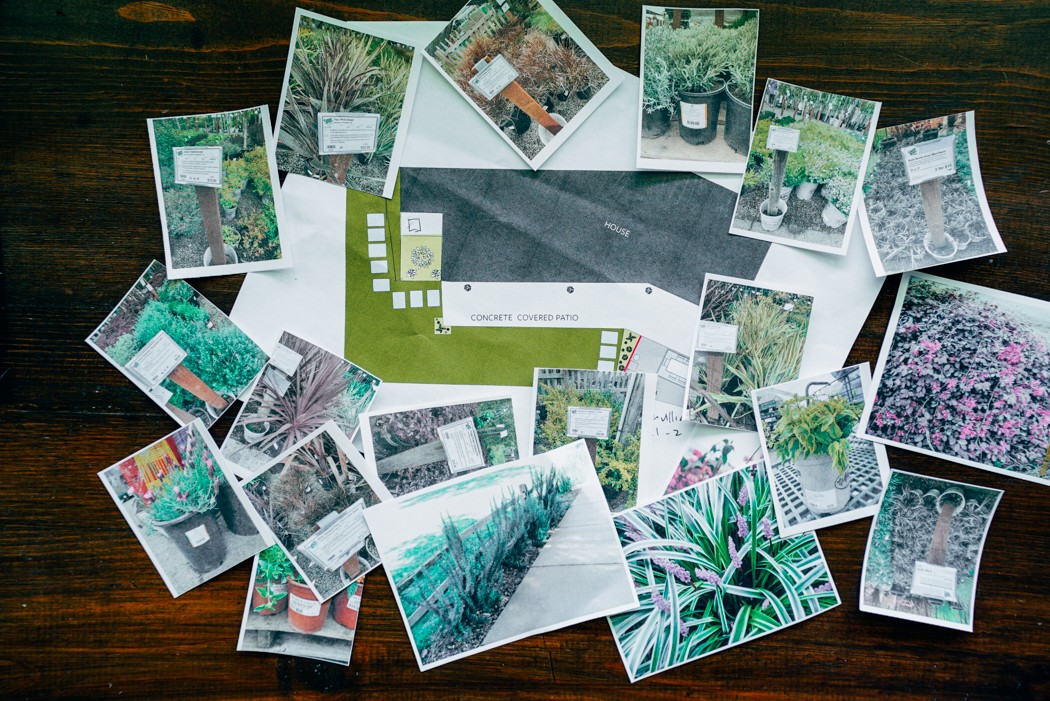
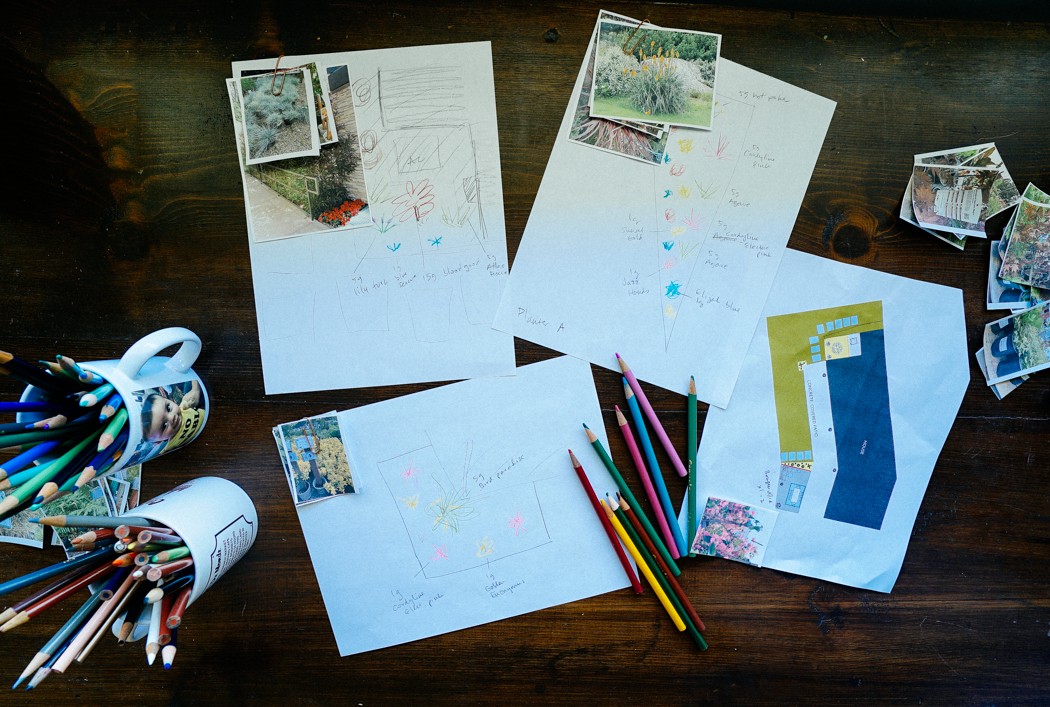
After all that I clipped my planter photos together and went back to my computer to work on budget and a final plant list. I did more research and due diligence, making some adjustments based on specific sun requirements and our budget. Since plants can be purchased in a variety of sizes, some 5 gallon plants got downsized to 1 gallons. This just means it will take more time for them to fill in and mature so we can be patient.
On to the final selections! I wish I had been more creative with our planter names but its too late now…
Planter A
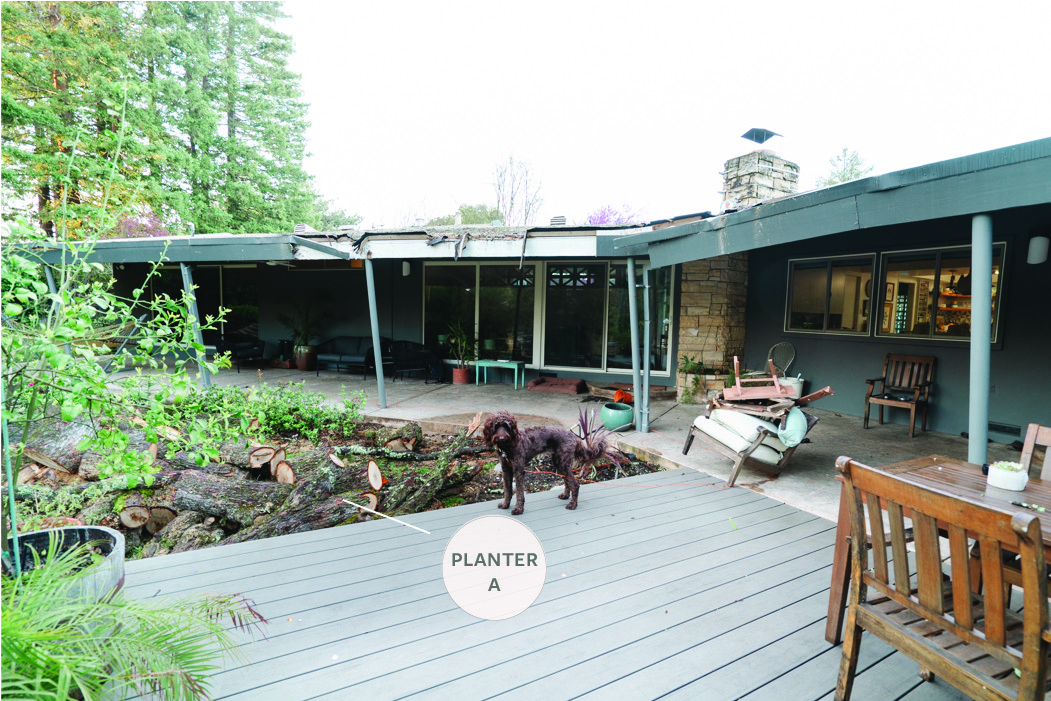
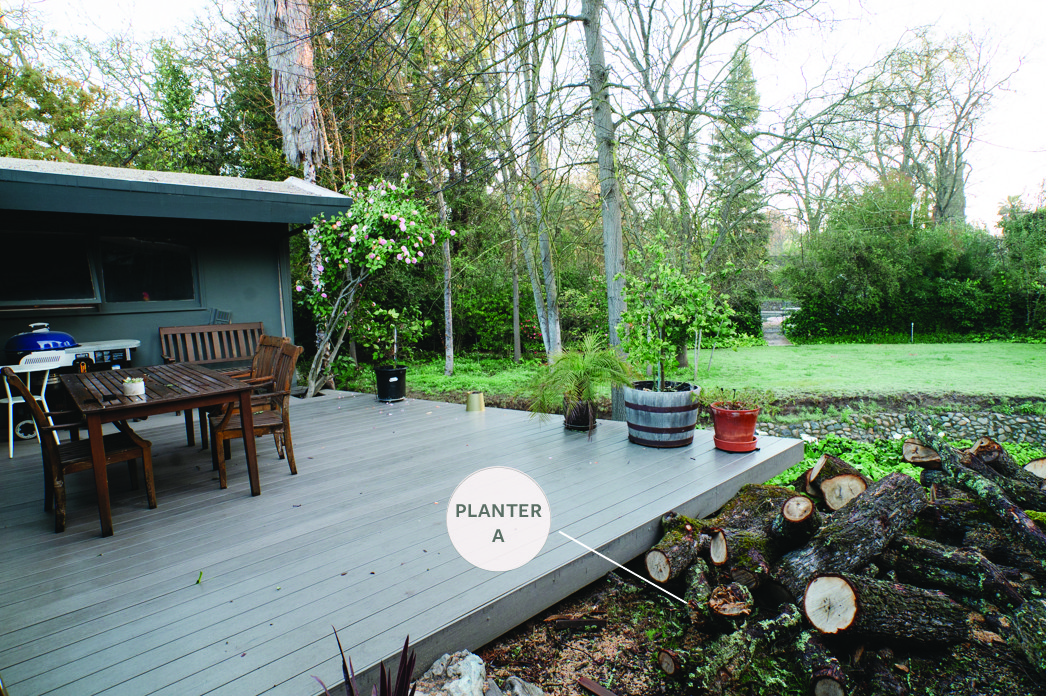 As a reminder, this planter runs along the side of the deck and borders the path going down to the creek. In order to minimize it being used as a go-between walkway I’m added spiky, uninviting plants here like the yucca. I’m also keeping things fairly low profile so we still have a view across the yard from the deck seating areas. This planter gets full sun practically all-day and the pergola won’t be any help based on its position. In Sacramento our summer days are often triple digits, so we’re keeping things hardy and drought tolerant. I do have a major thing for bougainvillea so I’m going to see if we can get it to grow on one of the pergola support posts.
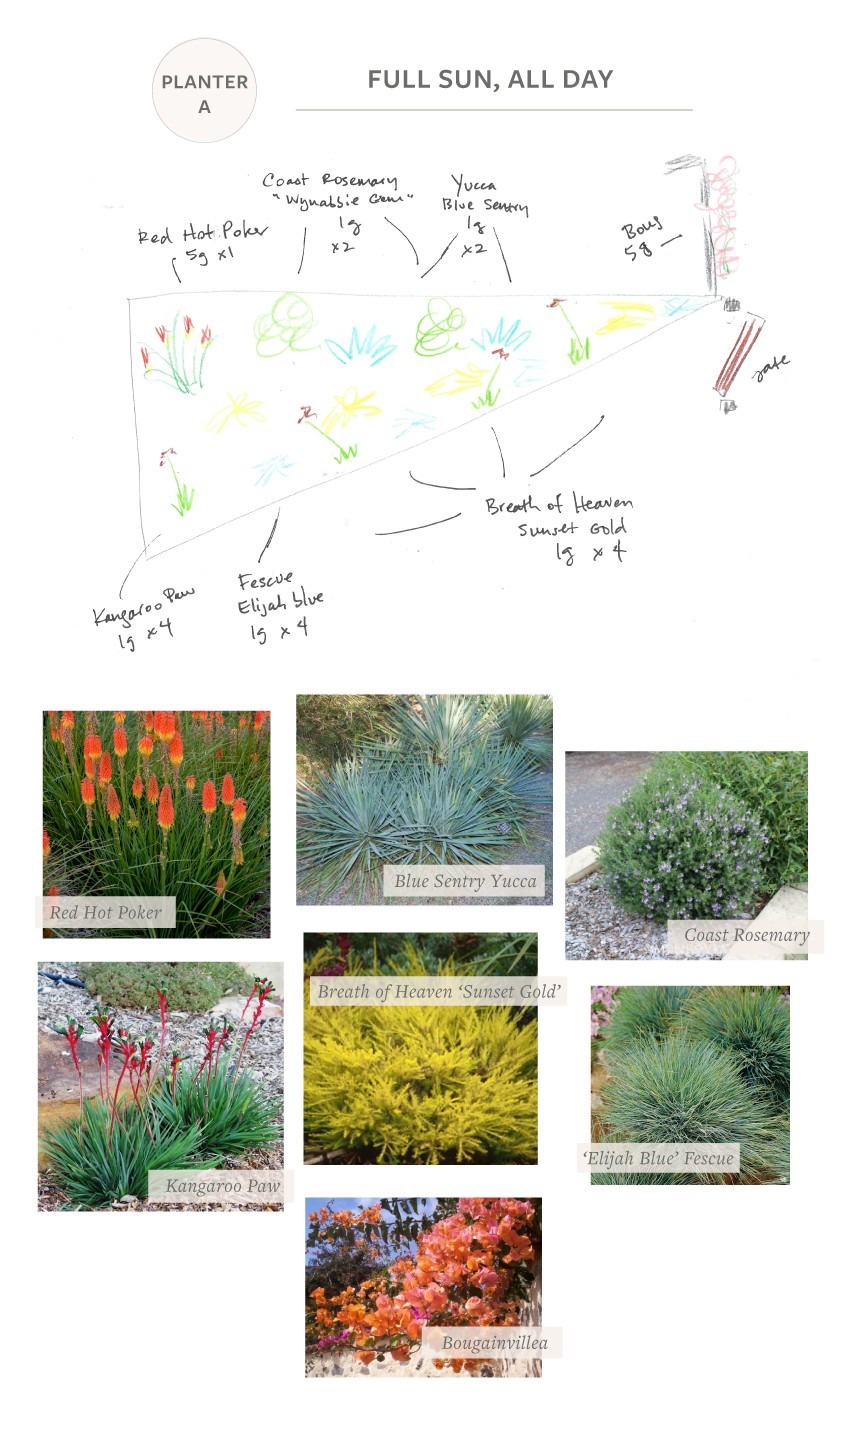
Planter B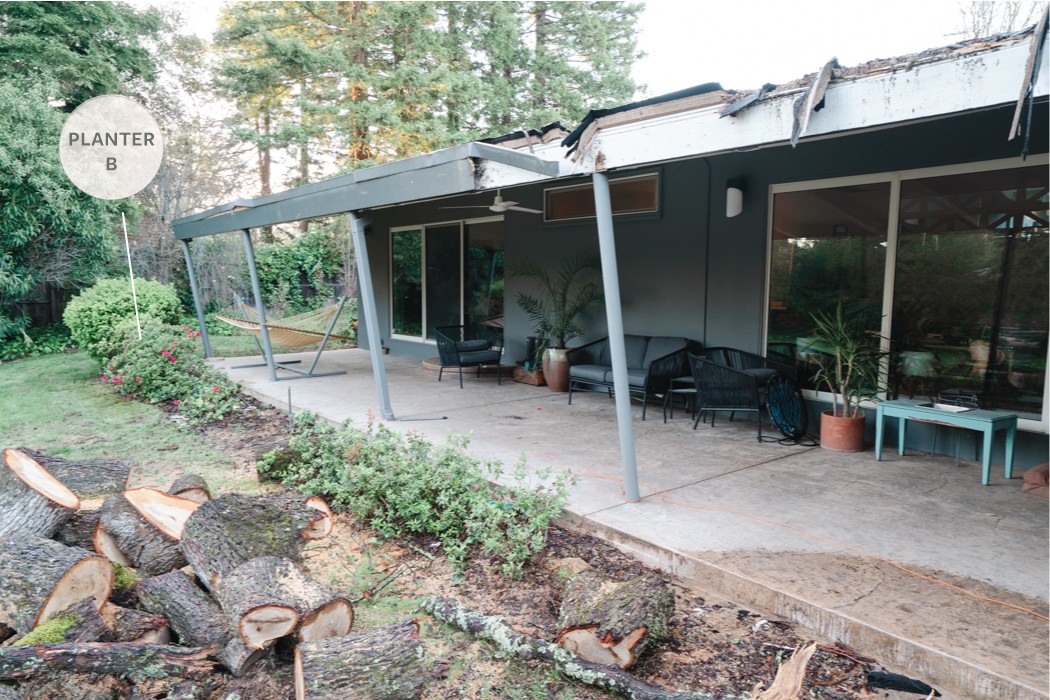
This is the small plot we’re keeping to soften the corner and also hide the sprinkler valves over there. The hammock is currently on a stand taking up way too much room, so it will be hung from the patio support posts in the same location once the shrubs are gone. This corner gets good sun but does get shade from the tall trees on that side of the yard so I’m trying some less sun-hardy plants here. I love how whimsical Bird of Paradise are and I’m adding one in the corner for height and big foliage. I’m obsessed with the color of the electric pink cordylines and hope they do well in this spot.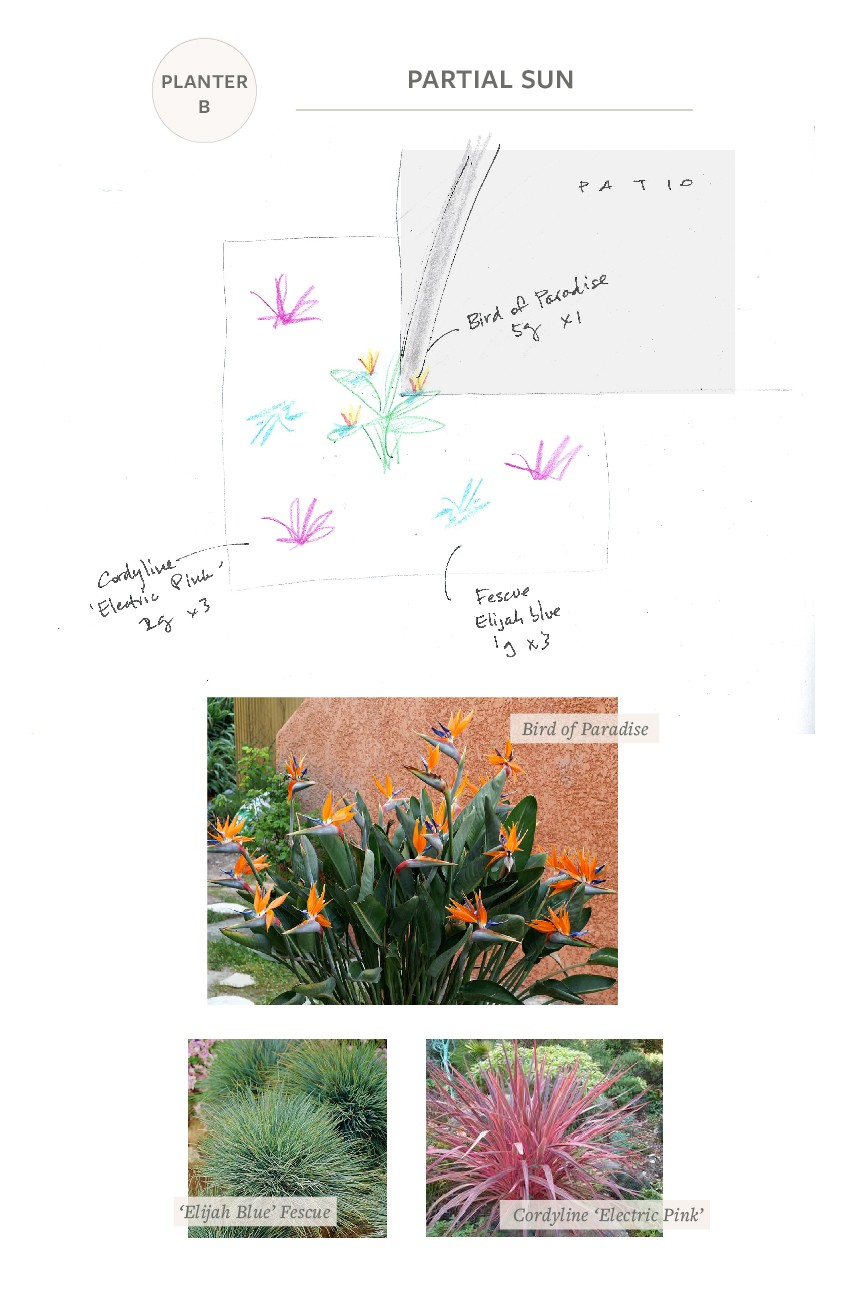
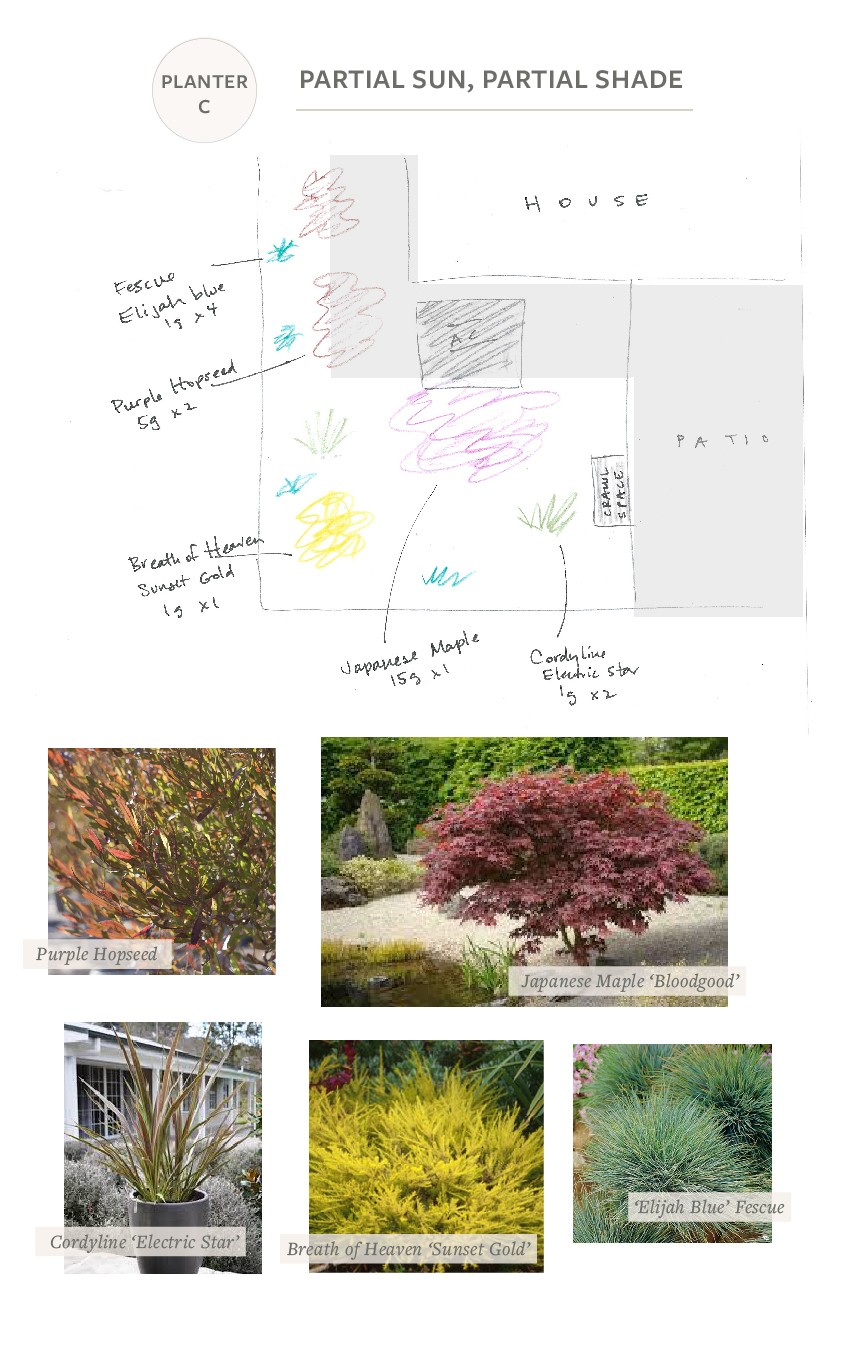
Planter C
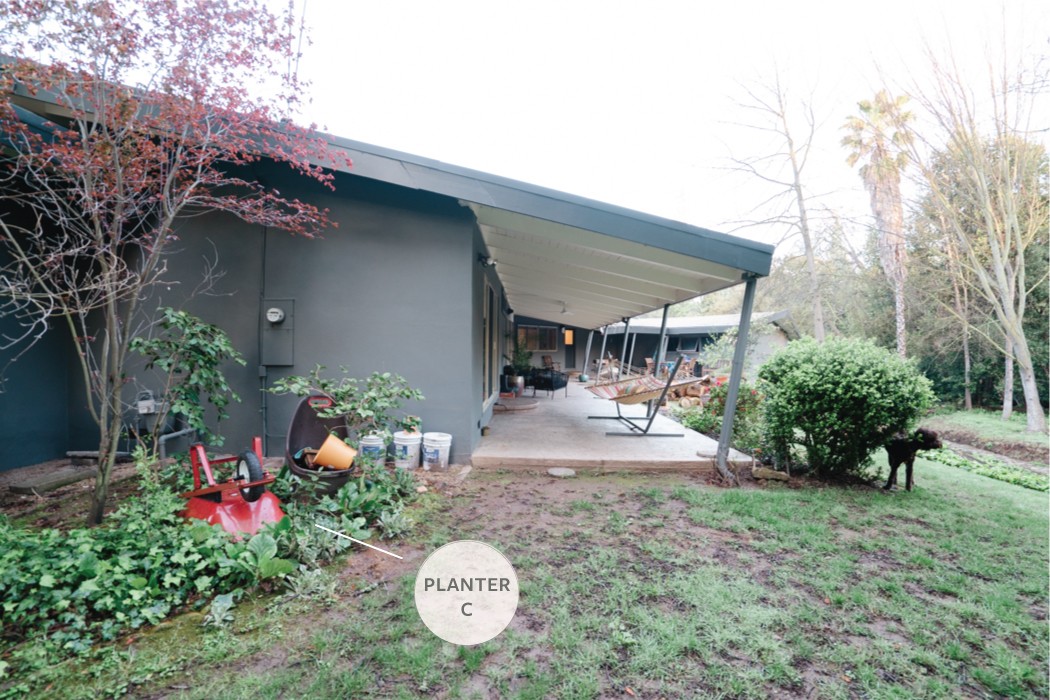
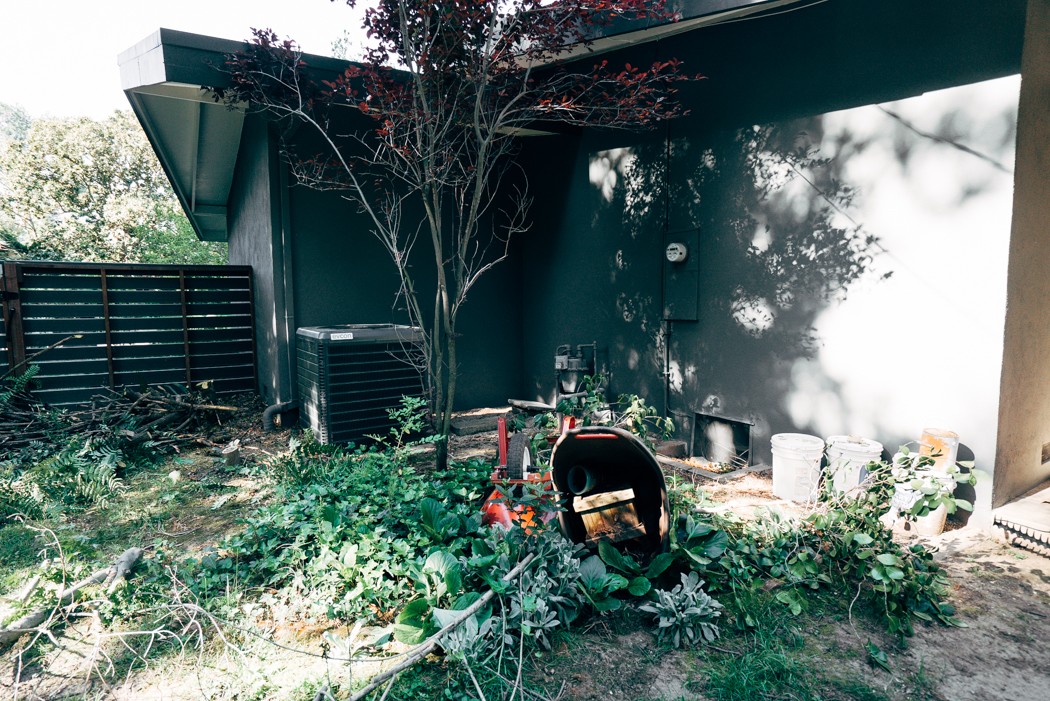 Ugh, this area is a hot mess. Random trees, overgrown ivy and its currently a dumping ground for equipment. As of today we’ve removed a couple of the smaller trees, and we’ll be sharpening up the shape of the planter. It currently has a scalloped brick edging that’s going away and will be clean and simple going forward. Since it does get quite a bit of shade from the overhang on the house as well as some tall redwoods stationed across from it, I made sure the plantings didn’t need a ton of sun.
The idea currently is to remove the plum tree and replace it with a Japanese Maple “Bloodgood” for deep color, but maybe now that the other trees are gone we’ll keep the plum. We’ll be adding some purple hopseed bushes to screen the air conditioning unit that’s over there as well as the side of the house. Bringing in plants from the other planters adds continuity through the yard and makes my decision-making easier.
Last but not least, I always make spreadsheets for these projects to help me shop and track costs. After looking everything over once more, and adjusting my drawings I made my final choices! When we’re ready to shop I’ll take this list to Green Acres Nursery & Supply and get everything we need. Then its on to the fun and equally hard part. Install!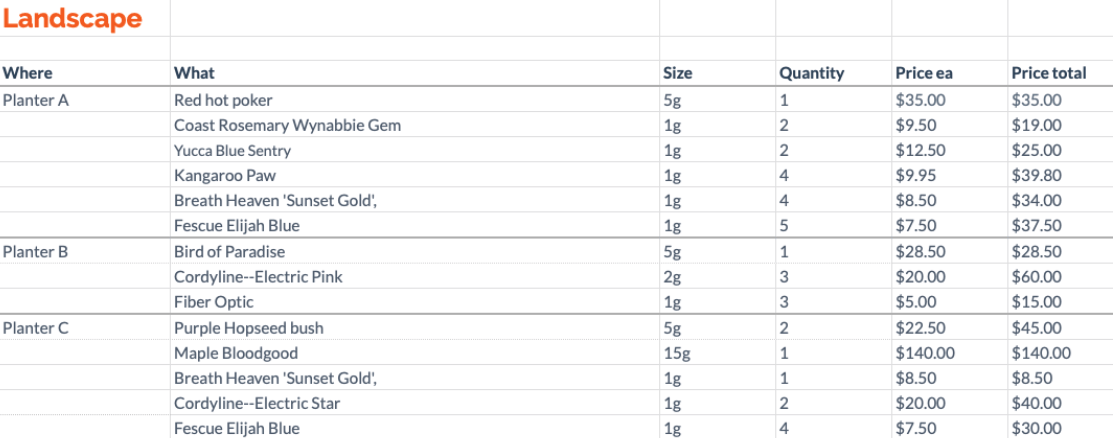
I’m also pinning away as I go, so you can find resources on line here!
Green Acres Nursery & Supply is a Sacramento-local, family-owned business. In 2003, they opened up their first garden center in Roseville, California. Since then, we have expanded to include a total of five retail locations.
*This post is in partnership with Green Acres Nursery & Supply, all words, designs and opinions are my own.


1 thought on “DIY Landscape Design”
Good fences make good neighbours.