

Hi friends! Who else is limping toward the finish line? We’re going to make it, but I’m fighting a cold and it seems like never ending tasks. BUT that’s the beauty of these weekly posts, they force me to look back and see how far we’ve come even in one week.
This week I’m going room by room with updates in order of excitement.
Laundry
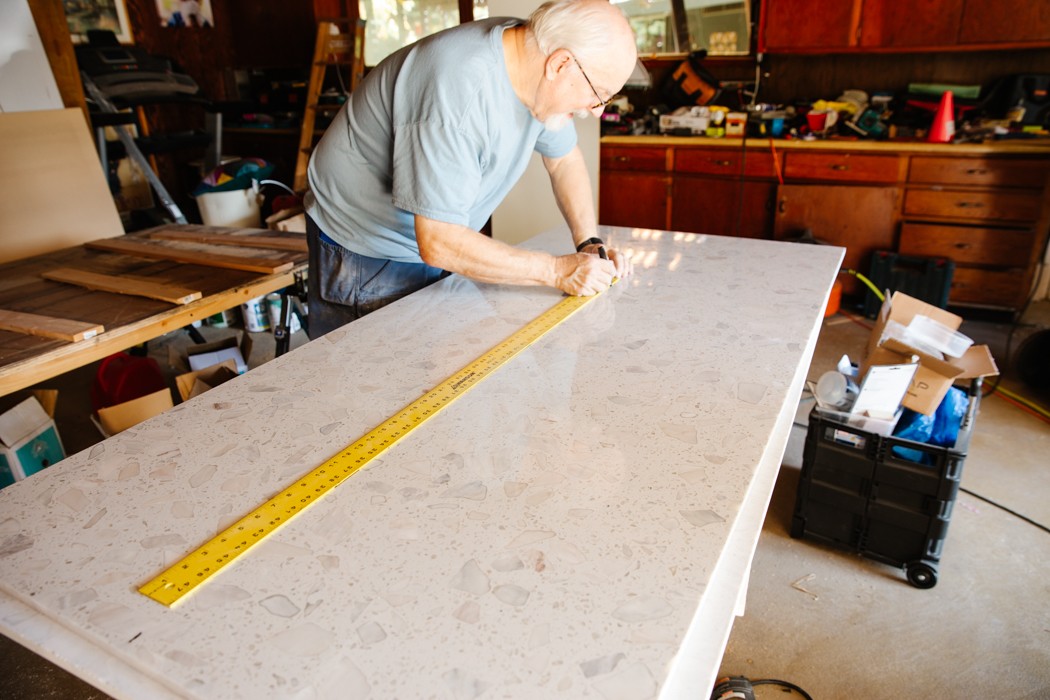
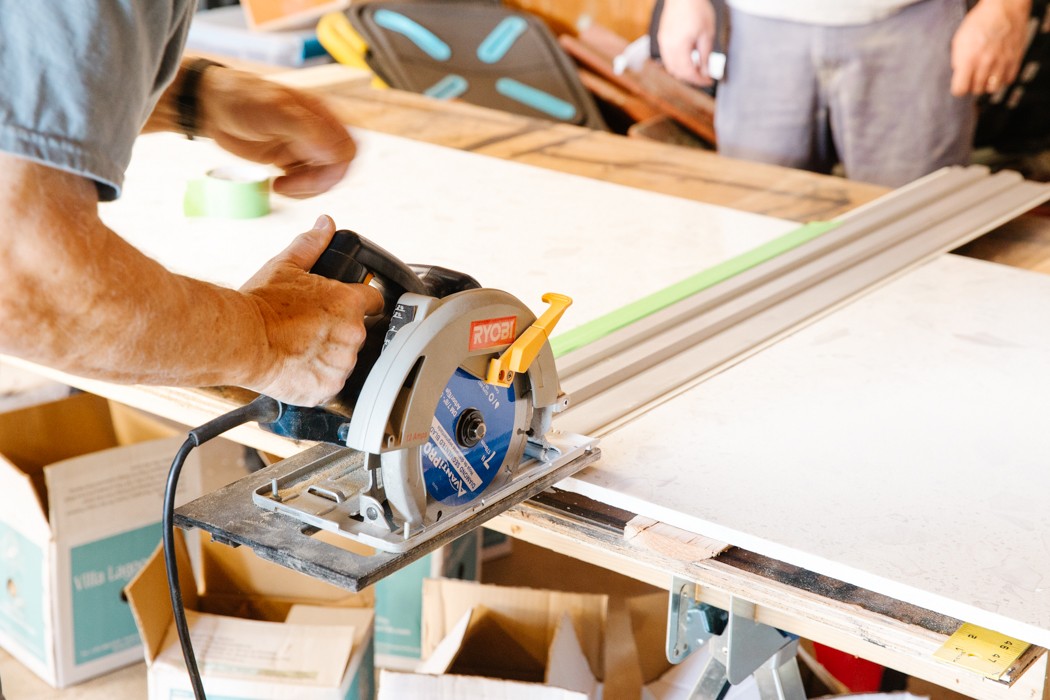
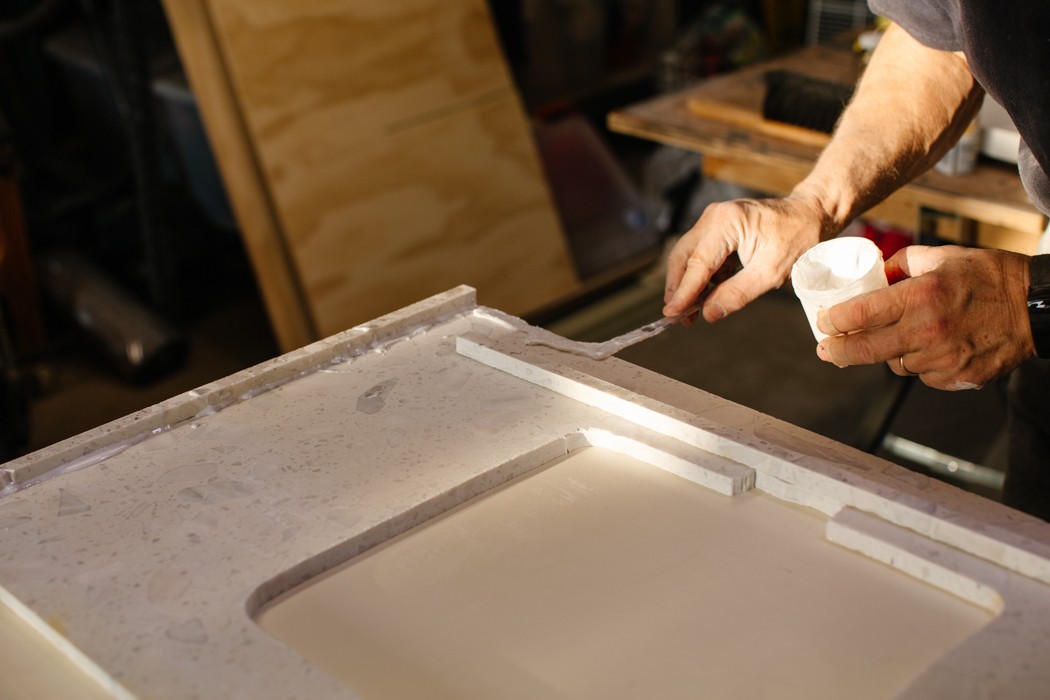
Again, this space didn’t have much to do aside from cabinets but the big To Do was to put in the quartz countertop. My dad, who you might know by now, can do a little of everything, has been watching the stone fabricators closely on our last couple projects so decided he wanted to take it on the cutting himself.
I talked a lot about this on Instagram Stories this week (do you follow me there!?) but we scored BIG TIME on two slabs of quartz for $25 each. Yep, both pieces for $50. How you ask? We went to our local prefab granite warehouse that sells basic granite and quartz countertops and islands in limited sizes. What you see is what you get and there’s not a lot of fuss (or service for that matter), but is super budget-friendly. Most of the styles I wanted were out of stock but then we found out they had an As-Is bin with chipped slabs for a bargain I was all over it. We found a couple 3’x6′ tub surround back pieces, which means they had bull-nose edges with a couple chips, but we were totally able to work around them. SCORE!
The big win was getting the large slab into position on top of the washer/dryer, which meant angling it just so and dropping it into a tight space without breaking it. They did it! Here’s a quick iPhone video of them installing it and using a pile of my books to lower it down. Profesh!
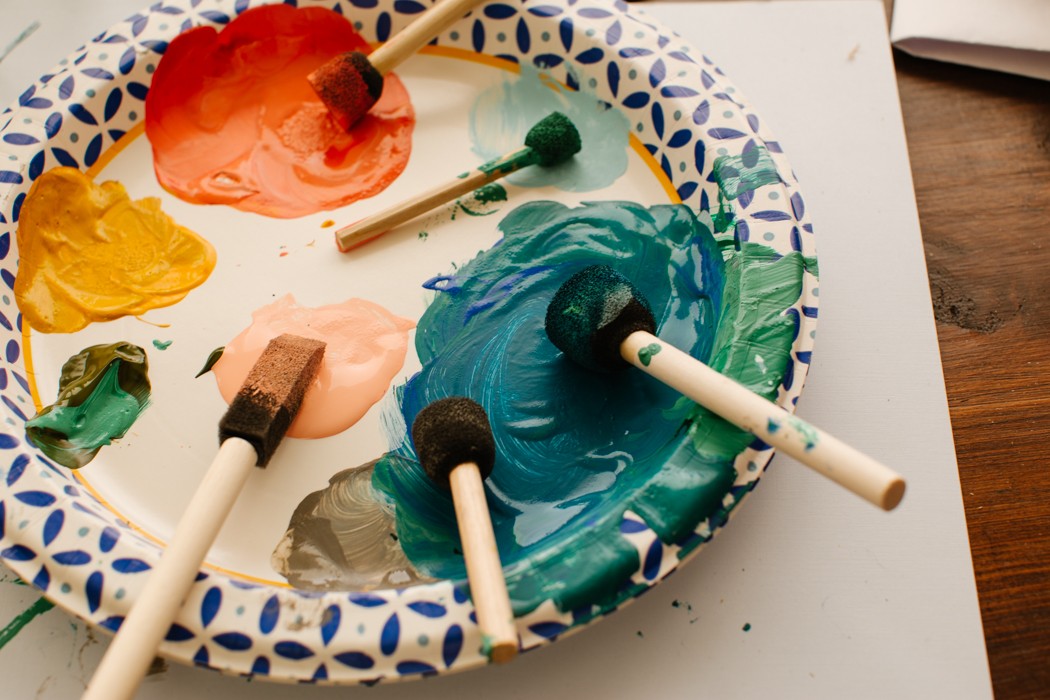
I really love this terrazzo-y pattern on the quartz. It adds so much texture at a nice scale and the colors are really pretty. I’m not going to lie, watching him cut it made me nervous but he made it work!
Mudroom
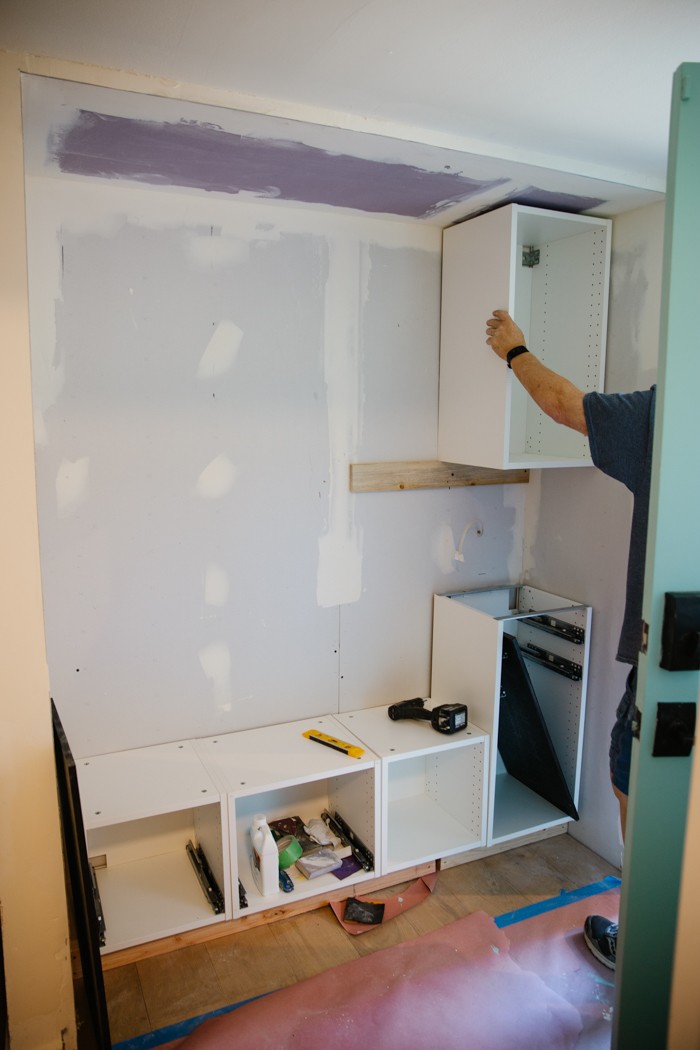
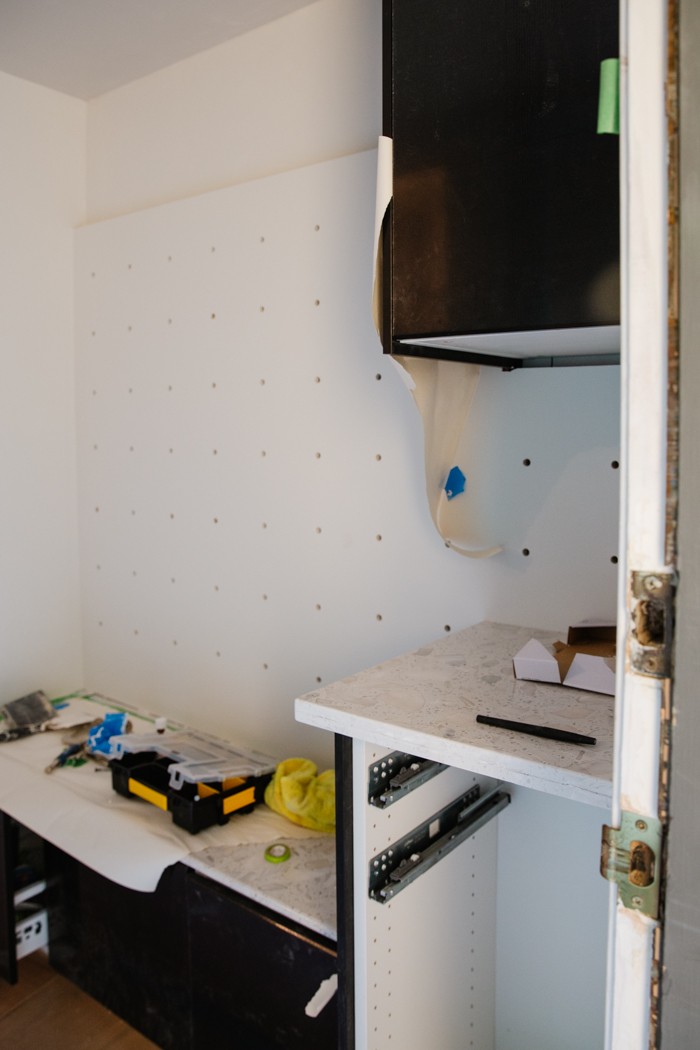
This space came a long way in a week! We got all the Ikea Section cabinets sorted out and put in place with their corresponding side panels cut to size.
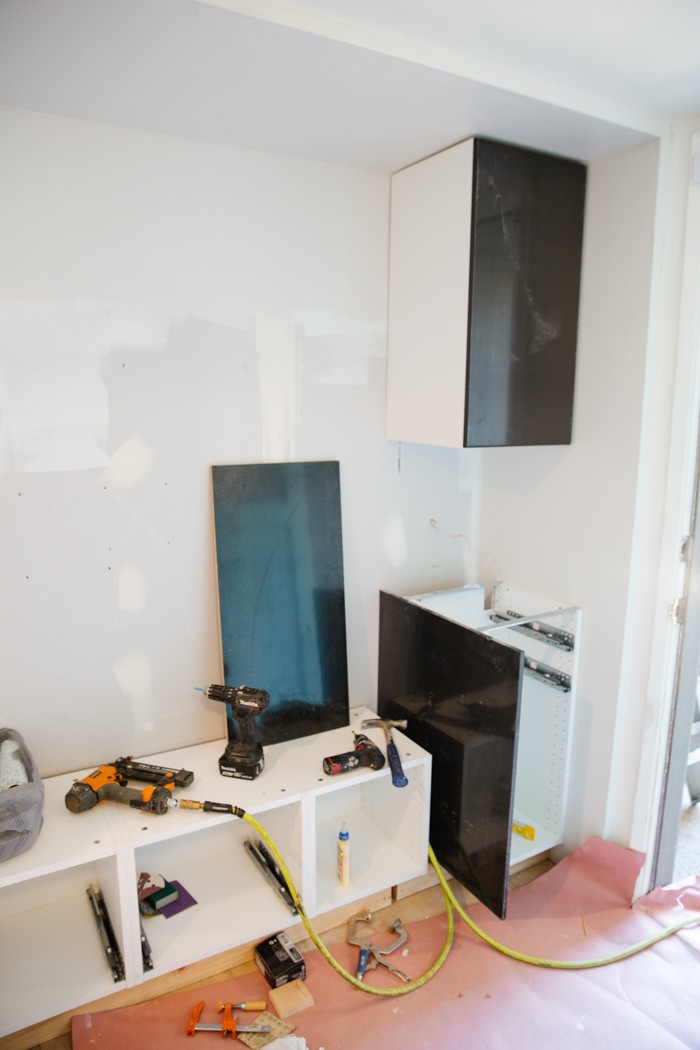
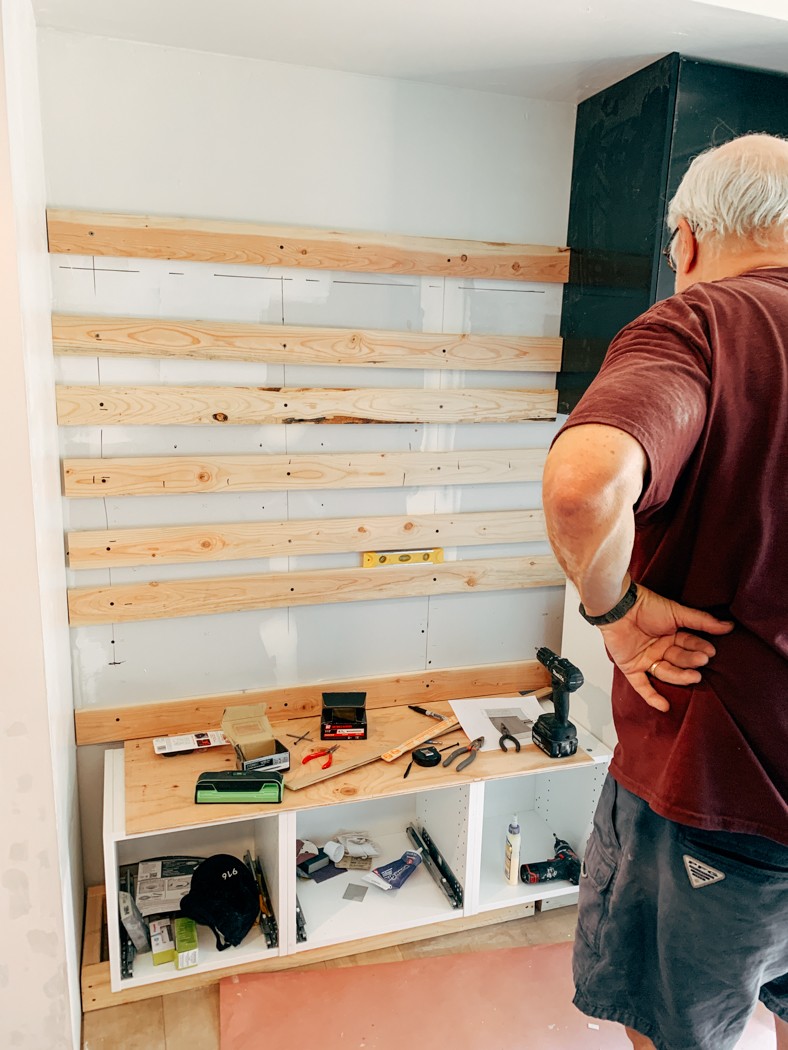
I really wanted an oversized adjustable pegboard here–they’re functional and so dang cute. We went with 1/2″ pegs/holes and spaced them 6″ apart. To ensure the pegs had a good seat and could support weight my dad screwed 2×4’s behind all the holes. That way each hole passes through the sheet of plywood and into the board behind it. He used this drill jig to keep the holes perfectly straight and square so the dowels pop right in.
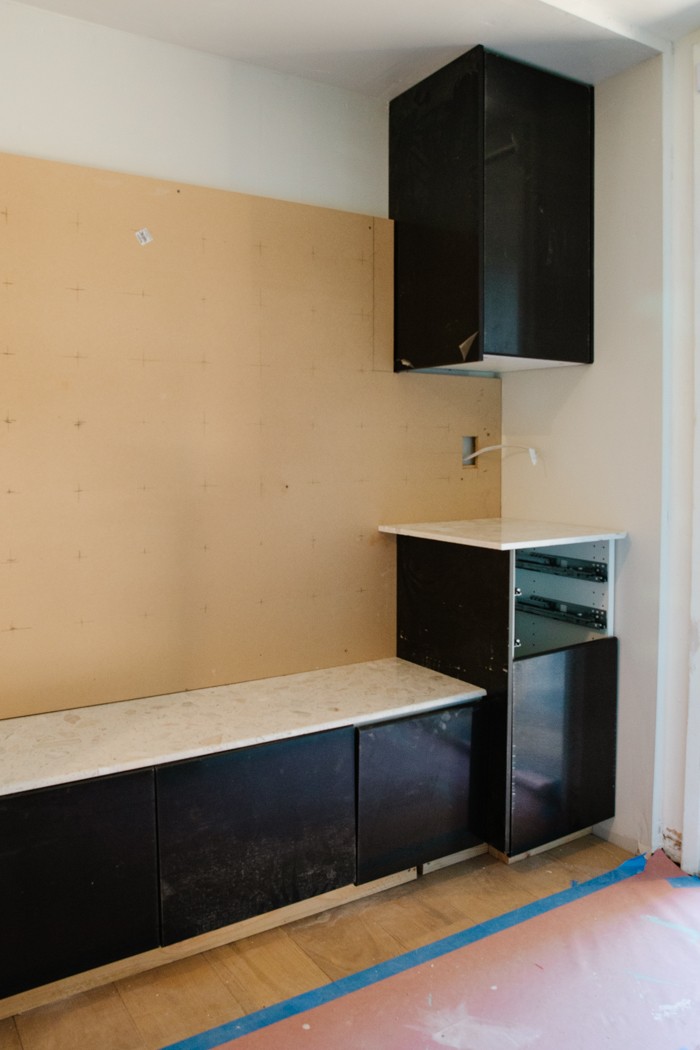
We left the bullnose on the quartz bench top (we did same on laundry counter), and I love how it kisses the bevel of the drawers. Its hard to see here but its comfortable to sit on and it actually looks good. I put a couple of coats of paint on the walls and pegboard (Benjamin Moore Classic Gray) which will give a subtle dimension to this nook area but still feel bright and clean.
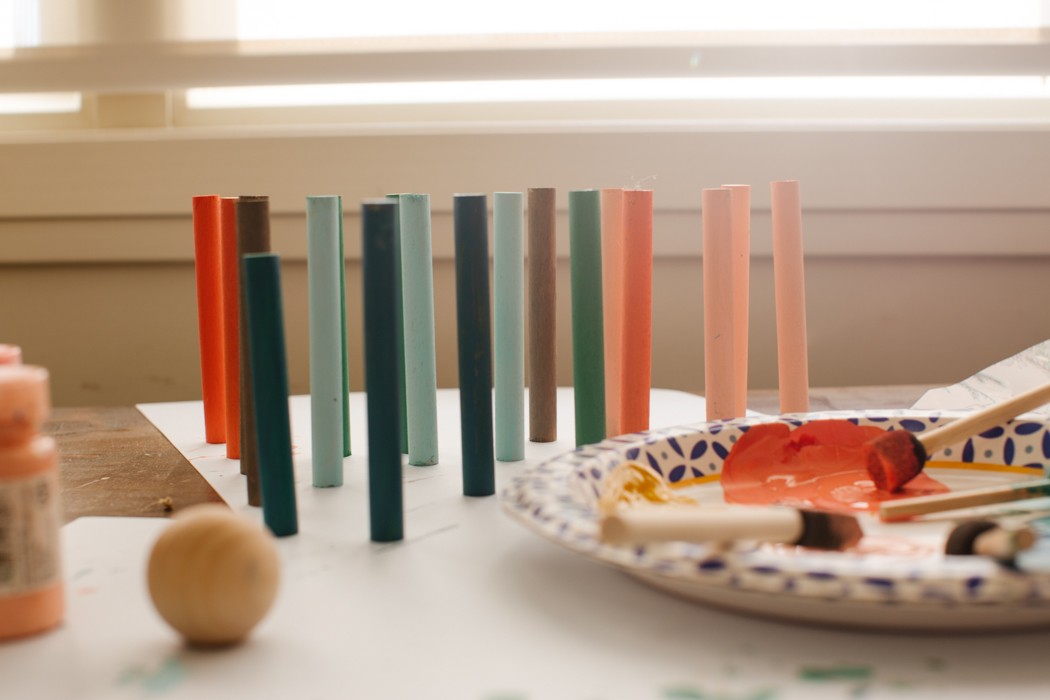
As you can see there’s not a lot of color in the finishes at this point so I’m doing something fun with the peg dowels. Stay tuned!!
Bathroom
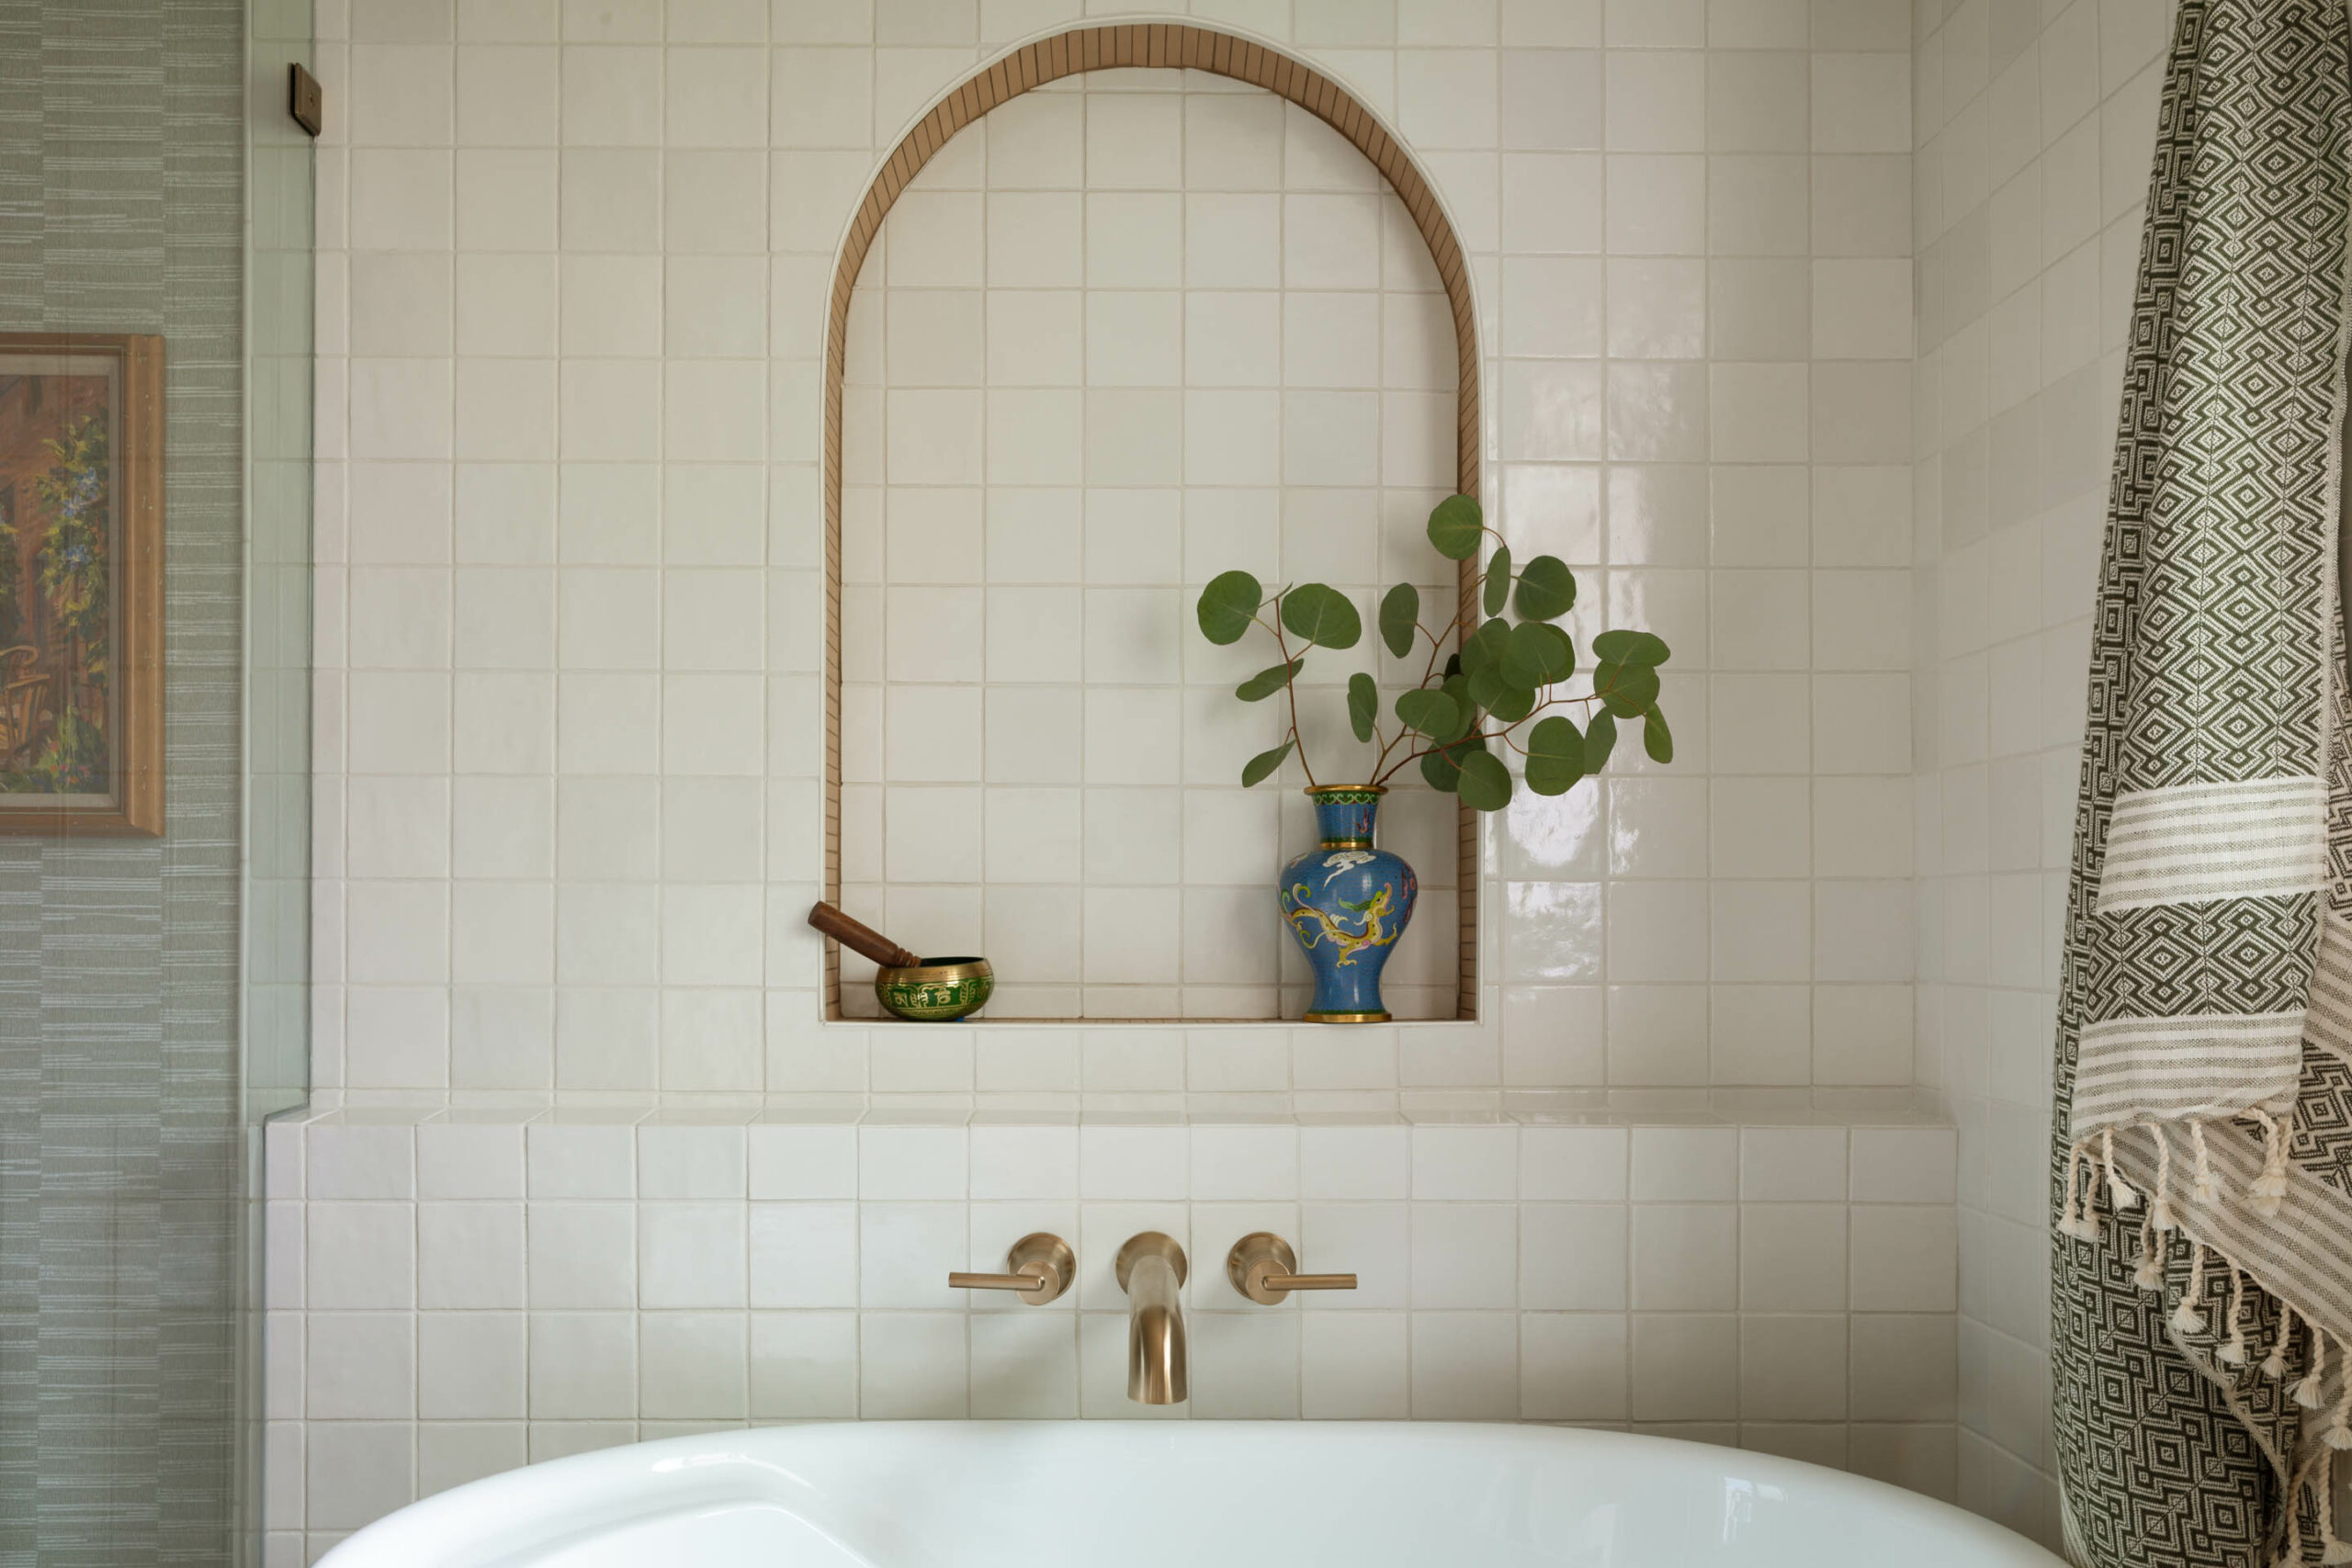
The bathroom turned a MAJOR corner this week. Like its a complete dream. The last couple weeks we laid the foundation with the Villa Lagoon tile floor and the resurfaced shower from Miracle Method. But this week it all came together and is such a happy space.
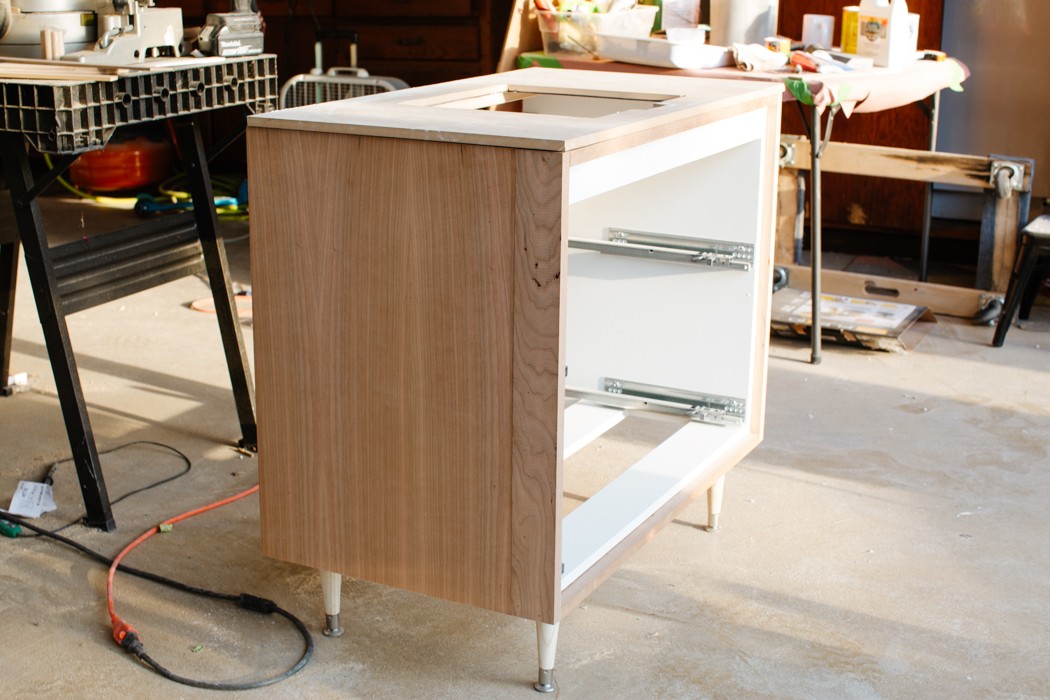
The vanity is an Ikea hack we are making up as we go along. It started with a basic Godmorgon cabinet that we added tapered legs to and wrapping in cherry plywood that I’ll stain a walnut color. Cute, right?
Here is more of our DIY countertop fabrication. Its not done yet, so here’s hoping we can get it polished to look decent. Although this may be a “you get what you pay for” situation. I’m ok with that.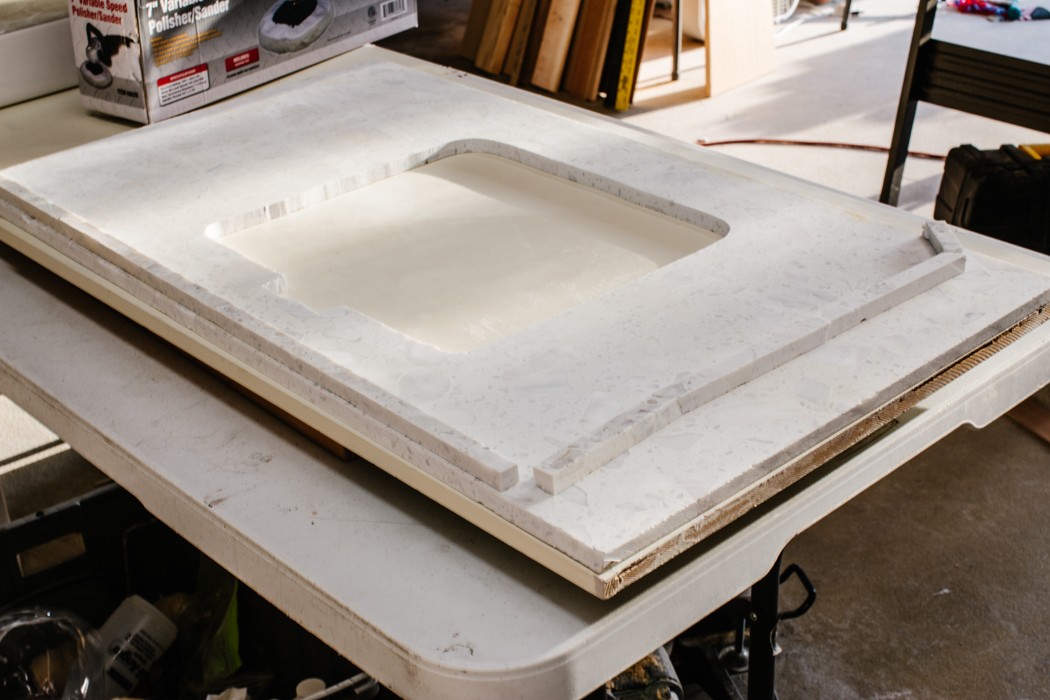
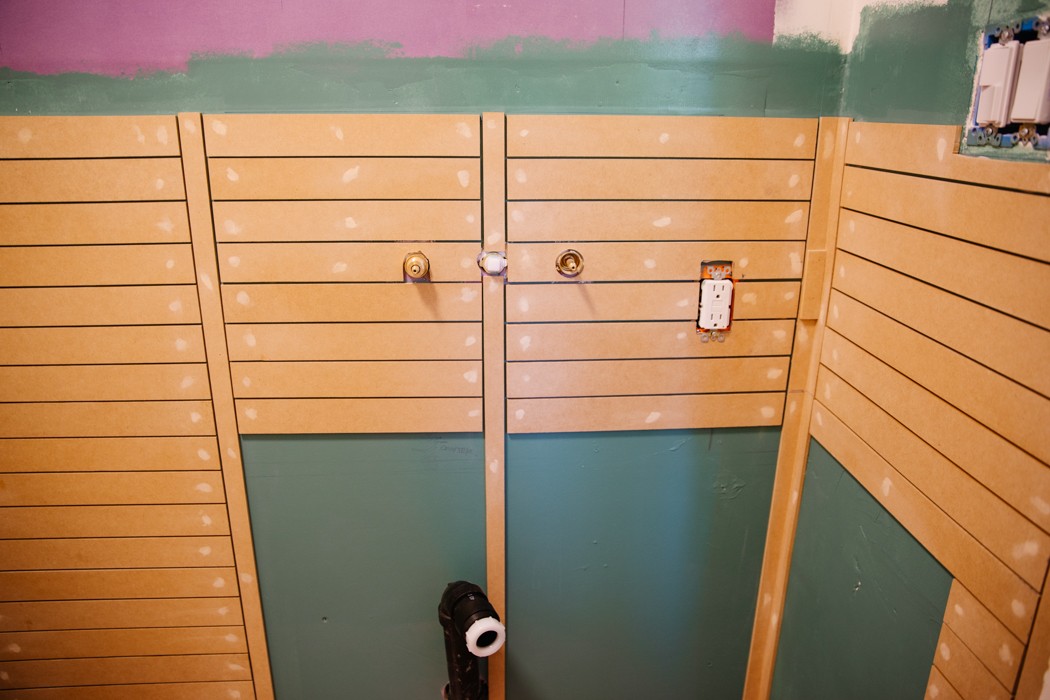
Last week we were just starting to get the wainscoting in place and it added so much character and weight to the small room. I started to panic about painting all those cracks without it getting gunky so at the last minute ran to Lowes and bought this sprayer. It took a little adjusting but it worked really well and the paint went on in no time. I’m so happy I got it, I think the brush marks and drips would have really stressed me out.
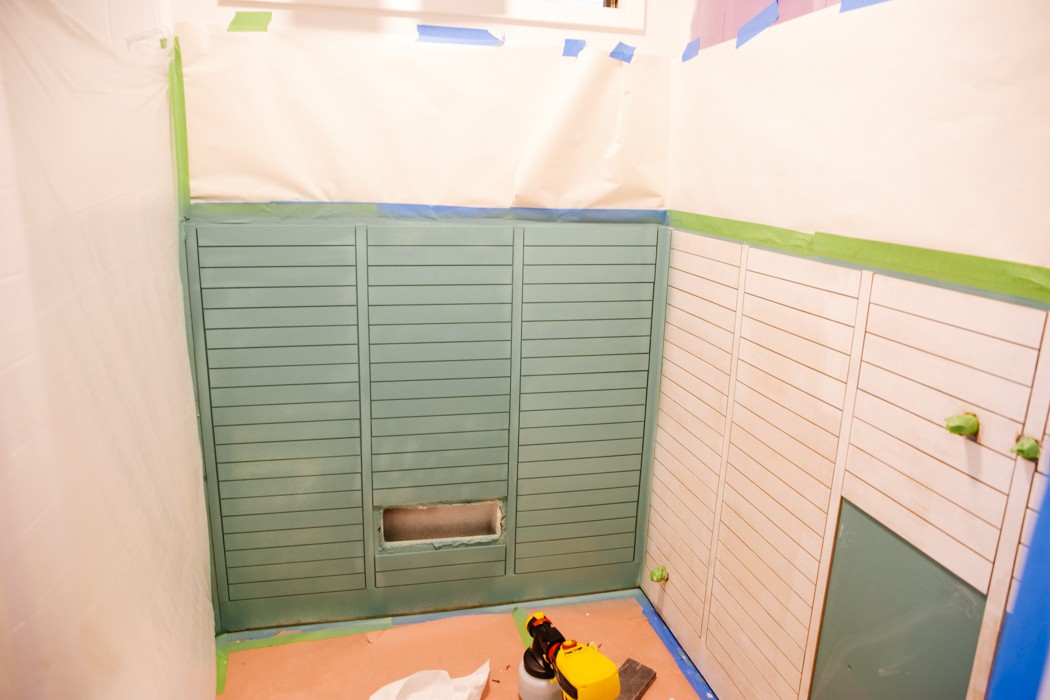
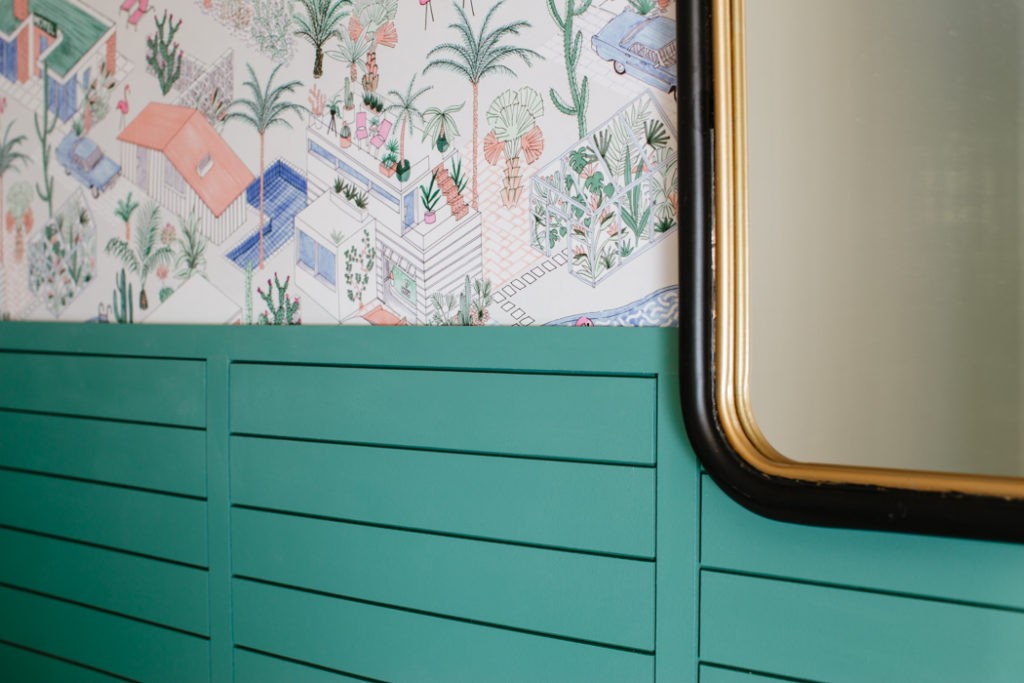
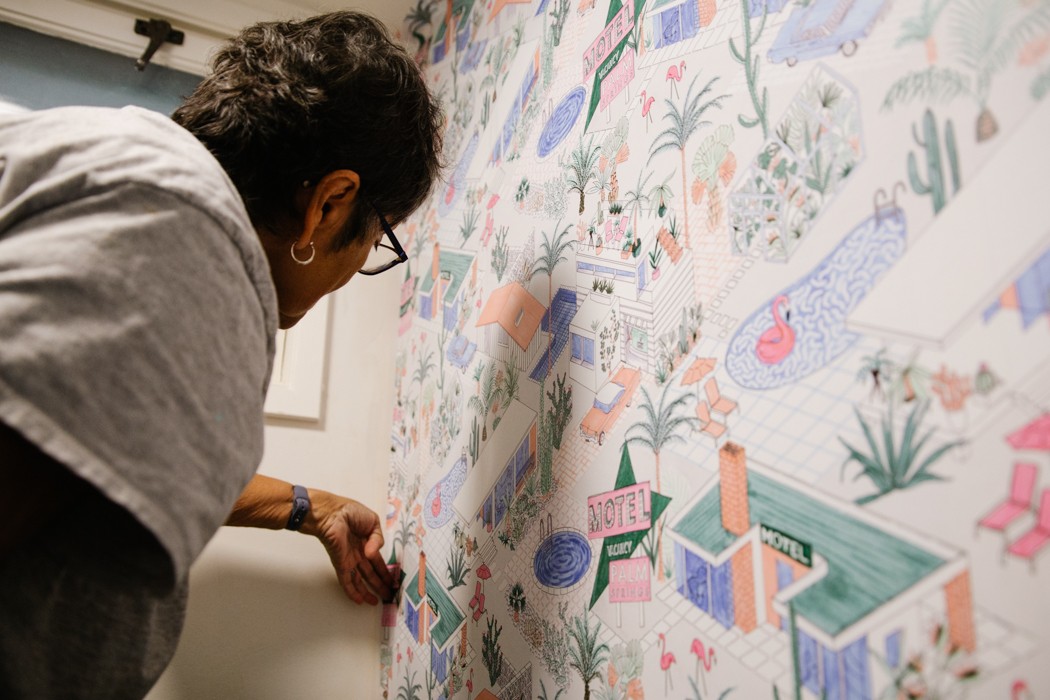
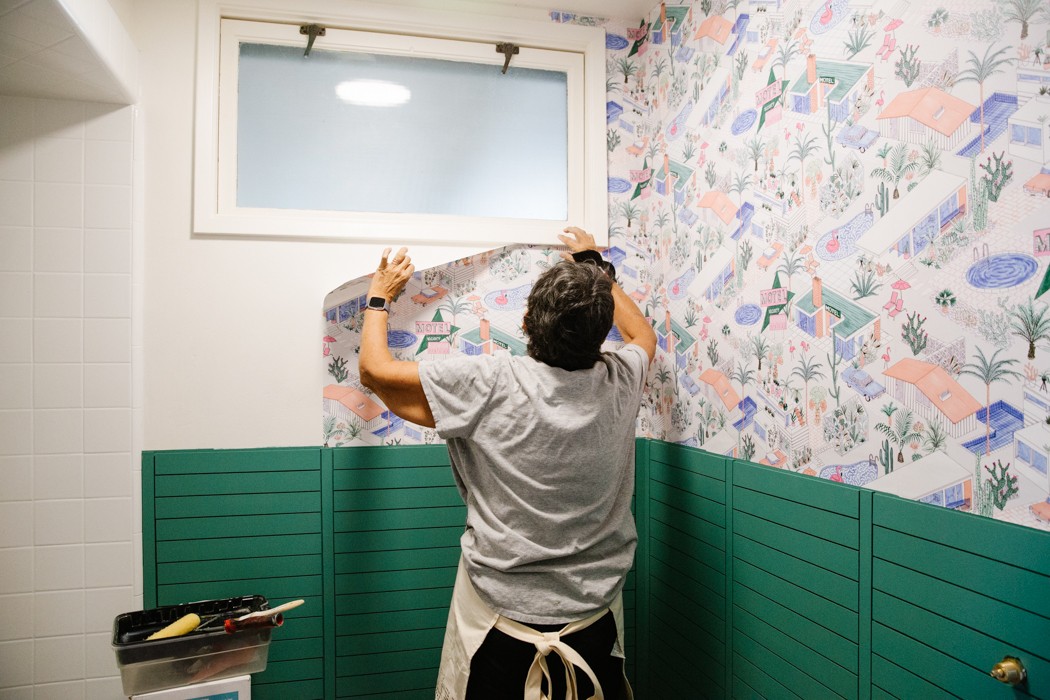
We let the wainscoting dry overnight and then it was wallpaper time! That same day I primed the walls with wallpaper primer so the paste wouldn’t soak into the walls. I’ll be honest, this was the project I was most nervous about. I had really high expectations but had never done it before, so I brought in my mom. She installed tons of wallpaper back in the day (it was big in the 80’s) and said she’d help me. Which means she basically did it all but she was a total pro!
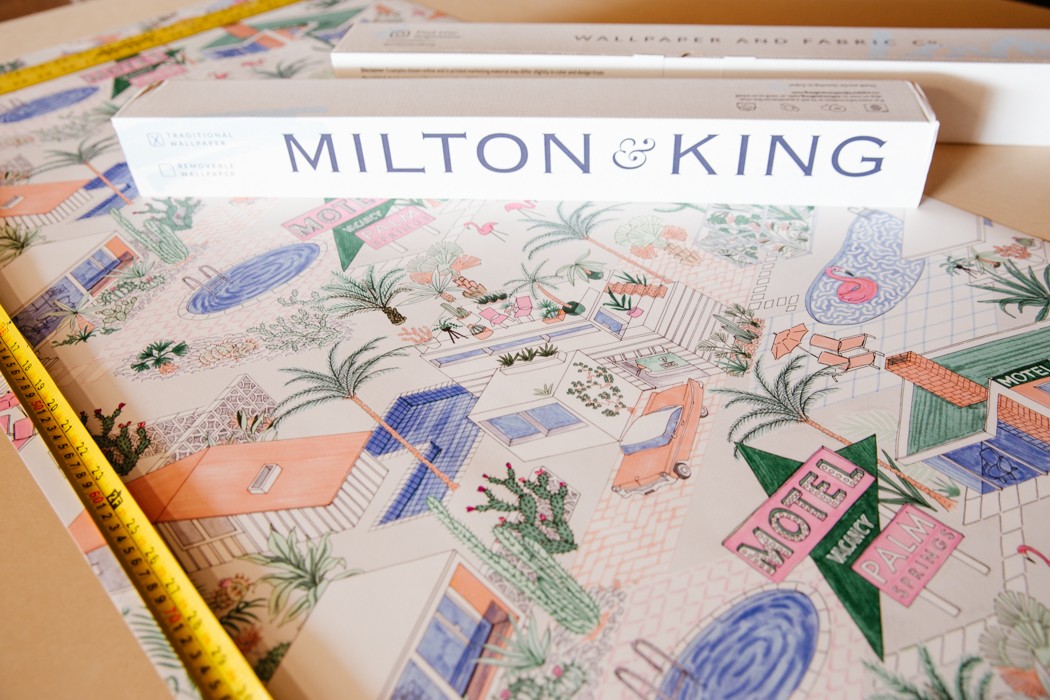
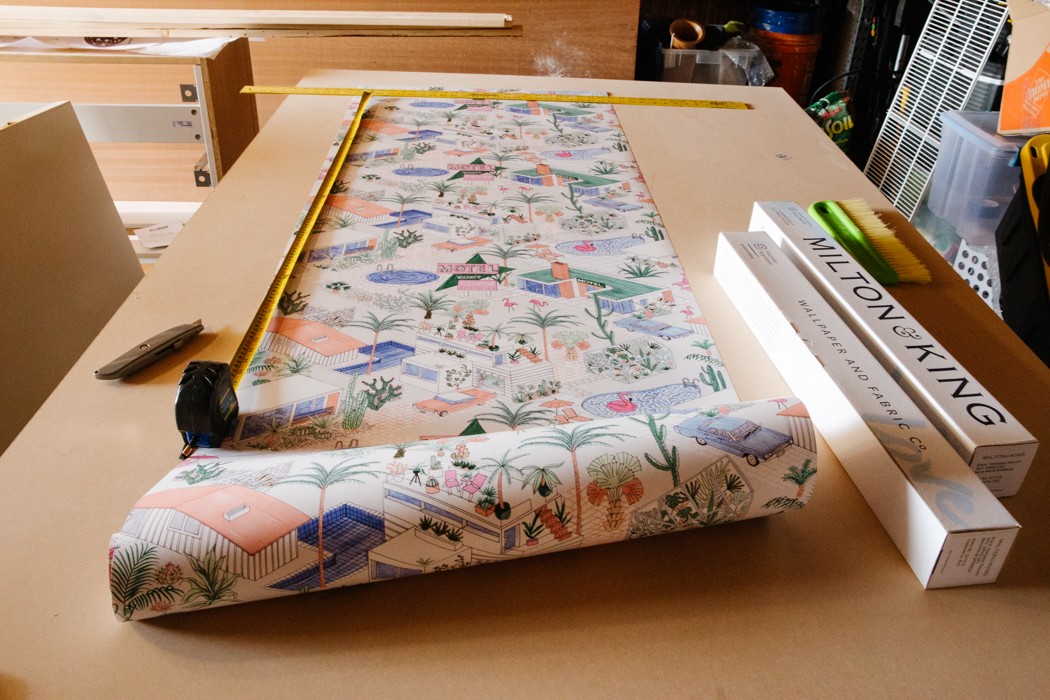
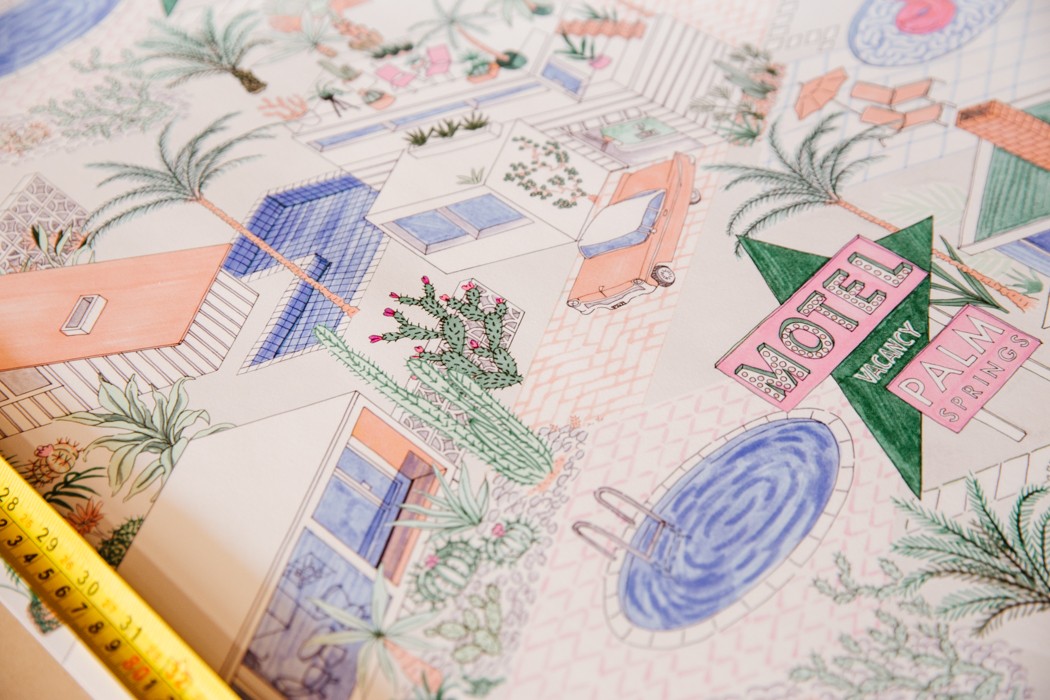
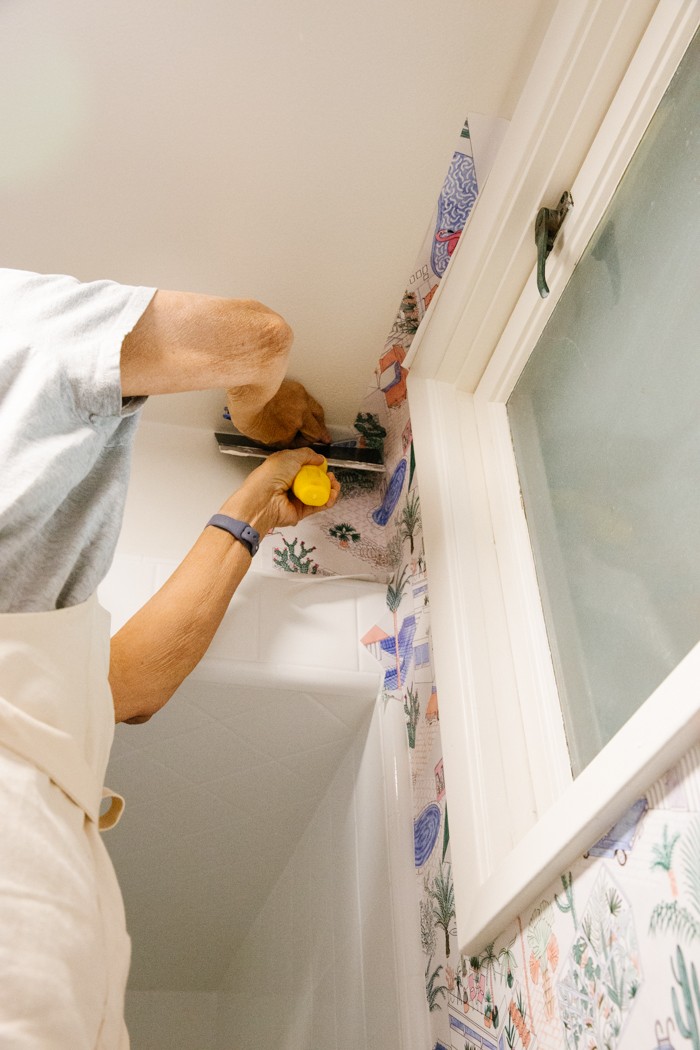
I mentioned this in my Design Plan post but the entire room design is inspired by this Palm Springs wallpaper from Milton & King. Its a retro wallpaper without looking dated and the modern color palette makes such a statement in this little room. I love the hand-drawn marker illustration style, and the quality is really stunning. It bugs me when you can see the digital dot pattern (I’m a print nerd) but there’s not a pixel in sight, just the artists brushstrokes. The paper is heavy, and really forgiving so was easy to butt the seams together and wipe clean of any paste. We went with the traditional non-woven material which is a little more durable wallpaper for the bathroom that may get wet or steamy. If you’re thinking of papering a high-use bathroom, proper ventilation is recommended.
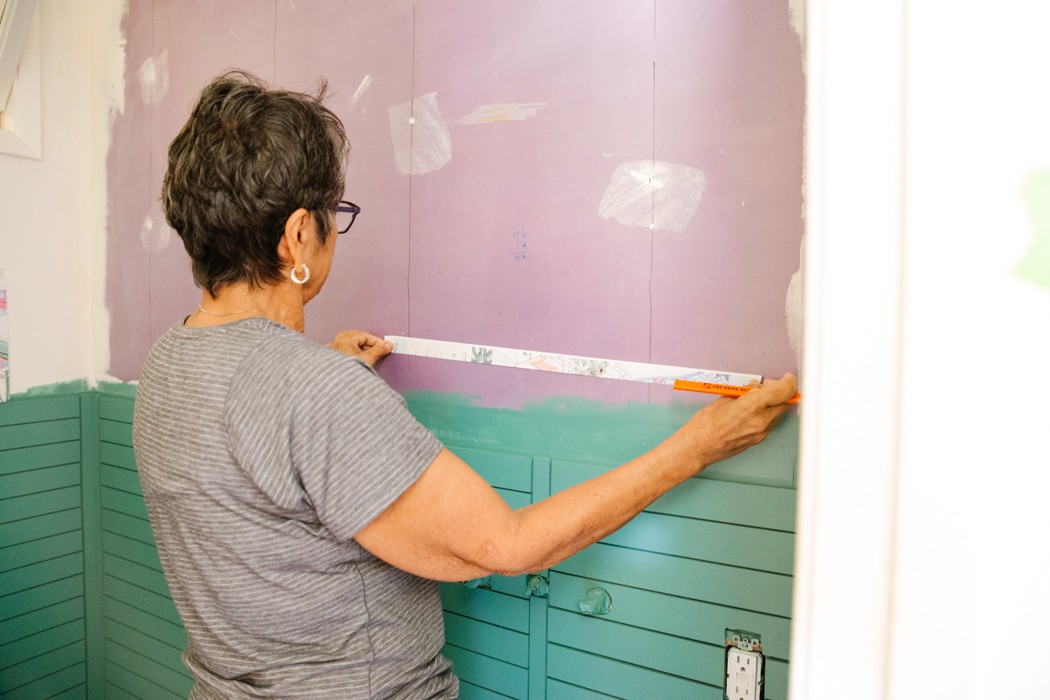
My mom marking the starting point and seam locations. We painted the wallpaper background color (white) behind the seams so the purple drywall wouldn’t show through.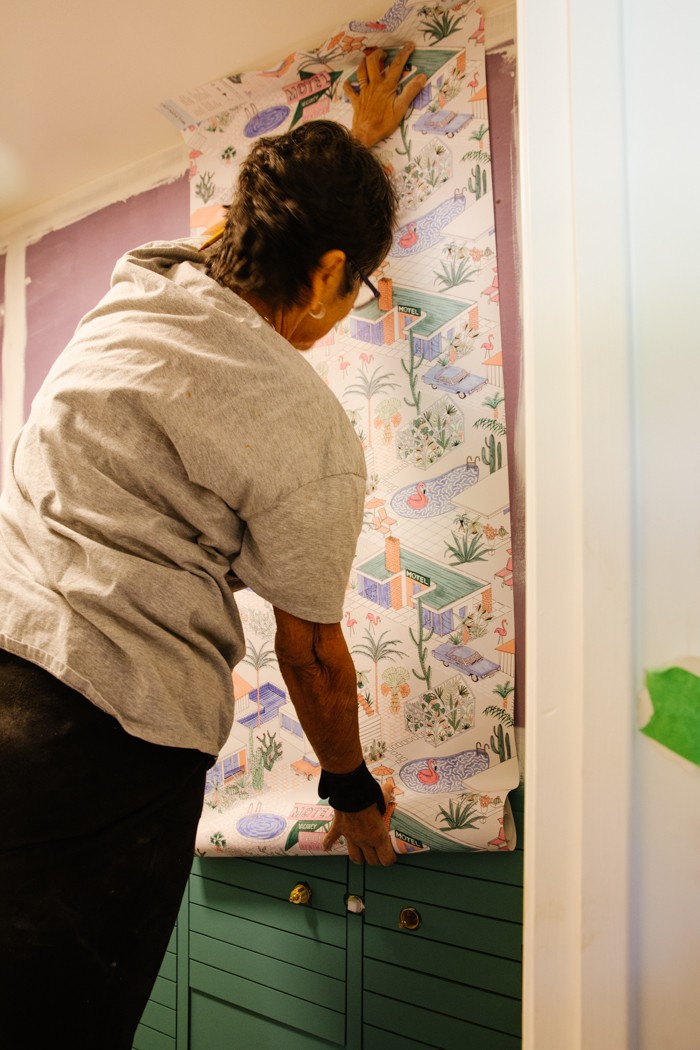
Installation was a lot easier than I thought it would be, especially if you were just doing a straight wall. The tricky areas were wrapping corners and cutting around the window and door. We followed a YouTube video for the corners and relied on the installation tips provided by Milton & King.
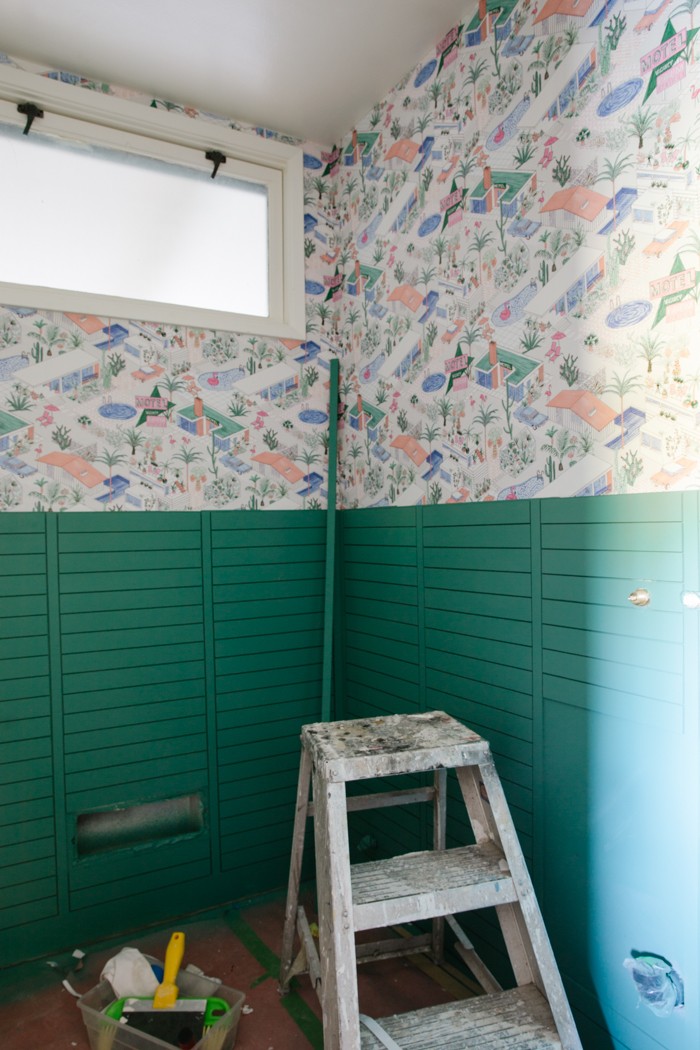
You guys, its a dream. Just seeing this little peek in the hallway with the blue door makes me so, so happy.
 I don’t have photos but we also got the shower trim and toilet installed so its a semi-functional space! Lots of tiny bits left but we’re in the home stretch!!
Lastly a shout out to Steve and Olga. I get about 20 DMs a day telling me how lucky I am to have such handy parents. Its 100% the truth and the only way these projects happen. I can have all the brilliant ideas in the world but we don’t have the budget to renovate our home on this scale and frequency without some major elbow grease. My parents have been married 50 years (next month!) and built, remodeled and DIY’d thousands of projects in various homes. They each have their strengths but the one we all have in common is our problem-solving skills (I got it from them). Its taken all of our stamina and expertise to pull this one off because we only hired out the floor tiling and shower resurfacing and we’re doing it in real time. FYI, my husband is also quite capable, but less willing (and not retired), so he jumps in when we need him but he’s mostly sitting this one out and keeping the household from spiraling into complete chaos. So, thank you, thank you family!
What’s left
Shower resurfacing (starts Friday!)Sand joint compound on walls smoothPaint back door(new addition)Paint the mudroom and laundry room. Also decide on a color first.Install all the Ikea cabinetryDecide on stain or paint for pegboard and open shelvingBuild and install pegboard in mudroomFabricate and install counter tops in mudroom, bathroom and laundry (wish us luck on this DIY).- Build and install open shelving in mudroom and laundry
- Install ceiling light fixtures and patch/repair ceilings in hallway
Build vanity- Stain and install vanity
Install bathroom lighting + mirrorInstall wallpaper in bathroomInstall and paint wainscot in bathroom (halfway done)- Swap old door hinges and hardware for hall doors
Hook up plumbing fixtures- Hang all the things
- Style and photoshoot prep!
* A million thanks to Milton & King for gifting the wallpaper for the bathroom. All opinions are my own. To shop more of their statement wallpapers, visit miltonandking.com.
My One Room Challenge Sponsors

Milton & King // Lumens // Villa Lagoon Tile // Miracle Method // Tidy Revival // Juniper Print Shop
Other One Room Challenge Posts
Catch up on the whole project
Week 1 // Week 2 // Week 3 // Week 4 // Week 5 (you’re here!) // Week 6
Links to my previous One Room Challenges
Fall 2018: Kitchen Refresh | Spring 2019: Midmod Patio Reveal
Don’t forget to see what all the other Guest Participants and Featured Designers are up to this week, things are getting real out there!


10 thoughts on “Week 5 (MudBathLaundry: Wallpaper!! and stuff)”
Love that countertop! can’t wait to see the rest!
Girl you are killing it. I love it all! It looks amazing. I can’t wait for the final reveal next week.
That wallpaper and wainscotting slays! Can I trade my traditional for your mid-centry modern?? I love it so much, Rebecca! Week 6….here we come!
OMG… what a project! It’s going to be beautiful. And yes, kudos to Steve and Olga!
Rebecca, everythin is looking so so good!
Whoa! Love that gorgeous paper! And the beautiful countertops.
OMG. This is looking so fab! Love it!
I adore that wallpaper and have looked at it on MiltonandKing.com often! I love your pegboard idea and just everything!! It’s going to be amazing!
Sooo gorgeous. Can’t wait to see the whole thing put together. Especially that wallpaper 🙂
It is really coming together now, I love the green you choose to paint and the countertop all classic choices.