


Goodbyyyyeee Week 4!! This one flew by, partly because we went out of town to celebrate some big birthdays for my mom and brother, BUT despite the break we’ve made some big progress on the finishes. This entire week has been bathroom-focused since we have the most work to do there. Luckily its a small space so things tend to go fairly quickly. The disruption to our home and schedules is getting old, but I think we’re down hill from here!
Back Door
I had a lot of hemming and hawing going on with the color scheme in the hallway. As I mentioned last week I had to pivot away from the light gray-aqua cabinets I was hoping for and we’re now using black door faces in the mudroom and laundry area. I’m happy with the choice but really wanted a something to be punchy in the long, narrow hallway. Its been so blah for so long I need it to really work a little harder visually.
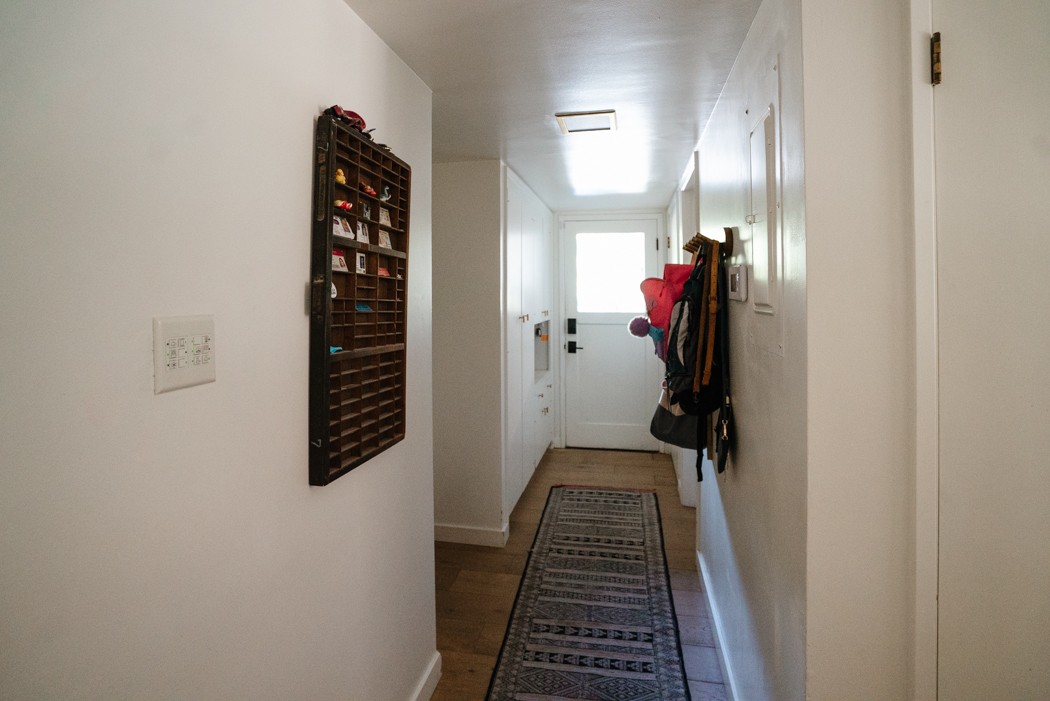
After a ‘duh’ moment I realized the back door needed a shot of color and then everything else could stay neutral. I have a bad habit of scope creeping myself during One Room Challenges but I like to harness our collective enthusiasm. Ha! But this also means I can wrap up the garage door project. 🙂 Anyway… I wanted to keep the door color the same inside and out but had a tall order for the paint color. It needed to:
- Go well with the dark gray of our exterior
- Pair with the cedar garage door color
- Not go flat in a dim hallway
- Not be too dark next to black cabinets
- Not compete with the green in the bathroom.
I got a lot of great feedback to my plight on Instagram but nothing I tested was feeling right.

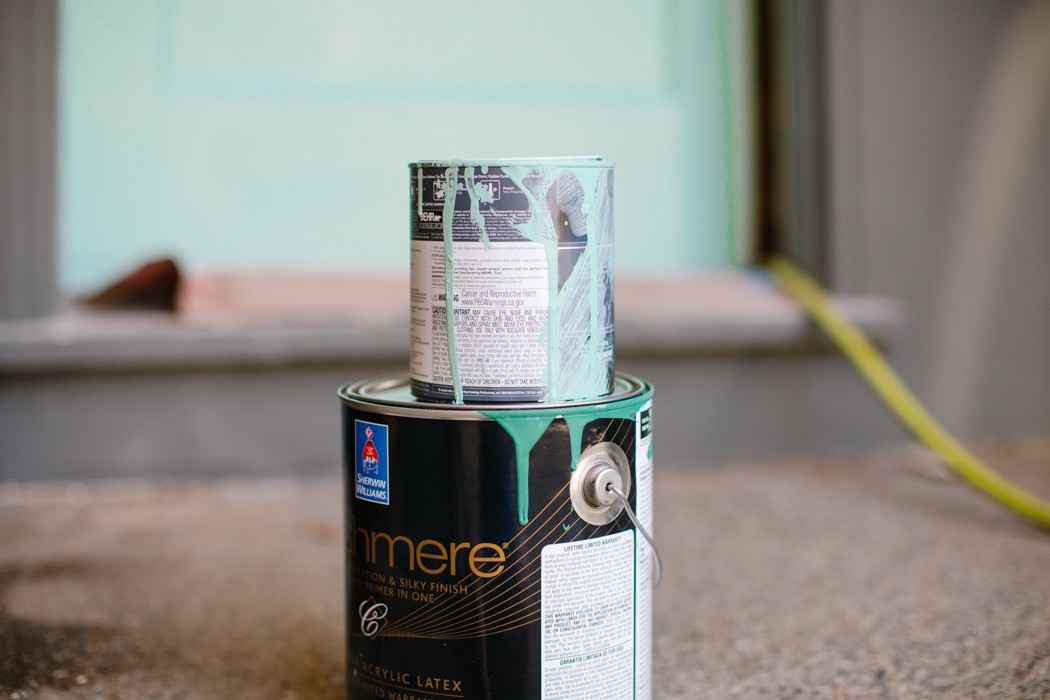
My mom was coming over to help paint so I was running out of time, then remembered I had some random sample pints in the garage. I knew I wanted aqua but turns out the original swatches were too dull. I needed something light and bright but more saturated.
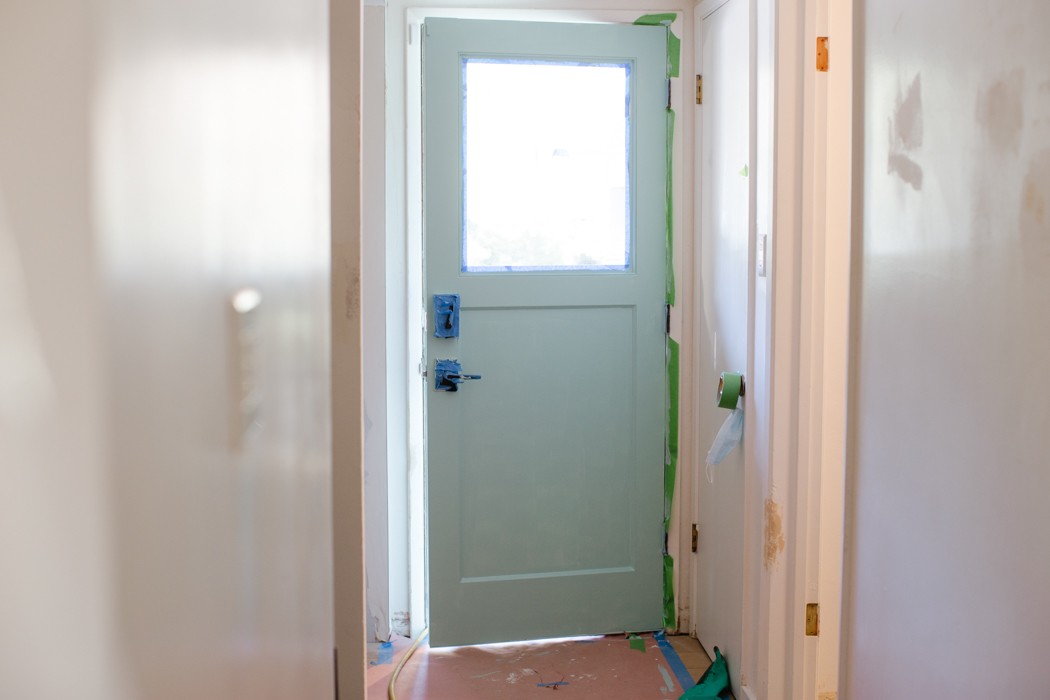
The color we ended up using is Behr Baby Aqua. For those of you who are into this nerdy stuff here is how the swatch compares to Drizzle (one of my final contenders).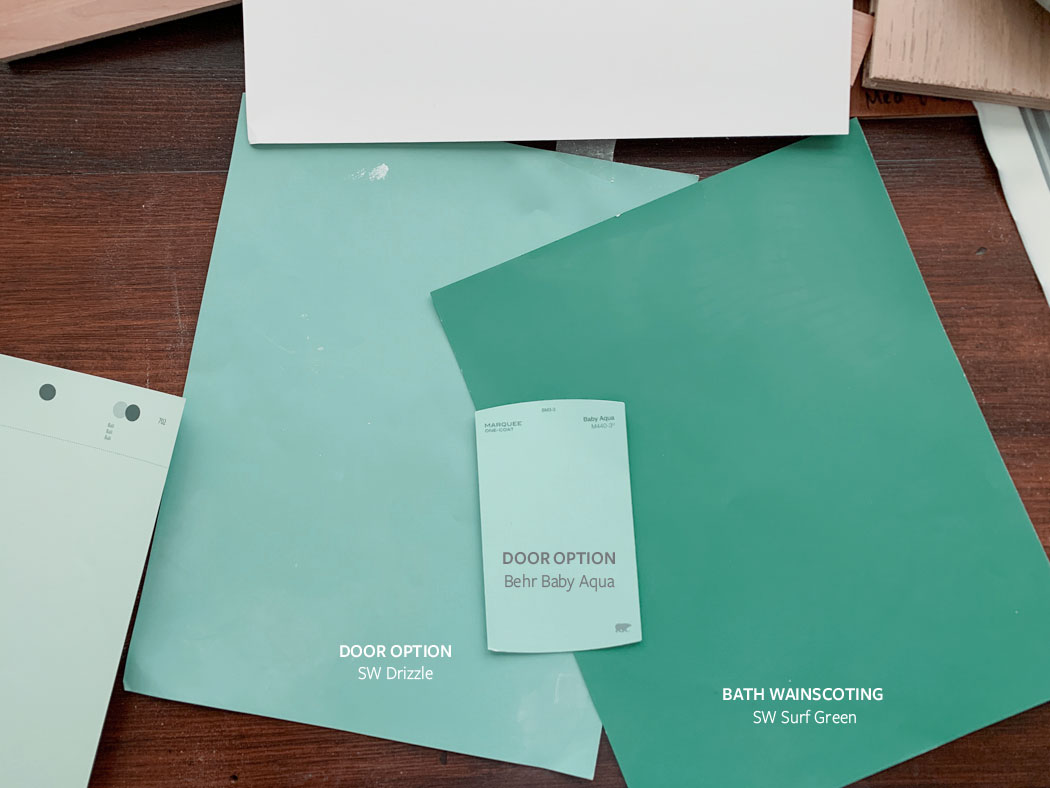
My mom got a couple coats of paint on the door, this photo taken after the first, and I’m really loving it! Once the black cabinets go in on the left its going to feel grounded and not like a baby nursery (despite the name). All the hall doors will have matte black hardware and hinges too.
Shower Resurfaced
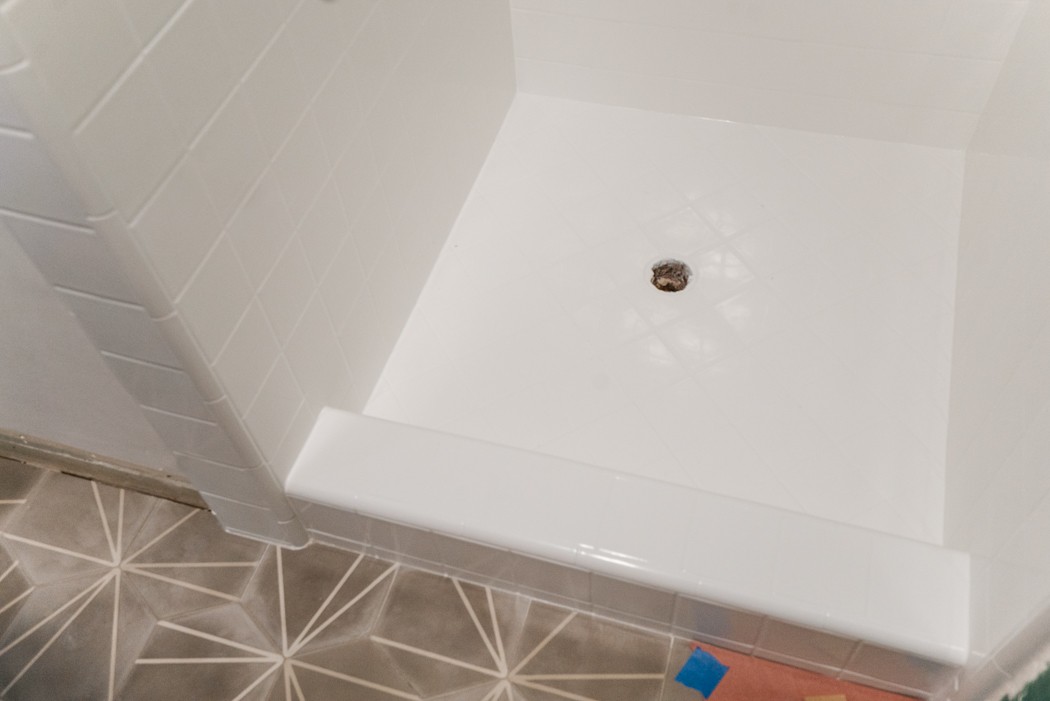
Oh-em-gee, the shower looks so good. I’ll go into more detail on the process in a later post but I am so happy we decided to resurface this shower instead of rip it out or continue ignoring it. Miracle Method* did a fantastic job, were super professional, and its literally like its brand new. We went with their basic white, which matches our sink and toilet and just looks CLEAN. A few of you warned me that the fumes were strong, and the final bonding step was. Throughout the day they had a huge vent moving fumes and dust out of the house and the real heavy smell didn’t happen until the last couple hours. It ended up being good timing that we went out of town, but even by the next morning it had dissipated quite a bit.
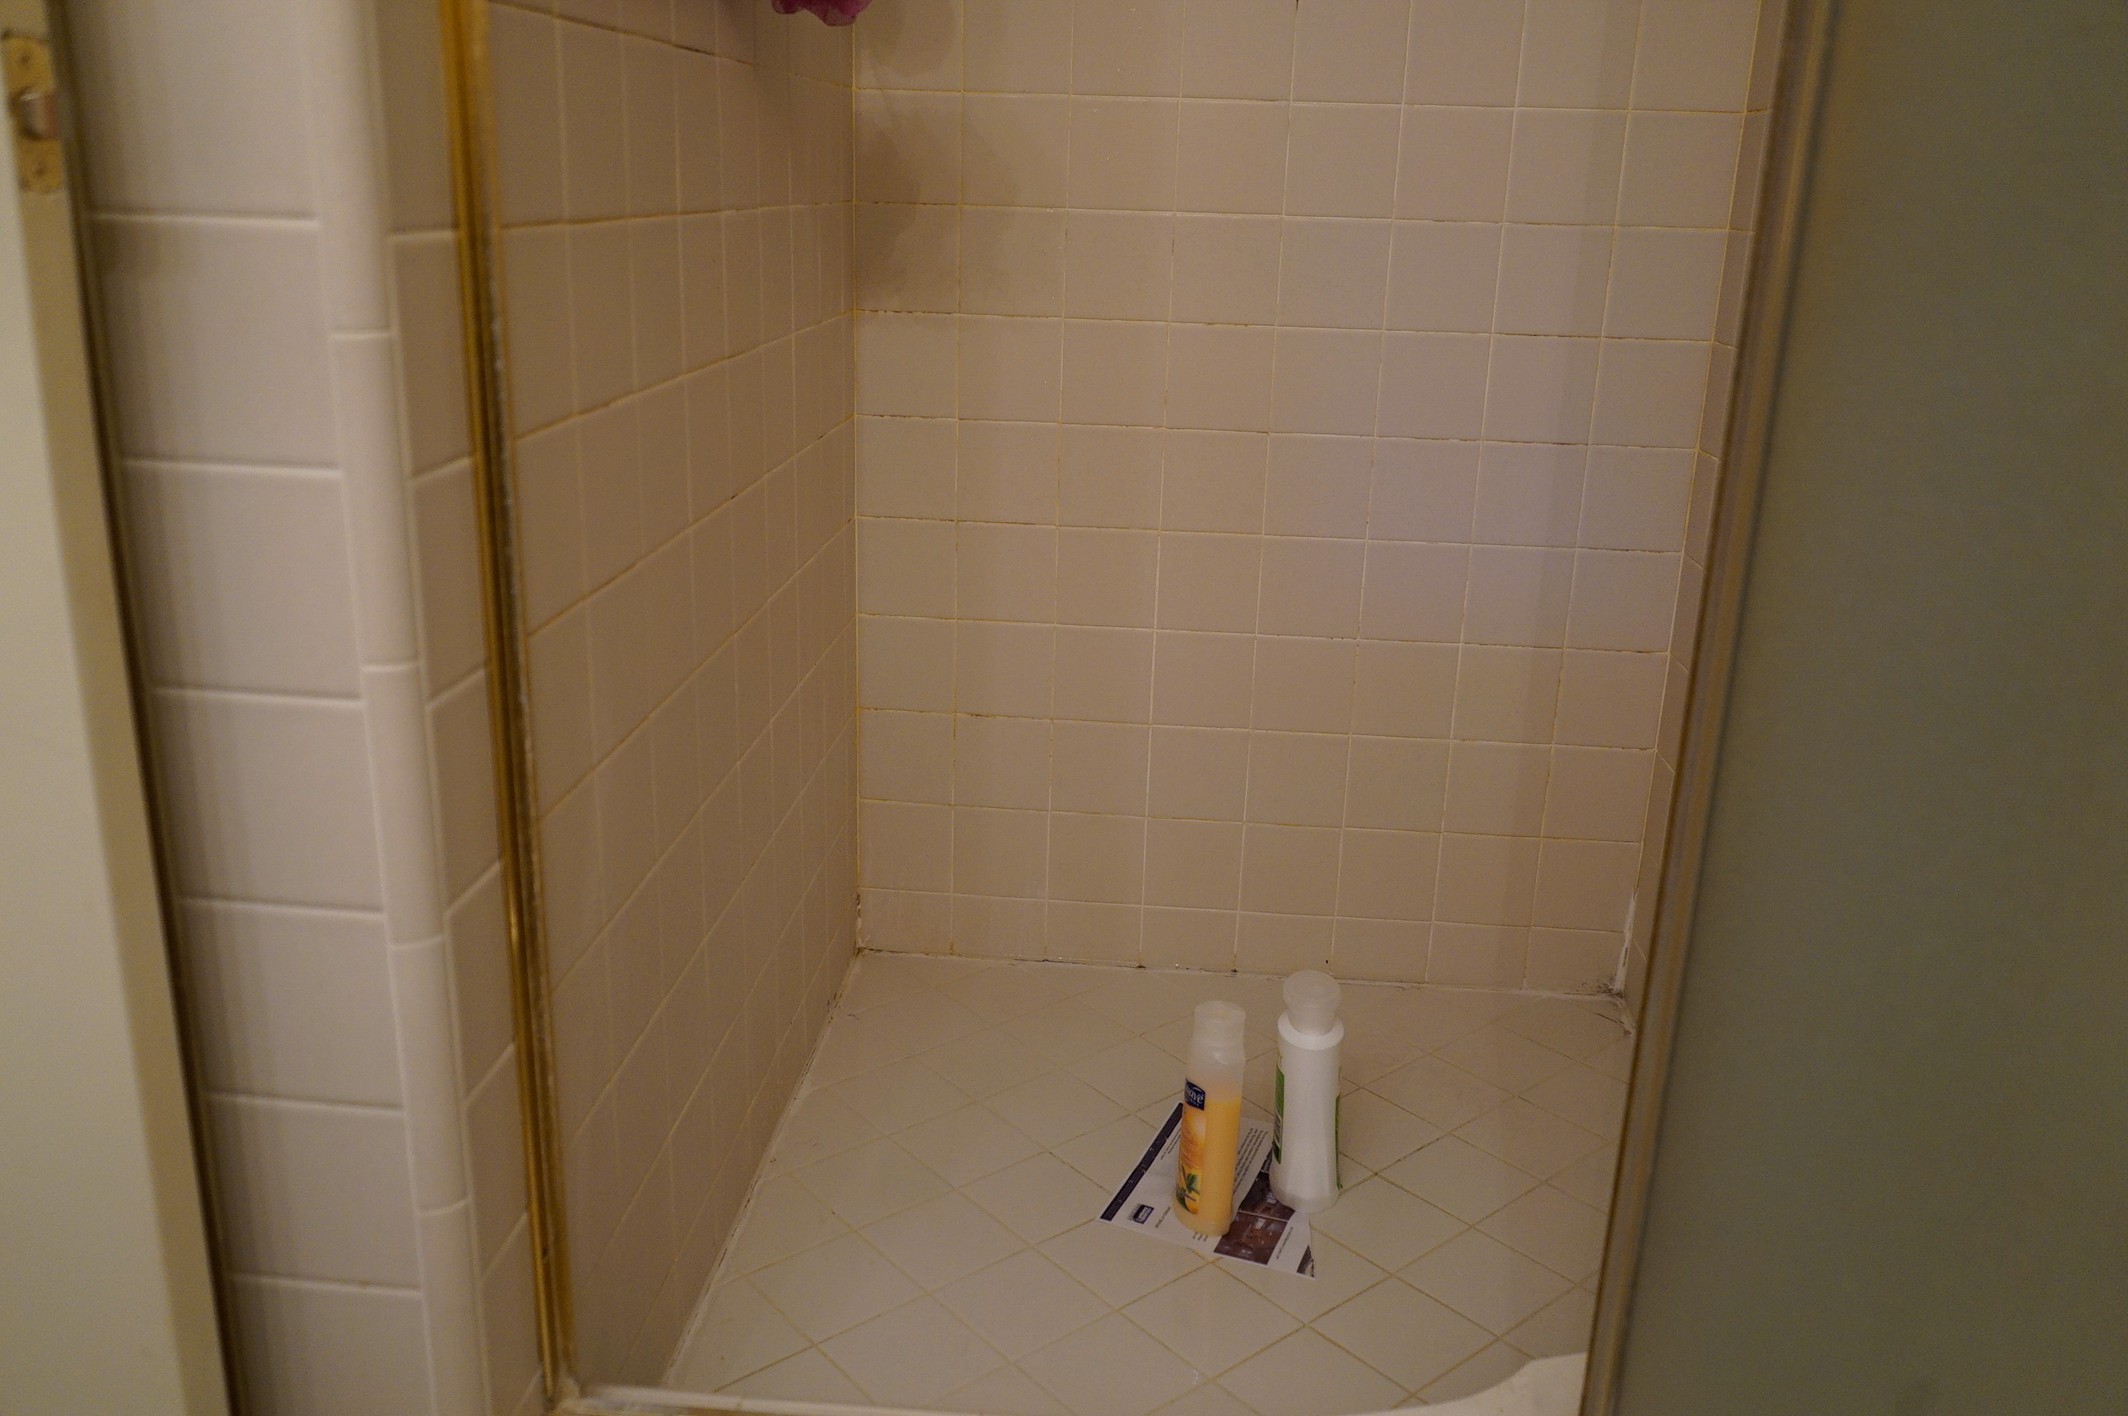
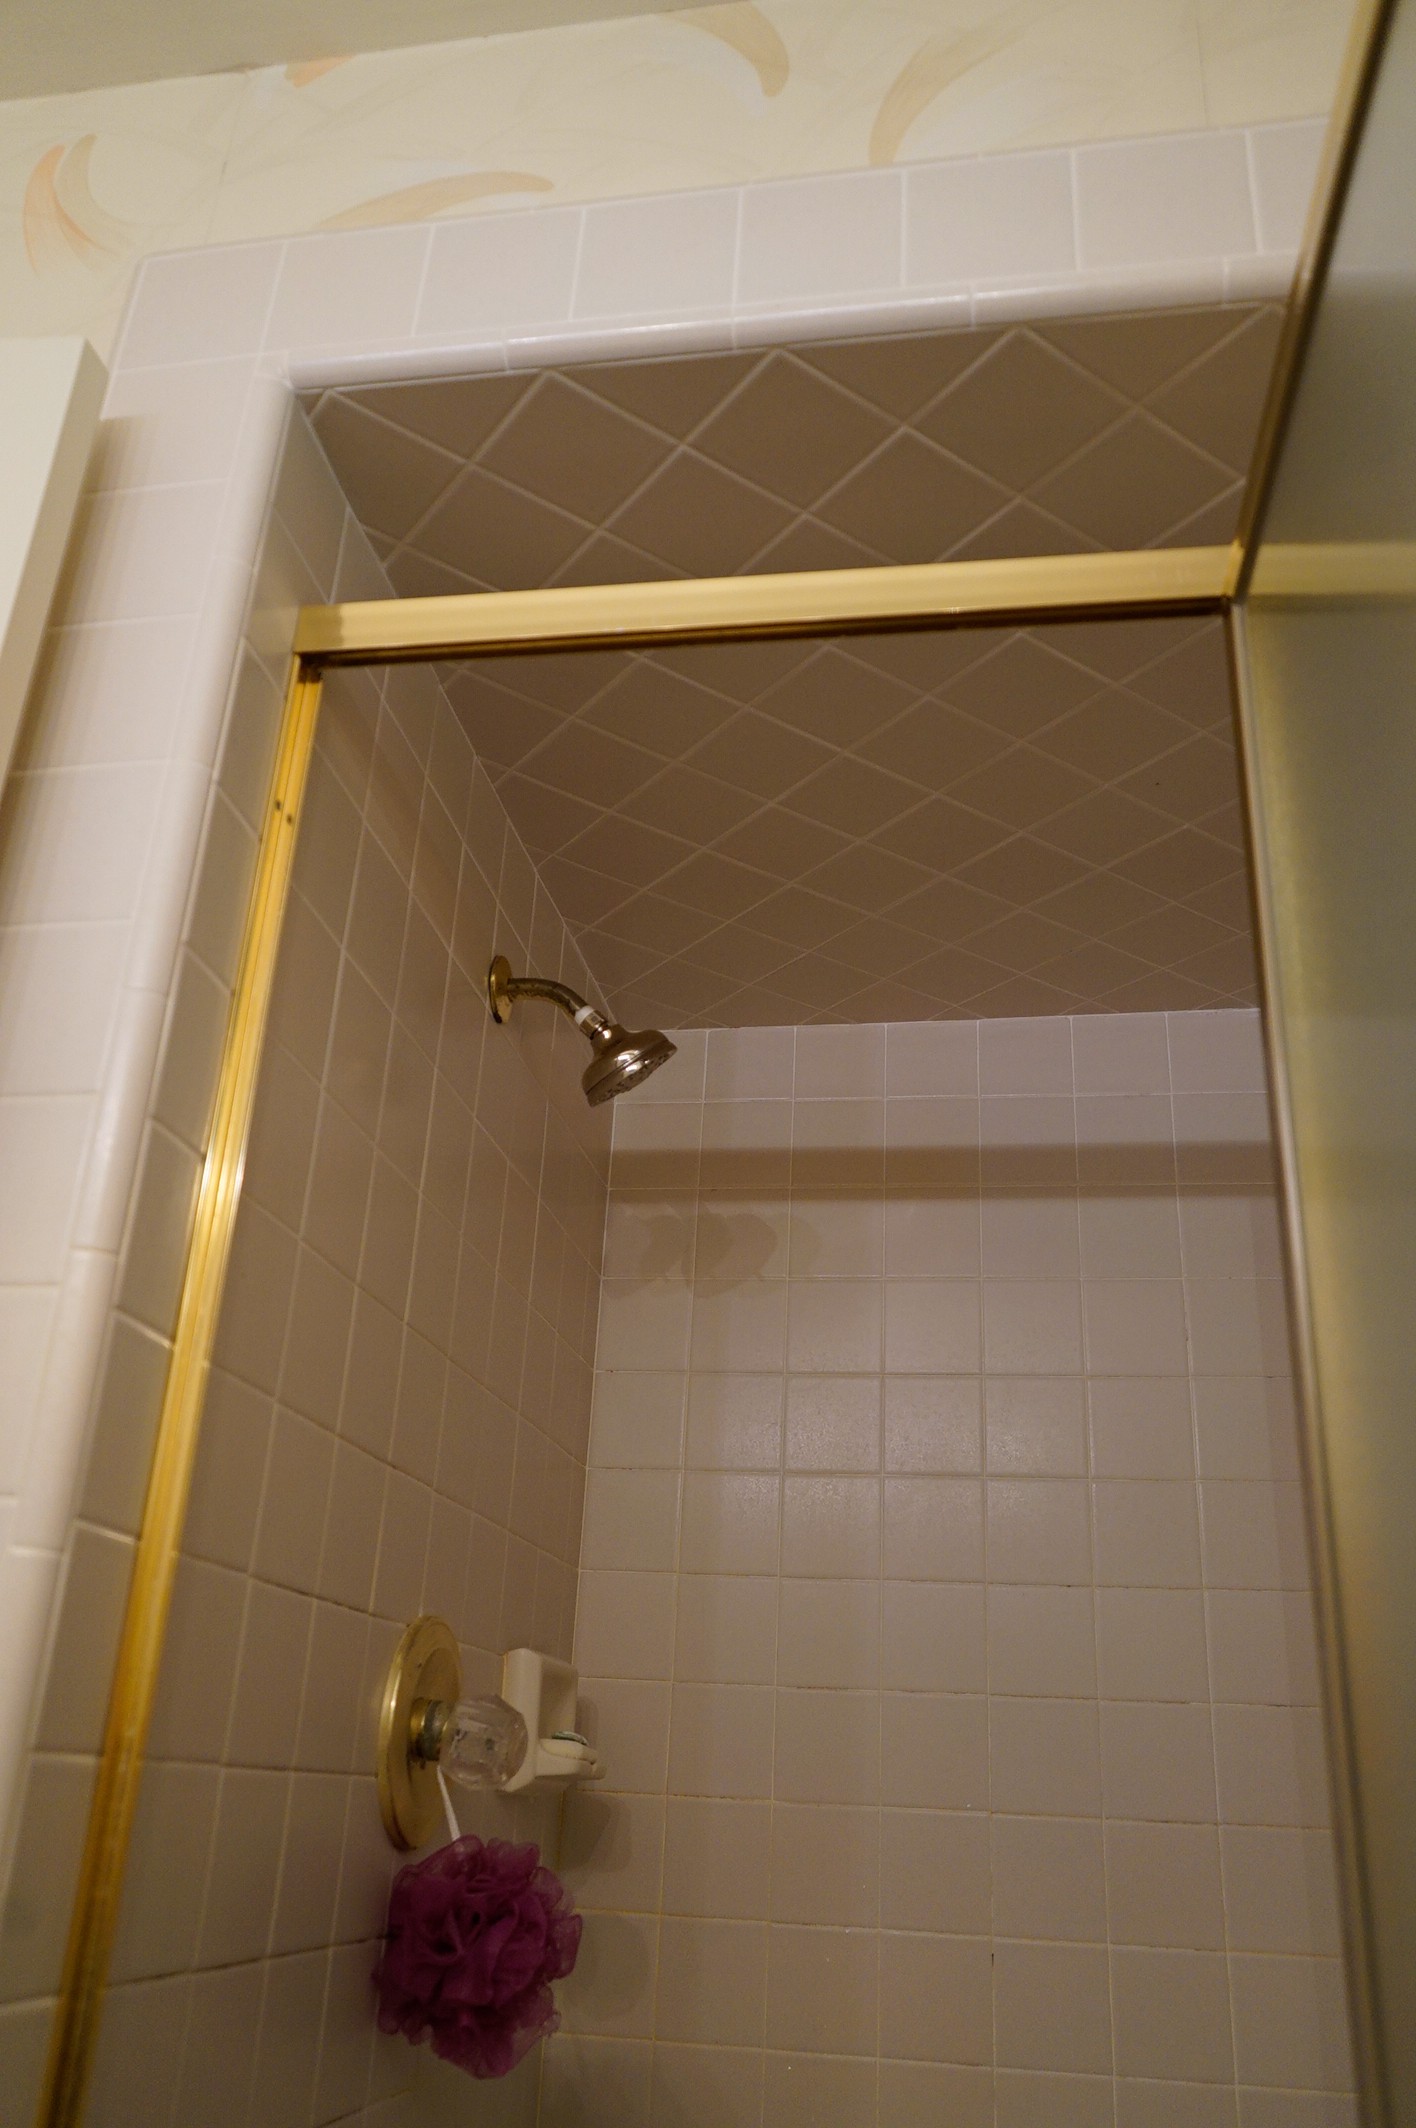
Here are some old photos I found from before we closed on the house back in late 2016. Yikes.
And here is how its looking today. We should be installing the shower head and trim this week which is going to make it all look even more incredible!!
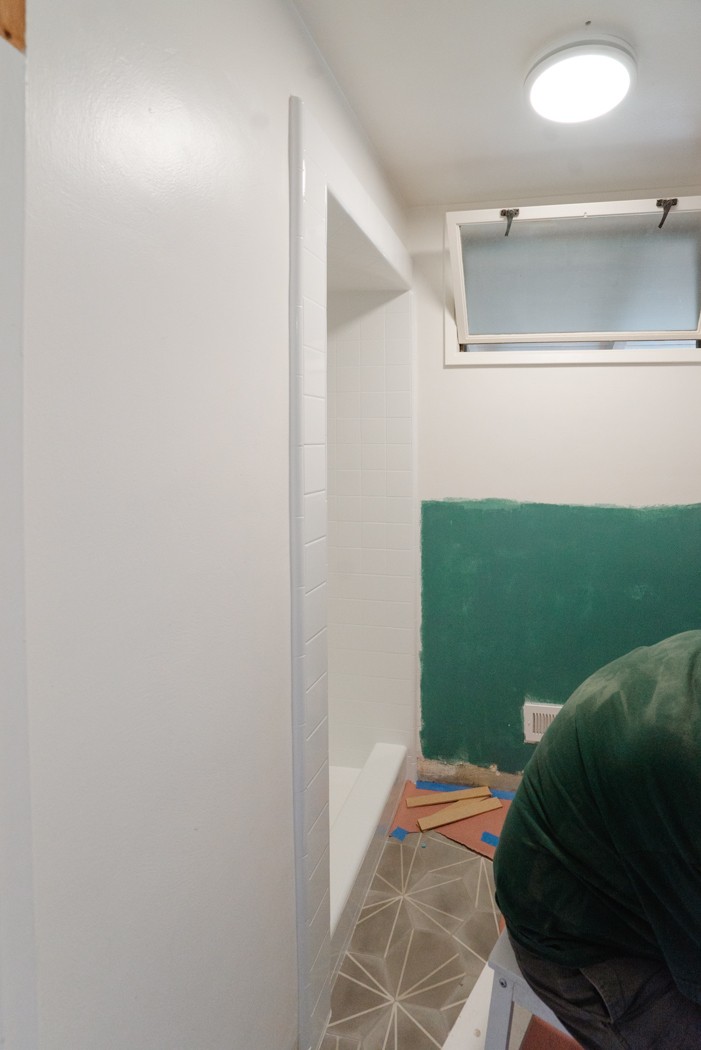

I’m dying over how it looks with the floors so far. I keep pasting up this tiny scrap of wallpaper trying to envision the finish line. It really helps me stay motivated and we have a couple more pieces of the puzzle in place!!
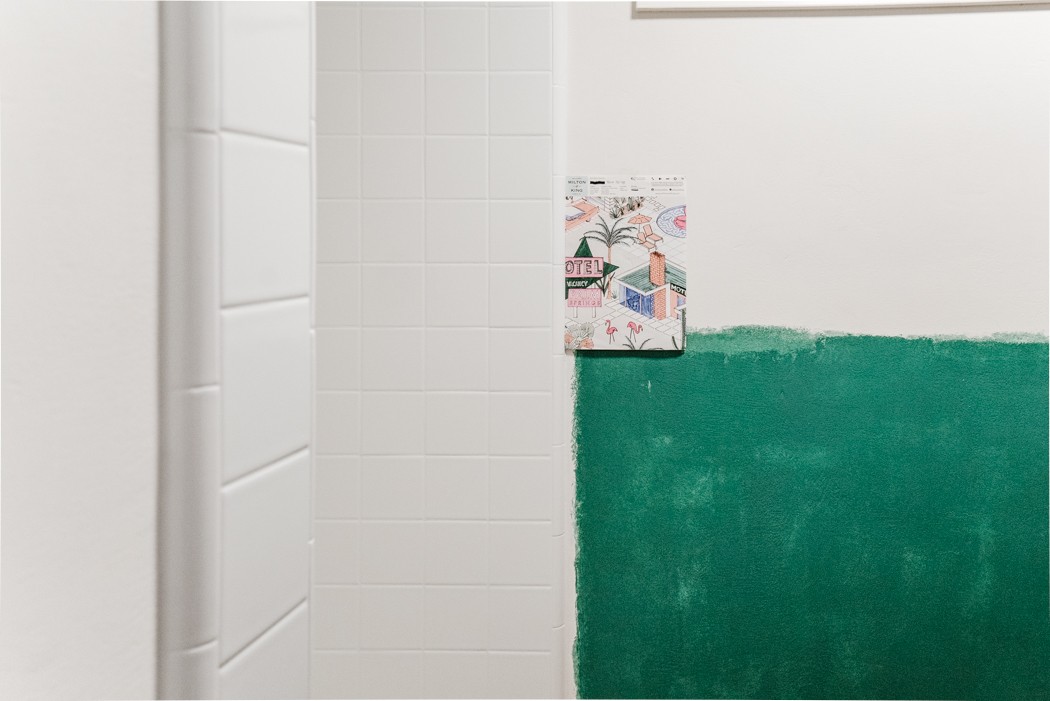
About that terrible paint job you see is going behind the wainscoting: I added a quick coat so when we install the boards you won’t see white walls in the gaps. Let me explain our plan a little better.
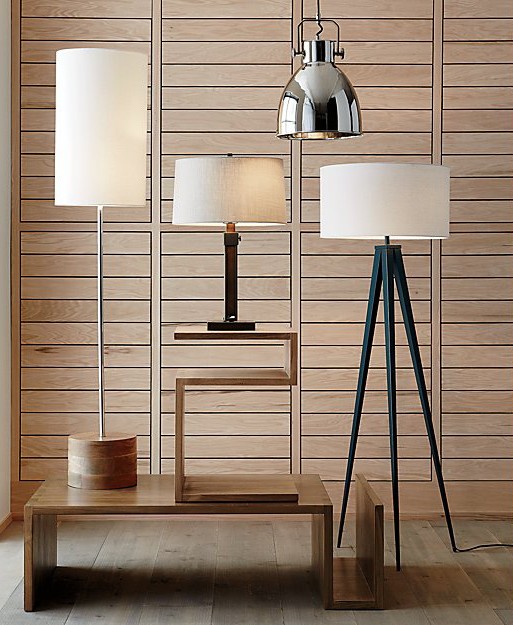
Since the wallpaper pattern is making quite the statement I knew I wanted to panel the lower half of the walls. This turned out to be tricky to find a paneling design that wasn’t traditional or farmhouse (so no bead board or shiplap), but suited our midcentury modern home. Like I said on IG, I wanted it to be both 2020 modern and 1960 modern but doable to do ourselves (I.e. my dad to do it). When I stumbled on this ad from Crate and Barrel it all clicked.

Thanks to Jenny Komenda and her brilliant DIY skills, we’re using MDF bender board which makes it affordable as well. My dad did a ton of math to make sure the verticals lined up where we wanted them and shrunk and expanded the horizontal columns to accommodate things like the faucet center and edge of the vanity cabinet.
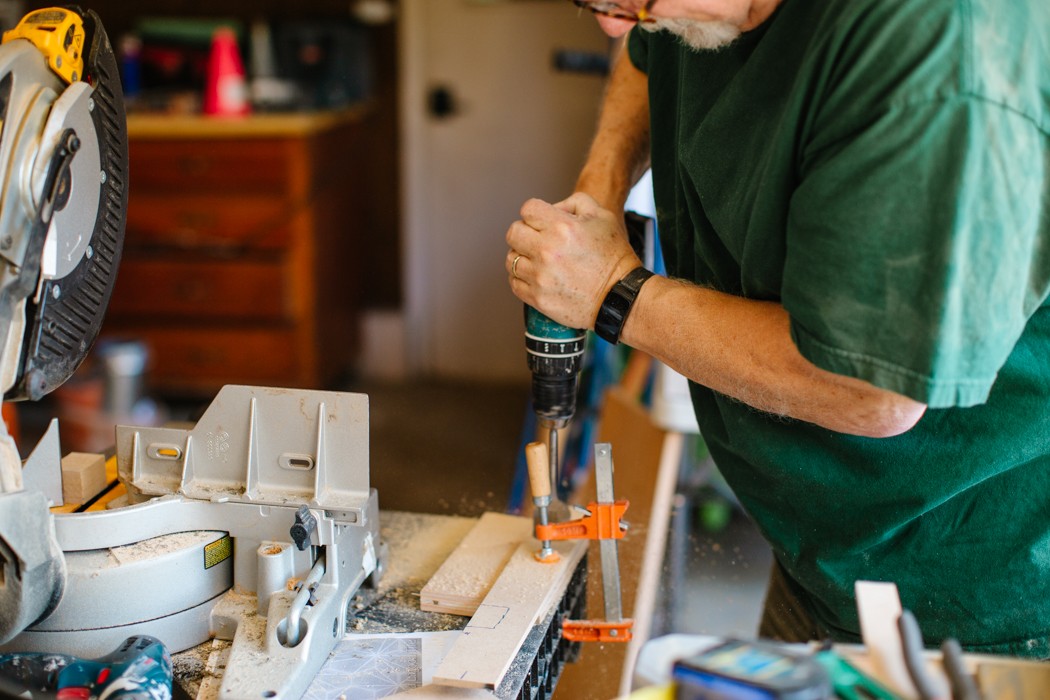
My dad wants you to know that he had to cut 154 individual pieces before he started attaching them to the wall with adhesive and a nail gun. Thanks, dad! Working around the faucet and electrical was the tricky part and he should be done installing them all tomorrow.
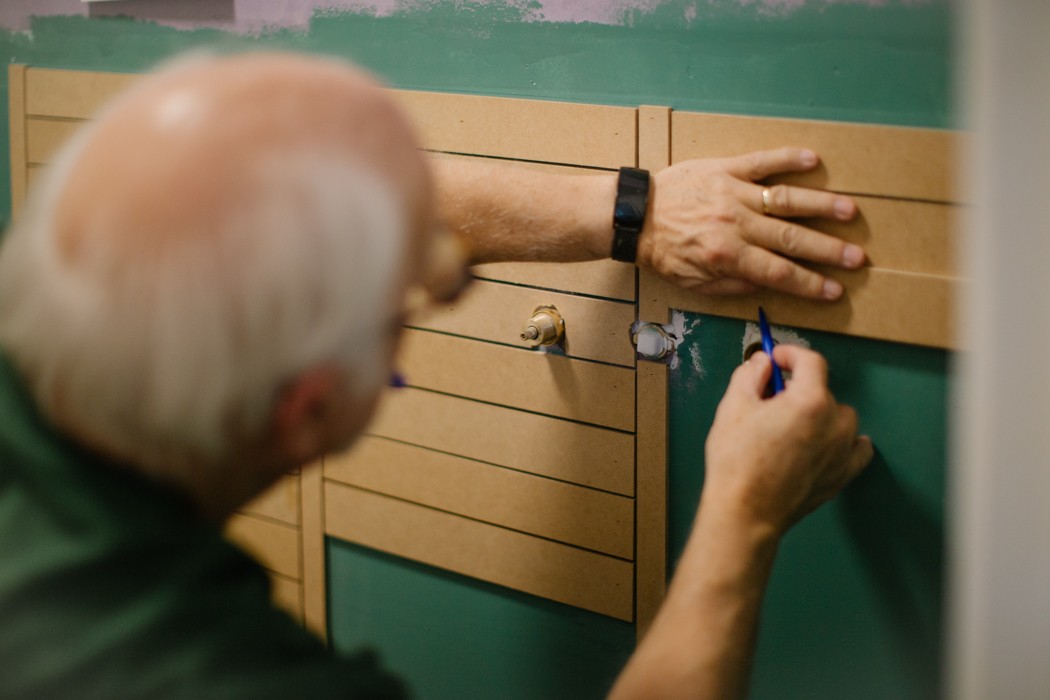
Once he’s done we’ll prime the boards, paint them and then move on to wallpaper. Eeeeek!! There is a top horizontal piece that goes on last over the wallpaper so it will fit cleanly underneath the board.
What’s left
Shower resurfacing (starts Friday!)Sand joint compound on walls smoothPaint back door(new addition)- Paint the mudroom and laundry room.
Also decide on a color first. - Install all the Ikea cabinetry
Decide on stain or paint for pegboard and open shelving- Build and install pegboard in mudroom
- Fabricate and install counter tops in mudroom, bathroom and laundry (wish us luck on this DIY).
- Build and install open shelving in mudroom and laundry
- Install light fixtures and patch/repair ceilings in hallway
- Install wallpaper in bathroom
- Install and paint wainscot in bathroom (halfway done)
- Swap old door hinges and hardware for hall doors
- Hook up plumbing fixtures
- Hang all the things
- Style and photoshoot prep!
*Thank you so much Miracle Method Sacramento for providing the resurfacing service for this project. All opinions are my own. To learn why you should finish instead of replace please visit www.miraclemethod.com/sacramento.
My One Room Challenge Sponsors

Milton & King // Lumens // Villa Lagoon Tile // Miracle Method // Tidy Revival // Juniper Print Shop
Other One Room Challenge Posts
Catch up on the whole project
Week 1 // Week 2 // Week 3 // Week 4 (you’re here!) // Week 5 // Week 6
Links to my previous One Room Challenges
Fall 2018: Kitchen Refresh | Spring 2019: Midmod Patio Reveal
Don’t forget to see what all the other Guest Participants and Featured Designers are up to this week, everyone is working so hard and things are shaping up out there!


15 thoughts on “Week 4 (MudBathLaundry: So Fresh and Clean)”
Ooh! This is coming along so very well! Bravo!
Wow, your dad is a champion. Looking good!
Wow that beadboard is so pretty and your color choices for paint and spot on, this is going to be a beautiful room.
It looks so so great. I love the wainscoting!
I love the color you chose for the door! And the shower looks amazing!
I’m so intrigued with your shower process! Holy cow! It looks so good. And LOVE the beadboard. This space is fast becoming a favorite to visit every week. I see so many ideas that I must file away for later. Yes, that’s a big compliment. Hang in there!! The progress is fabulous.
That shower is amazing and the back door color is perfect! Loving it all!
It’s amazing how much detail goes into these makeovers. Mind boggling really. But in the end it’s always worth the extra effort. This is going to be gorgeous!
Steve is the real MVP!!! Cheers to him + your combined efforts this week. Love how it’s coming along, girl!
I love the accent wall your dad is working on #perfection!
We love your color palette! While we feel sorry for your dad and all of those cuts LOL it looks amazing!
I have been enjoying following your progress on this space on Instagram! You have taken on a lot and it is going great!
Very good information. Lucky me I recently found your blog by chance (stumbleupon).
I have book marked it for later!